
The Ultimate Guide to Steam Deck Enhancement at the Dock

The Ultimate Guide to Steam Deck Enhancement at the Dock
The Steam Deck is very well tuned for the handheld niche it’s going for. More games than not will have smooth performance, but only when using the native 720p resolution of the device. This can leave a lot to be desired when you are using an external display, also known as playing “docked”.
Let’s have a look at the best settings and modifications you can apply to get the most out of your Steam Deck while docked.
Disclaimer: This post includes affiliate links
If you click on a link and make a purchase, I may receive a commission at no extra cost to you.
Resolution on the Steam Deck
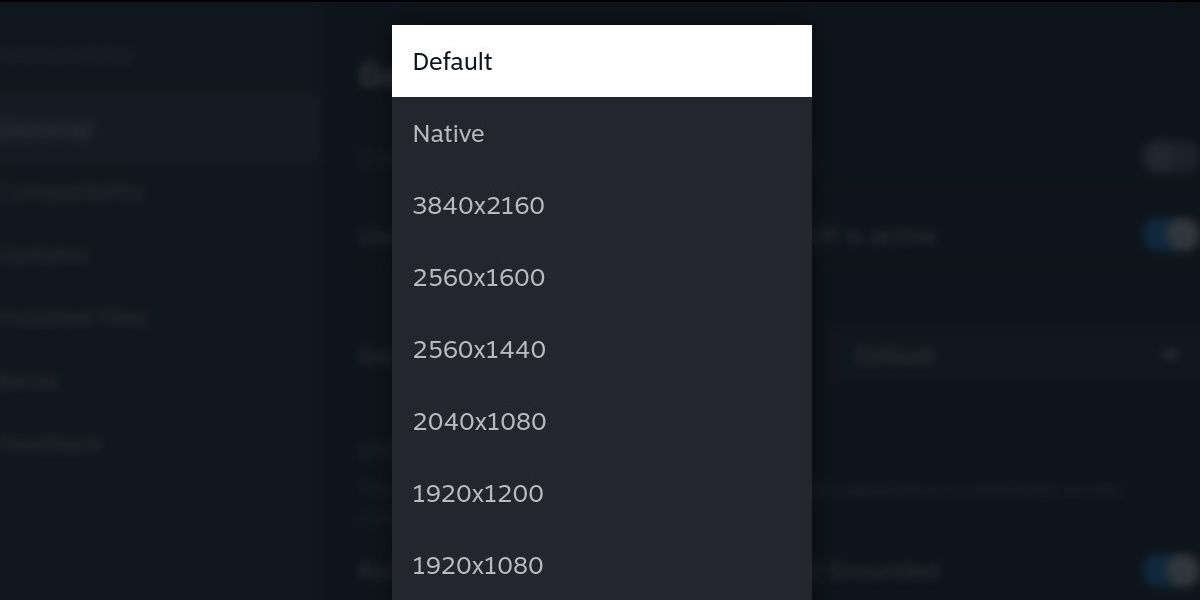
Your choice between maintaining the 720p resolution or pushing the device higher is the first one you’ll need to make when it comes to playing any game on the big screen.
The 720p resolution ensures that the Steam Deck will reach playable frame rates on just about any game. However, this resolution is blurry and unpleasant to look at on larger screens.
Thankfully, the Steam Deck is capable of outputting to up to 8K resolution, though it’s unlikely to perform well past 4K.
All you have to do is access the launch settings for each game to modify this. Seek out thegear icon on the game’s page and hitProperties .
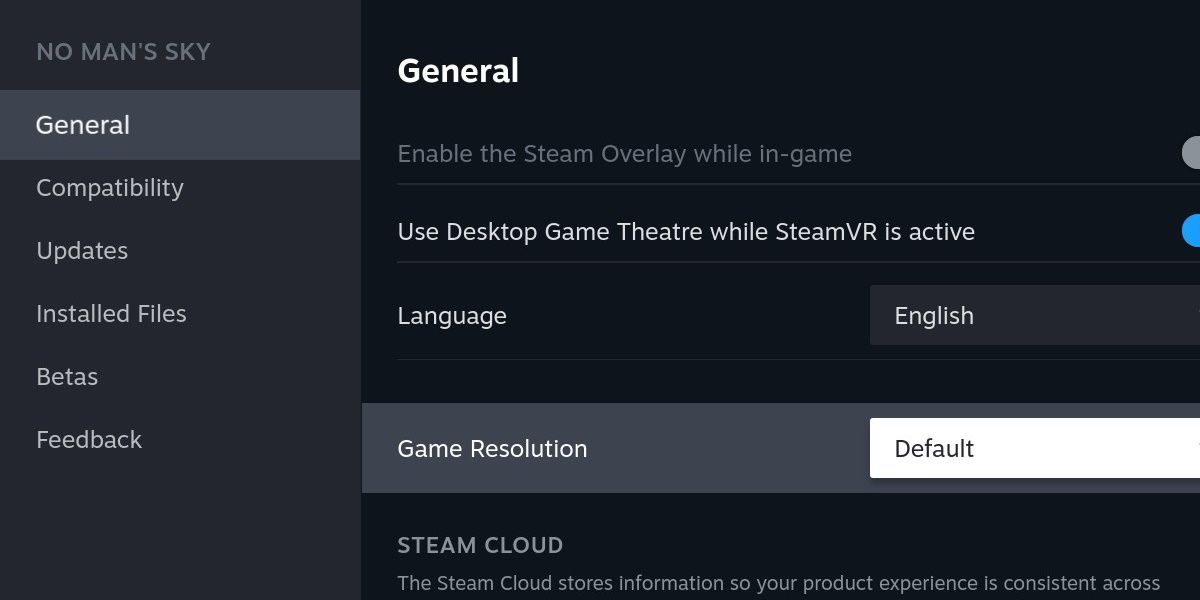
UnderGeneral , changeGame Resolution from default to a value of your choosing.
It’s best that you choose a resolution that coincides with a specific aspect ratio, or whatever is native to the external device you’re using. Make sure youunderstand the specifics of how aspect ratio relates to resolution when choosing .
Now that your image is being output at a higher resolution, you’ll be able to access higher resolutions in game. It will look a lot nicer on the big screen, but it’s also going to be more taxing on your performance. Let’s see what other tools the Steam Deck has to manage performance.
Using Per-Game Settings
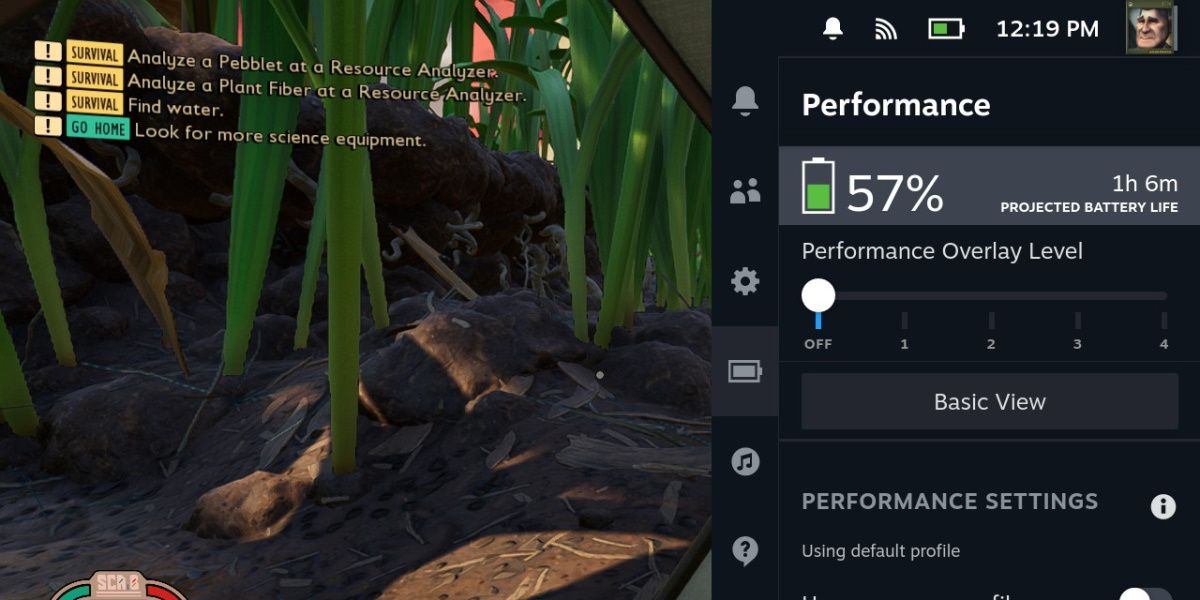
Now that you’ve bumped up the resolution, you’ve significantly increased the performance overhead for your game. Many games will run worse, requiring you to adjust the in-game settings. Seeing as we’re playing on a larger screen, this isn’t desirable.
The solution here is to become familiar with per-game performance profiles for your games.
Hitting theQuick Menu button while in a game brings up an overlay on the right side of the screen. Scrolling down to the battery icon will show the performance menu.
If you’ve docked your Steam Deck, it’s likely you’re using a controller instead of the controls on the unit itself. In this case, holding thesystem button + A will display this menu.
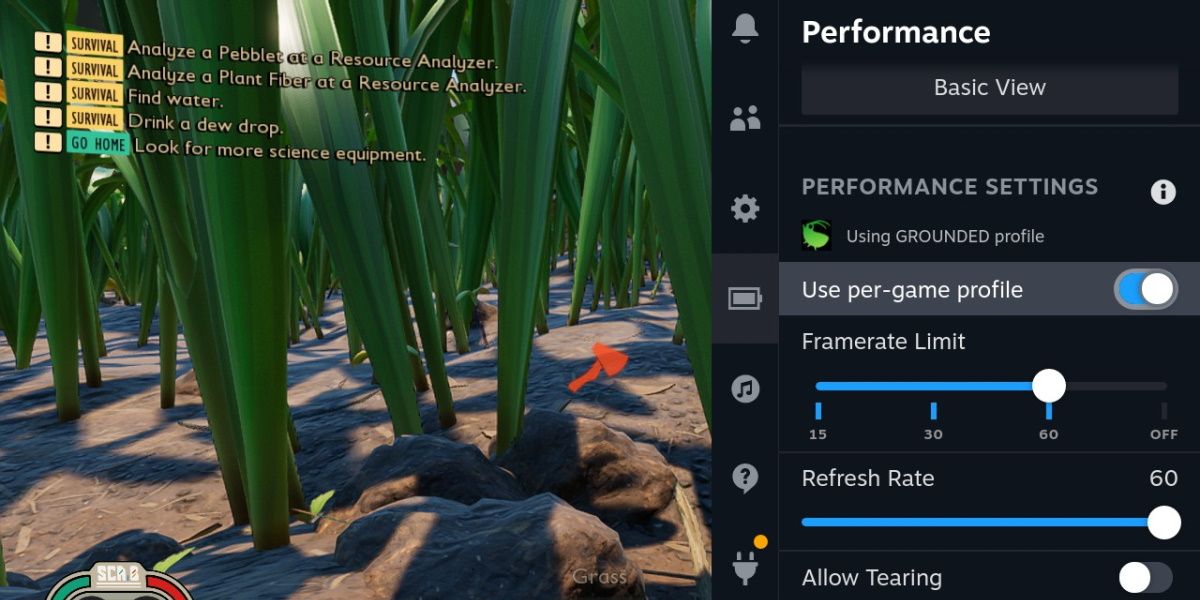
First thing to do is to enableUse Per-Game Profile . This will ensure that any changes you make in this menu will only affect the currently active game.
In this menu are a handful of options for tuning performance beyond what the game itself allows. Let’s run through what each of these settings control:
- Framerate Limit will let you set a cap on how high the framerate can go. When playing games with unstable framerates, these caps can smooth out performance by preventing the device from spiking above a desired framerate.
- Refresh Rate allows you to modify the refresh rate of individual games.Understanding how refresh rates affect framerates is important for performance tuning , but for our purposes, it’s best to leave this setting at its default of 60Hz.
- Allow Tearing relates to the above setting. If enabled, the game will be allowed to run at higher framerates than the 60Hz refresh rate allows. This is only desirable if your external device also runs at higher refresh rates than 60Hz.
- Half Rate Shading can improve battery life by cutting the resolution of pixel shaders in half. This is a great performance option for when you’re on the go, but if you’re using a dock, this setting should remain at its default.
- Thermal Power (TDP) Limit is another battery-friendly setting, allowing you to throttle the amount of battery power being used regardless of game settings. Again, since you’re using a dock and likely powered, this setting should remain at its default.
- Manual GPU Clock Control is a very important setting depending on what game you’re playing. It allows you to manually set how powerful your GPU is at any given time. You cannot natively overclock the device from this menu, but you can underclock it. This can allow for extra resources to be allocated to other components.
- Scaling Filter is an interesting option, allowing you to clear up the picture of a game running at a lower resolution. For external monitors, this can be a useful performance setting. Running the game at a lower resolution, but turning the scaling up high, can allow for more performance while mitigating the unpleasant visuals.
These settings are important whether you’re docked or undocked, but settings such as the Framerate Limit and Scaling Filter can be a game changer when it comes to running games at higher resolutions.
Generally, when starting to tweak a game for docked gameplay, you should adjust the Framerate Limit, the GPU Clock Control, and the Scaling Filter.
Play around with the game’s in-game settings to get a steady framerate, then start pushing up the framerate limit, lowering or raising the clock speed, and applying a scaling filter to see if you can get a higher framerate. Then, bump up the in-game settings and do it again.
You’ll eventually find yourself with a very pleasant image and a comfortable framerate.
Target 30 or 40 FPS Over 60 FPS
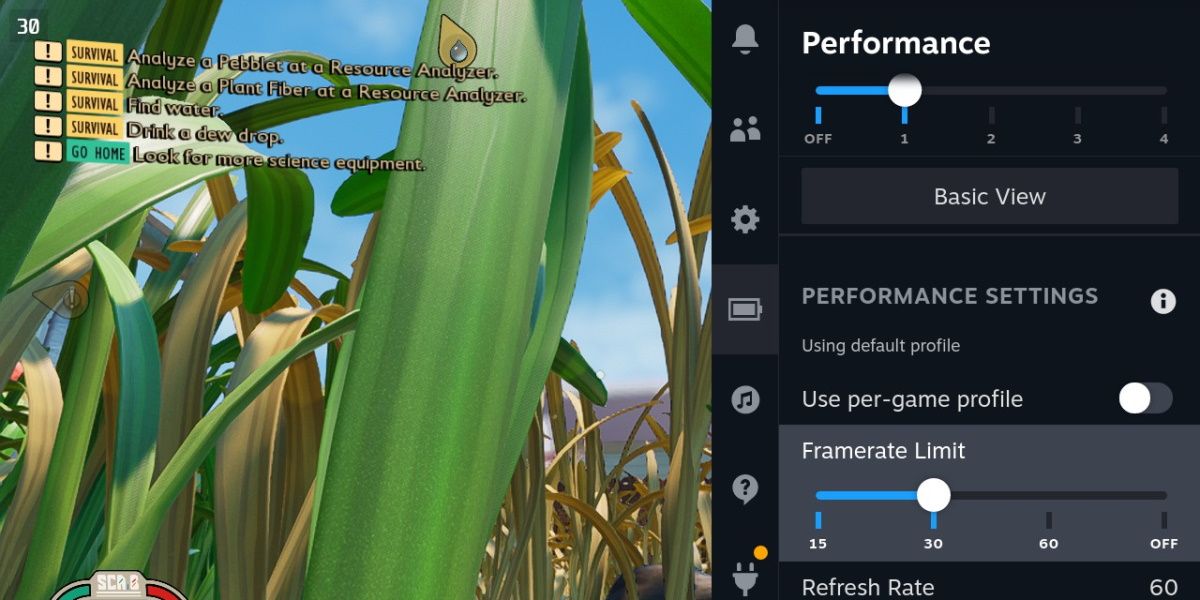
A major part of gaming on the Steam Deck is being comfortable with lower framerates.
60 FPS is always the goal, but newer games with more demanding visuals will rarely reach 60 FPS on the Steam Deck. This becomes even more difficult when you add the performance overhead of a higher resolution into the mix.
So, get comfortable with 30 or 40 FPS. 30 FPS is generally considered more than playable on the handheld screen, and 40 FPS is a decent upgrade to that to make the docked experience a little easier. If 60 FPS is the goal for you, you can alwaystake steps to further optimize individual games on the Steam Deck .
Steam allows you to target 30 FPS using the performance overlay, but this framerate limiter occurs outside the game itself. For the best results, check if the game you’re playing has an inbuilt framerate limiter. These are more accurate and responsive than the Steam Deck’s overlay menu.
Docking Your Steam Deck Is a Balancing Act
Just about any game will run well enough once you connect the dock. The problem is, those default settings can result in a blurry or unpleasant image. Increasing settings that improve these visuals will very quickly tax the Steam Deck and result in poor performance.
The result is a lot of tinkering with an impressive collection of performance tools until you get it just right. Whether you’re going for a high, consistent frame rate, or a picture that looks as good as it can, you’ll find some sort of happy medium when it comes to docking your Steam Deck.
Also read:
- Chronicles Unveiled: Diving Into Windows 11 History
- Convert M4V and WMV Videos for Free with Movavi's Web-Based Media Transcoder
- Deutsche Tagesstruktur: Lerne Die Deutschen Tage Verstehen
- Discover the Best TV & Monitors at IFA
- Enabling Steam Remote Play: Windows Tips
- Google Play Pass's Unmatched Benefits, Except for This Exception
- Learn How to Configure and Browse Shared Drives on a Mac Using the Built-In Finder Tool
- Retro Pi Fans, Decision Time: Batocera Vs. RetroPie
- Saving Game Moments with FBX Recorder for 2024
- Swift Switching: Laser-Focused or Lever-Based?
- Unraveling Tech Mysteries: Inside Tom's Hardware Wisdom
- Title: The Ultimate Guide to Steam Deck Enhancement at the Dock
- Author: William
- Created at : 2024-10-23 18:09:00
- Updated at : 2024-10-24 21:51:27
- Link: https://games-able.techidaily.com/the-ultimate-guide-to-steam-deck-enhancement-at-the-dock/
- License: This work is licensed under CC BY-NC-SA 4.0.