Streamline and Organize Your Steam Game Shots

Streamline and Organize Your Steam Game Shots
When you play a video game, there’s often a moment that you want to memorialize. Whether it’s some stunning scenery, a funny bug, or an epic accomplishment, a picture can tell a thousand words.
That’s one of the reasons that Steam is so great. It makes it incredibly simple to take screenshots in-game at the press of a button, which are saved immediately.
Here’s everything you need to know about taking screenshots of games with Steam.
How to Take a Screenshot With Steam
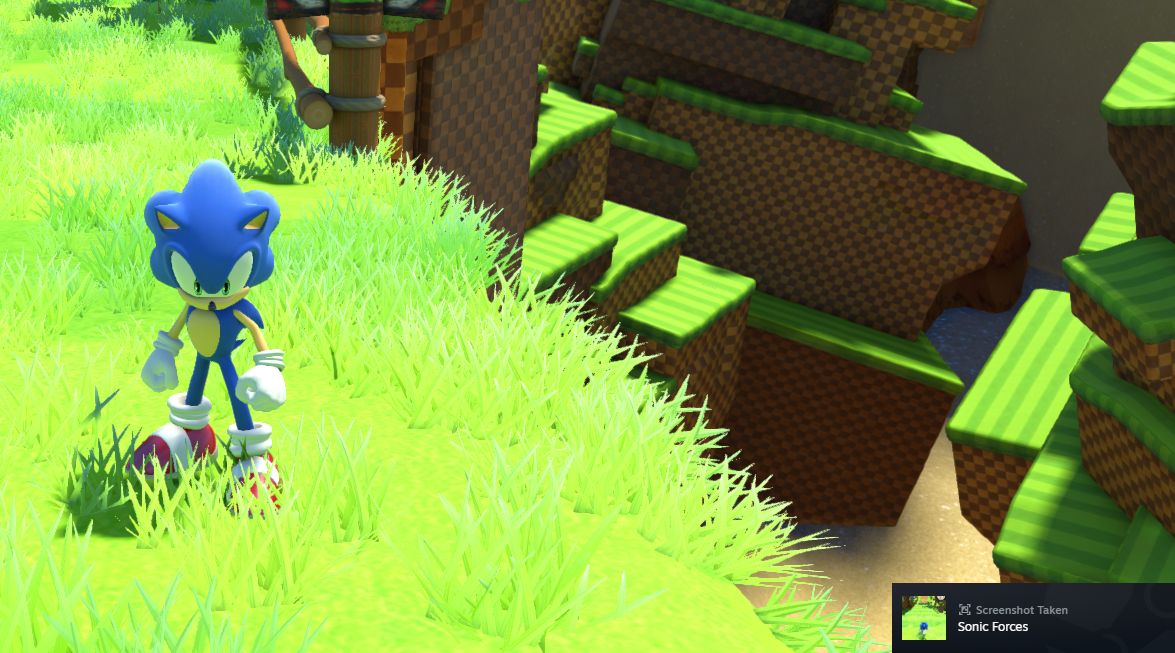
WhileWindows offers multiple ways to capture in-game screenshots , if you’re playing a game on Steam, the easiest way to capture a snap is to pressF12 . A shutter sound plays and a notification pops in the bottom-right to confirm the screenshot has been captured.

To view all the screenshots you’ve captured so far during the game session, pressShift + Tab to open the Steam overlay and clickScreenshots (the image icon) from the bottom menu.
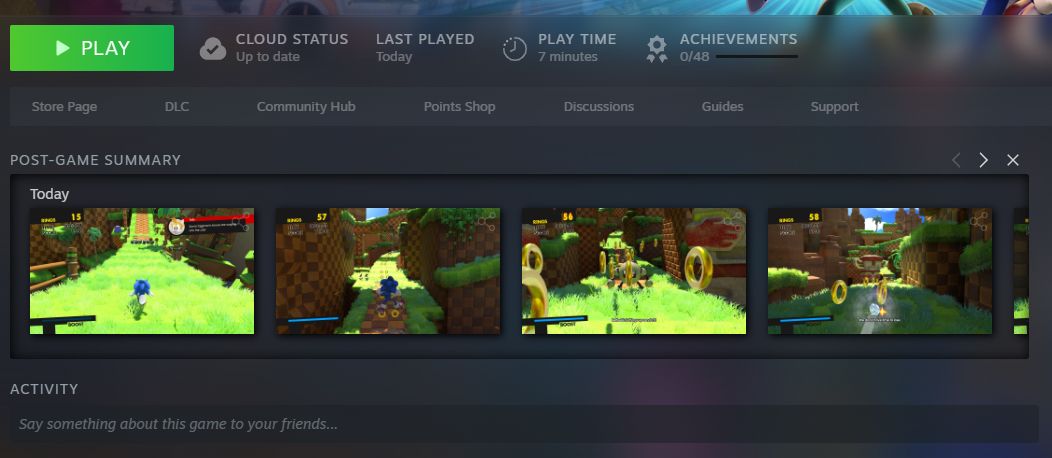
When you close the game, you’ll see aPost-game summary in your Steam library that shows all the screenshots you captured during that session.

How to Manage Your Steam Screenshots
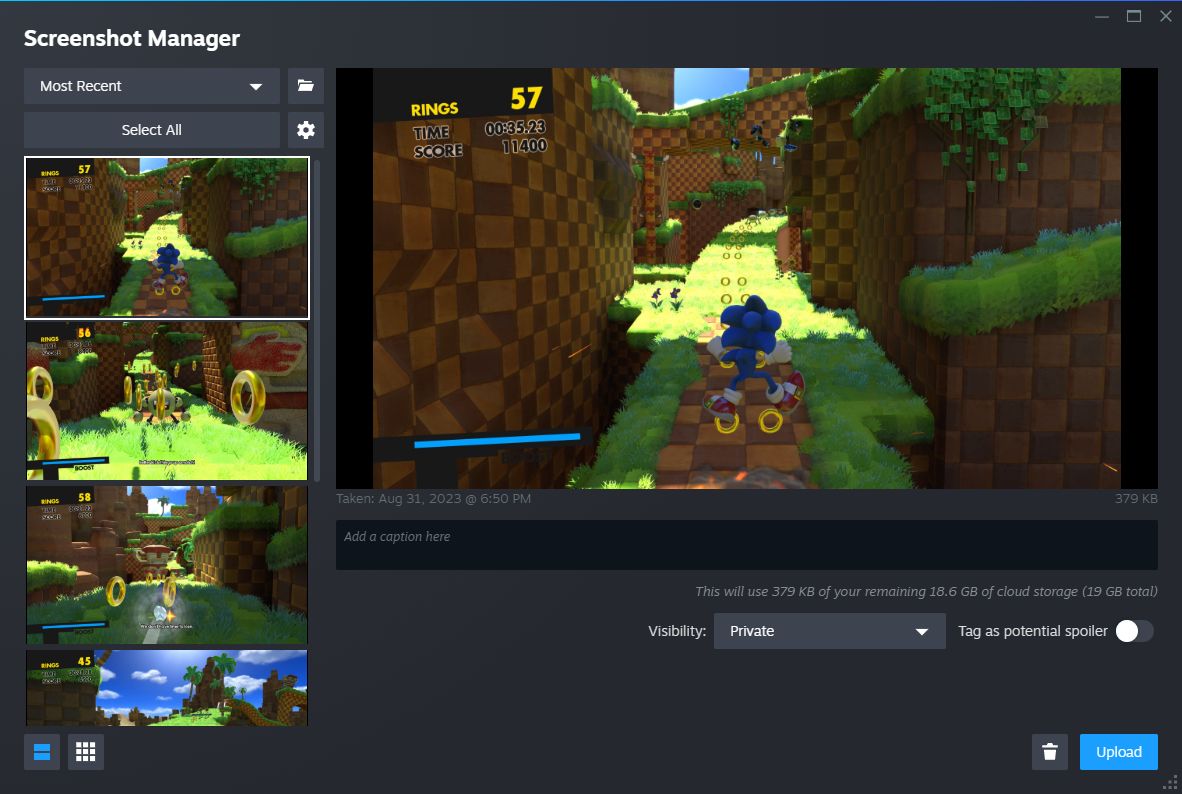
From Steam’s top menu, clickView > Screenshots to open the Screenshot Manager. It’s sorted by yourMost Recent screenshots by default; use this dropdown to select a specific game. Select a screenshot from the left to view it larger in the main pane, along with details like capture date and file size.
The screenshots are stored locally on your computer. Through the Screenshot Manager, you can adjust theVisibility and choose toUpload screenshots to share on the Steam Community for other players to view. You can also add a caption and mark the image as a spoiler.

To select multiple screenshots, holdCtrl and click each in turn, or holdShift and click to highlight all screenshots in the range. You can also clickSelect All .
To remove an image from your computer, clickDelete (the trash can icon) andDelete again to confirm.
If you want to browse the raw image files on your computer, clickShow on disk (the folder icon). This opens the folder on your system where the screenshots are stored. You’ll notice the folder path is convoluted, and each game is stored in its own confusingly named folder, so you’re better off navigating to your local screenshots via this method than going manually through File Explorer.
How to Customize Your Steam Screenshot Settings
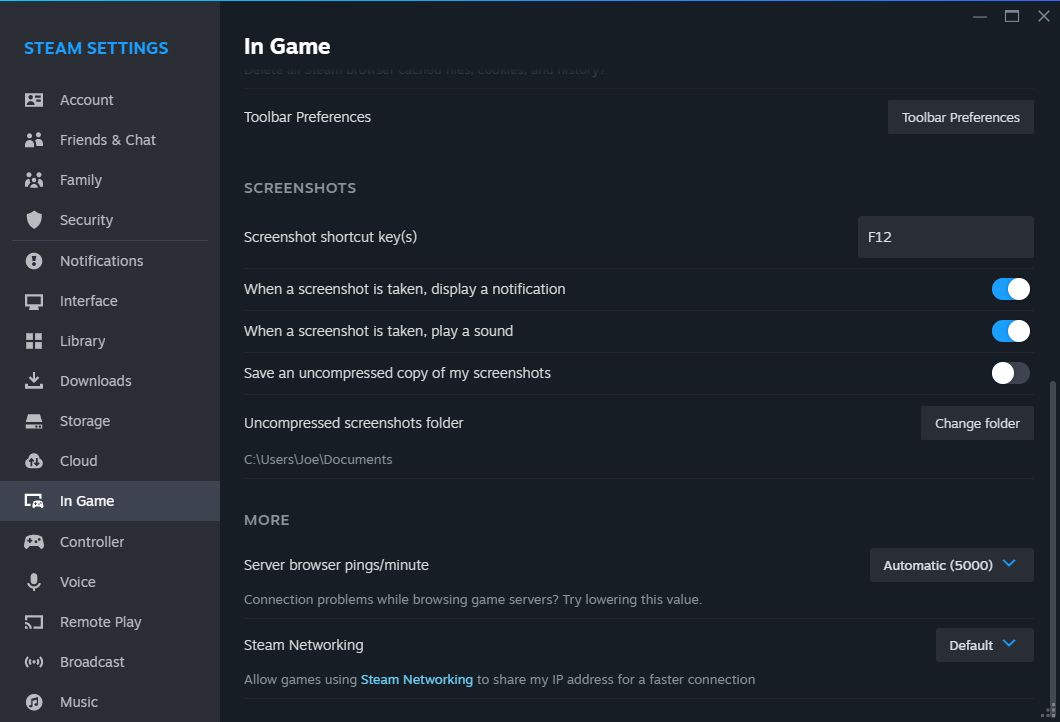
You can change the Steam shortcut for taking screenshots, disable the capture sound effect, and a few other settings. To do so:
- Open the Steam client.
- From the top menu, clickSteam .
- ClickSettings .
- From the left-hand menu, clickIn Game .

Here you’re able to set yourScreenshot shortcut keys , plus toggle whether a screenshot shoulddisplay a notification andplay a sound .
If you want your screenshots saved in the highest quality possible, enableSave an uncompressed copy of my screenshots , though be aware this will use more disk space. To change the storage location of these uncompressed screenshots, clickChange folder .
It’s Easy to Take Screenshots on a Steam Deck Too
With Steam, it’s a breeze to capture and manage your game screenshots. That’s true even if you’re using Valve’s excellent Steam Deck handheld—pressSteam + R1 to take a screenshot. It’s one of the system’s many handy shortcuts.
Also read:
- [New] Advanced Strategies for Quiet Capturing
- [Updated] In 2024, Standout 1980S Visual Techniques in Media Editing
- Conquer iPhone Podcast Downloads – A Step-by-Step Guidebook
- DXVK Explained: Enhancing Gaming Performance on Windows
- End Steam's Subscription Cycle Easily
- In 2024, How to Remove Forgotten PIN Of Your Samsung Galaxy M14 4G
- In 2024, Top-Rated ASMR Gear High Quality, Priced Right
- In 2024, What is Geo-Blocking and How to Bypass it On Nubia Red Magic 9 Pro+? | Dr.fone
- New In 2024, 10 Essential FCPX Plugins to Elevate Your Video Editing Game Free and Paid
- Regulating Activity of Xbox Game Bar on Windows 11 PCs
- Six Subtle Secrets to Turn On Your PS5
- Title: Streamline and Organize Your Steam Game Shots
- Author: William
- Created at : 2025-01-27 18:01:30
- Updated at : 2025-01-30 16:42:13
- Link: https://games-able.techidaily.com/streamline-and-organize-your-steam-game-shots/
- License: This work is licensed under CC BY-NC-SA 4.0.