
Steps to Correct Win-Oculus Connectivity Problems
Steps to Correct Win-Oculus Connectivity Problems
The Oculus Windows app is essential software for Rift users who must connect their virtual reality headsets to PCs. It’s also important for Quest 2 users who want to utilize apps and play games from the Rift storefront within their VR headsets.
However, some users can’t install the Oculus Windows app because of an error message that says, “Sorry, we encountered an error during installation.” Users can’t utilize Rift headsets without that software installed. Quest 2 users can’t play Rift PC VR games because of this issue. This is how you can fix the “we encountered an error” Oculus app installation issue.
1. Disconnect Your Quest 2/Rift Headset From Your PC Before Installing Oculus
Some users have said they resolved the “we encountered an error” installation issue by disconnecting their VR headsets before running the Oculus installer. So, make sure your Rift or Quest 2 headset isn’t connected to your PC. Then try installing the Oculus software without the VR headset connected to your PC.
2. Run the Oculus Installer File With Administrative Rights

Some Windows programs require admin permission for installation. So, try running the Oculus installer file as an administrator to give it full system access. You can do that by right-clicking theOculusSetup.exe file and selectingRun as administrator .
3. Deselect the Use Proxy Server Checkbox
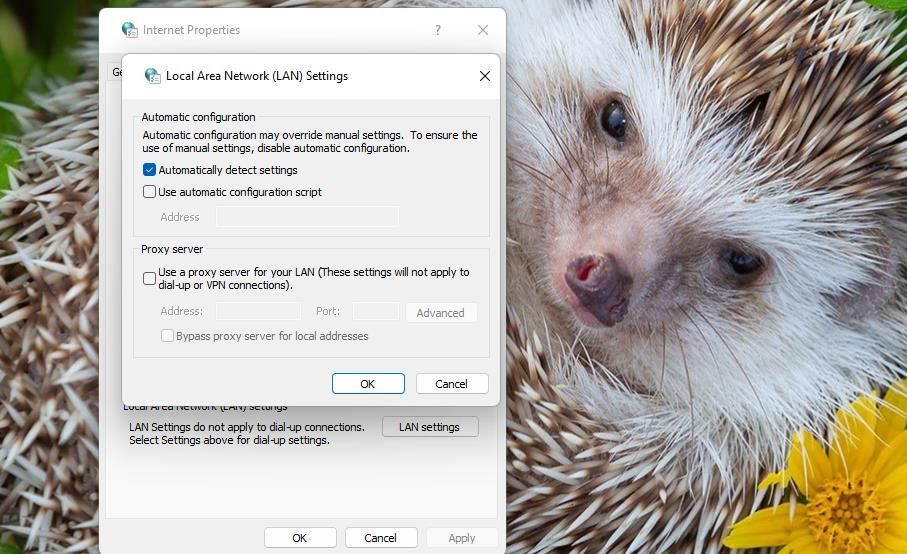
Disabling proxy servers is another fix a few Oculus app users confirm can fix the “we encountered an error” installation issue. You can deselect theUse a proxy server checkbox within Internet Properties. Our guide to disabling proxy settings in Windows includes step-by-step instructions for how you can deselect that setting.
 /a>
/a>4. Temporarily Disable Microsoft Defender (or Third-Party Antivirus)
Real-time antivirus scanning can cause the “we encountered an error” issue to occur. Temporarily disabling antivirus protection on your PC will ensure it can’t block the Oculus software installation. This how-to-turn-off Windows Defender article includes instructions for disabling the Microsoft Defender antivirus.
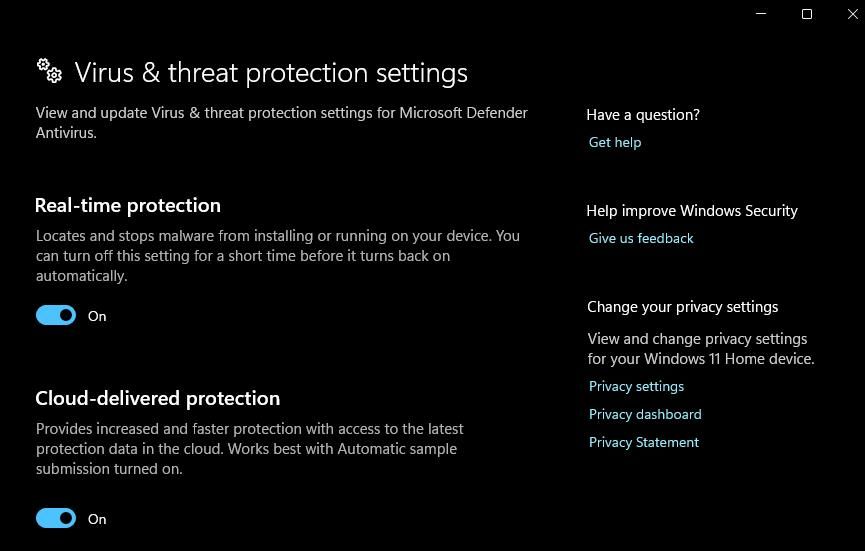

If you utilize third-party antivirus software, turn off that app’s antivirus shield. Right-click a system tray icon for the antivirus software and select an option that will turn off its real-time antivirus shield (preferably for no longer than 30-60 minutes). Then try installing Oculus with your antivirus protection turned off.
5. Turn Off the Windows Firewall
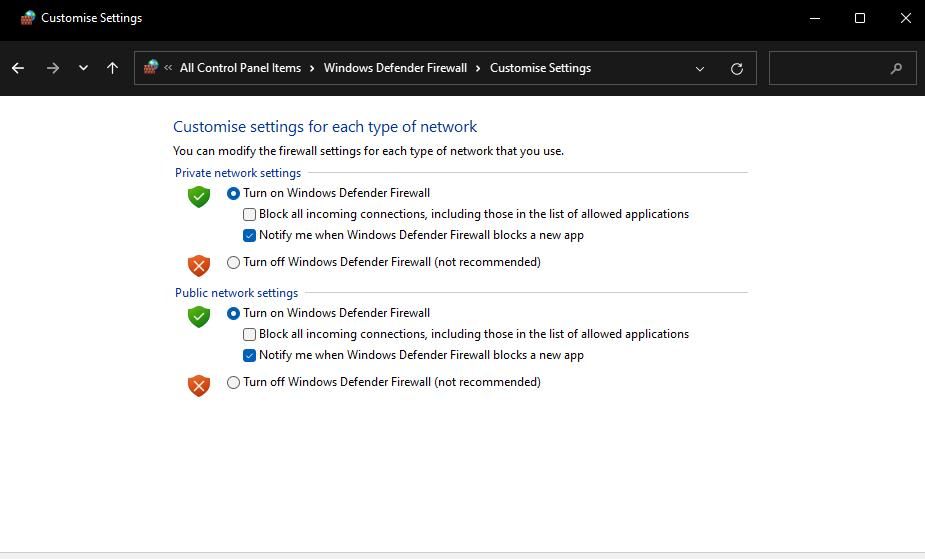
The Windows firewall can disrupt the Oculus server connection required for the software installation. So, temporarily disable the Microsoft Defender Firewall before installing the Oculus app. Check out this how-to turn off Microsoft Defender Firewall guide for instructions about how to do so. Then have another go at installing the Oculus software with the firewall disabled.
6. Install .NET Framework 4.6.1
It has also been confirmed by Oculus users that installing .NET Framework 4.6.1 can fix the “we encountered an error” installation issue. This is how you can install .NET Framework 4.6.1:
- Open this Microsoft .NET Framework 4.6.1 webpage.
- Click theDownload option for .NET Framework 4.6.1.
- Bring up the directory containing the downloaded .NET Framework setup file.
- Double-click theNDP461-KB3102438-Web.exe file to bring up the setup window.
- Select to install .NET Framework 4.6.1 if you need to.

The setup wizard will say if .NET Framework 4.6.1 or later is installed on your PC. If you don’t need to install that framework, try applying the resolution below or others specified here.

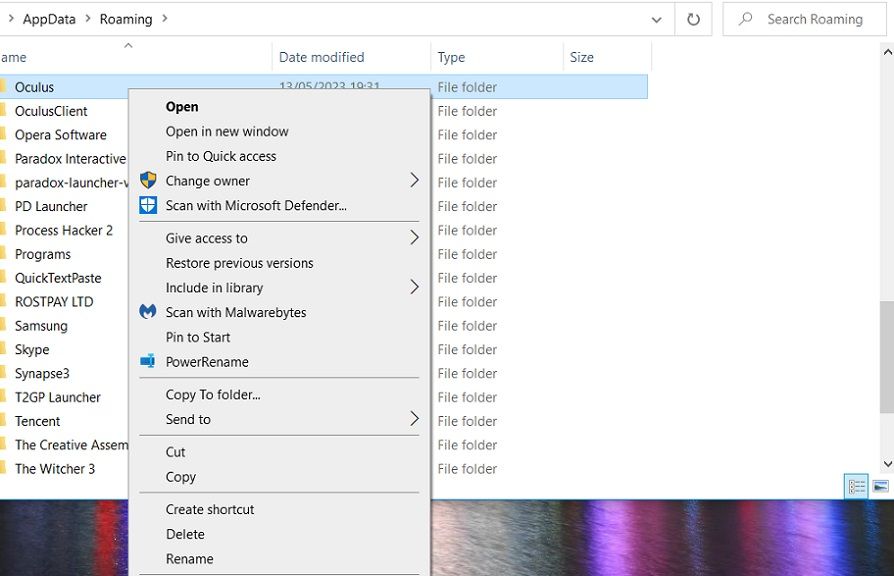
7. Remove Leftovers From a Previous Oculus App Installation
If you’re trying to reinstall the Oculus app after uninstalling it, removing leftover debris from the previous installation might resolve this issue. This means manually deleting Oculus folders left behind from the previous installation. You can erase leftover Oculus folders as follows:
- Simultaneously press theWindows logo +X keys and select to open Run from the Power User menu.
- Input**%appdata%** inside Run and clickOK .
- Right-click any Oculus subfolder in theRoaming directory and selectDelete .
- Repeat the previous step to delete any Oculus subfolders left behind at these folder locations:
C:\Users\<User Folder>\AppData\LocalLow C:\Users\<User Folder>\AppData\Local C:\Users\<User Folder>\AppData
You can also utilize a third-party uninstaller utility like IObitUninstaller to clear away leftover Oculus folders and registry keys. When you’ve eradicated all leftover Oculus subfolders, open this Meta download page . Then clickDownload Software to get the latest Windows Oculus app for your VR headset and try installing it.

company, user or members of the same household. Action! - screen and game recorder</a>
Install the Oculus Windows Software
Many users have resolved the “we encountered an error” Oculus app installation issue by applying those potential solutions. So, there’s a good chance one will fix the Oculus app not installing on your Windows PC. Then you get back to playing all your favorite Rift PC VR games again.
- Title: Steps to Correct Win-Oculus Connectivity Problems
- Author: William
- Created at : 2024-08-27 17:00:24
- Updated at : 2024-08-28 17:00:24
- Link: https://games-able.techidaily.com/steps-to-correct-win-oculus-connectivity-problems/
- License: This work is licensed under CC BY-NC-SA 4.0.