
Step-by-Step: Achieving Optimal Display on Xbox S&X

Step-by-Step: Achieving Optimal Display on Xbox S&X
Your Xbox Series X|S has the ability to display a high-quality picture, and the chances are, so does your TV. But if your settings aren’t operating in tandem with one another, you could be missing important details in your game. The TV Calibration tool allows you to calibrate your TV so it is fully capable of displaying every detail on your Xbox Series X|S.
The process, however, is a little complicated and requires digging around in the settings of both your Xbox Series X|S console and your TV. If you’ve been wanting to calibrate your TV for a while, but you were feeling a little intimidated by it, we have written a step-by-step guide to walk you through the process.
What Does Calibrating Your TV for Your Xbox Series X|S Do?
Calibrating your TV for your Xbox Series X|S involves tweaking your TV’s display settings to perfectly suit your Xbox. This includes changing things like your TV’s dimensions, brightness, color, contrast, and sharpness so that they are able to work in tandem with your console to bring you the best picture possible.
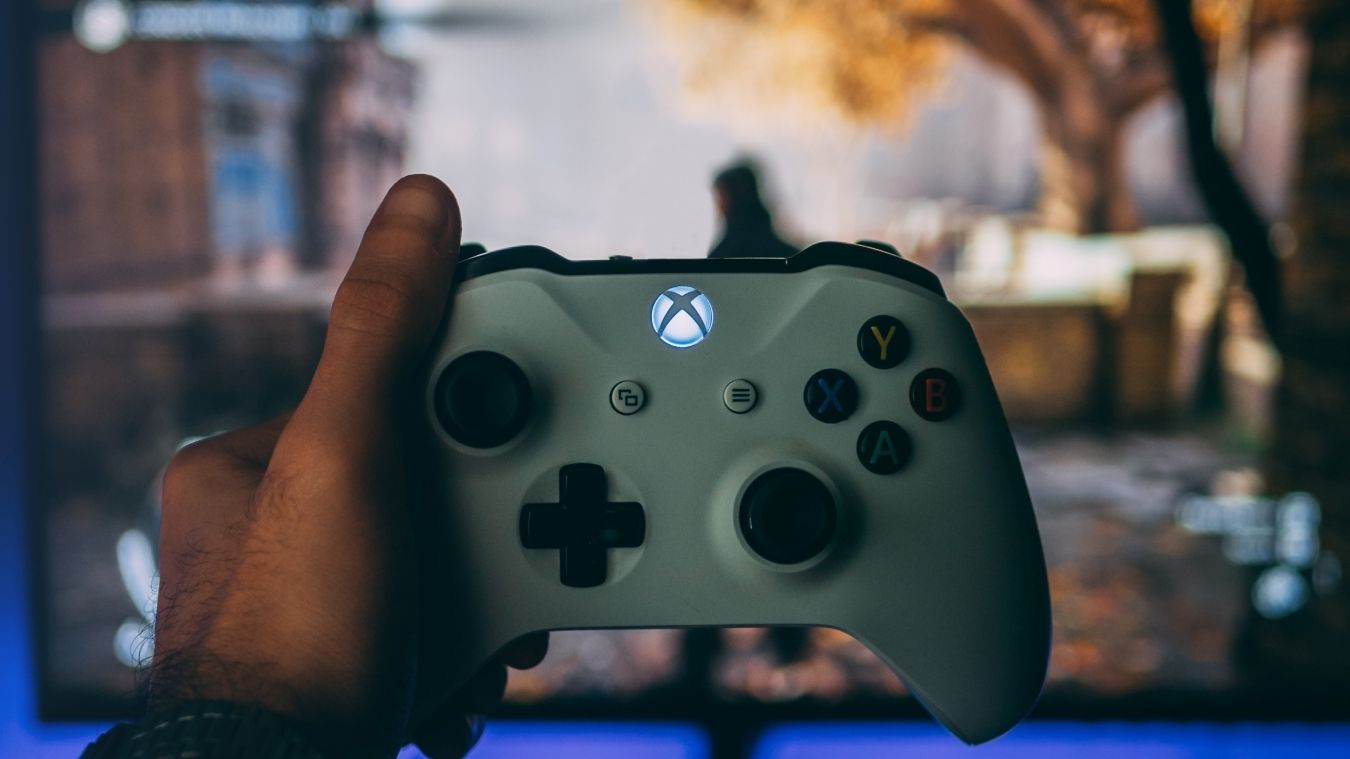
TVs come with a plethora of different settings, and it can be daunting trying to figure out what exactly they all do. Even if you’re not 100% sure what a particular setting does, the TV Calibration tool provides you with suggestions of ideal settings to make the process as simple as possible.
How to Calibrate Your TV for Your Xbox Series X|S
The calibration process is relatively simple, but it can be lengthy, especially if you aren’t familiar with your TV settings. It’s also hard to provide exact instructions and terminology since all TVs are different. But while every brand uses different wording, the process shouldn’t be too vastly dissimilar, and alternate terminology is provided to ensure each user can find what they’re looking for.
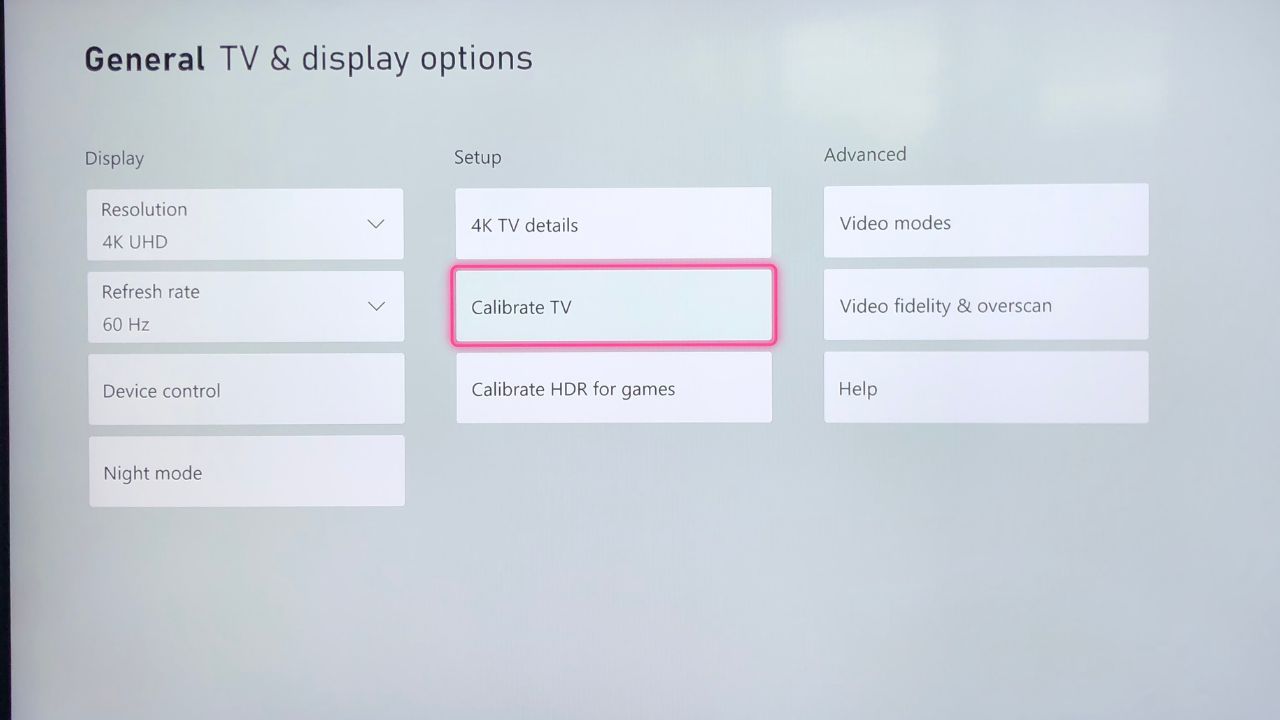
The first step to calibrating your TV is to find and open theTV Calibration tool on your console. You can find this in theTV & display options .Enabling auto HDR on your Xbox Series X|S is another setting you can find in this section that will improve your gaming performance even further, but for now, selectCalibrate TV.
The first screen gives you a general overview of what to expect when using the tool and encourages you to leave your TV on for around five minutes before you begin the process so the display can warm up. Once you’ve waited five minutes and read through the instructions, tapNext .
Recommended Settings
At this point, you will be given several recommended settings for your TV display. To begin applying them, open up your TV settings and head toPicture . Start by changing yourPicture Mode . Xbox recommends you change this toCinema ,Movie , orStandard .
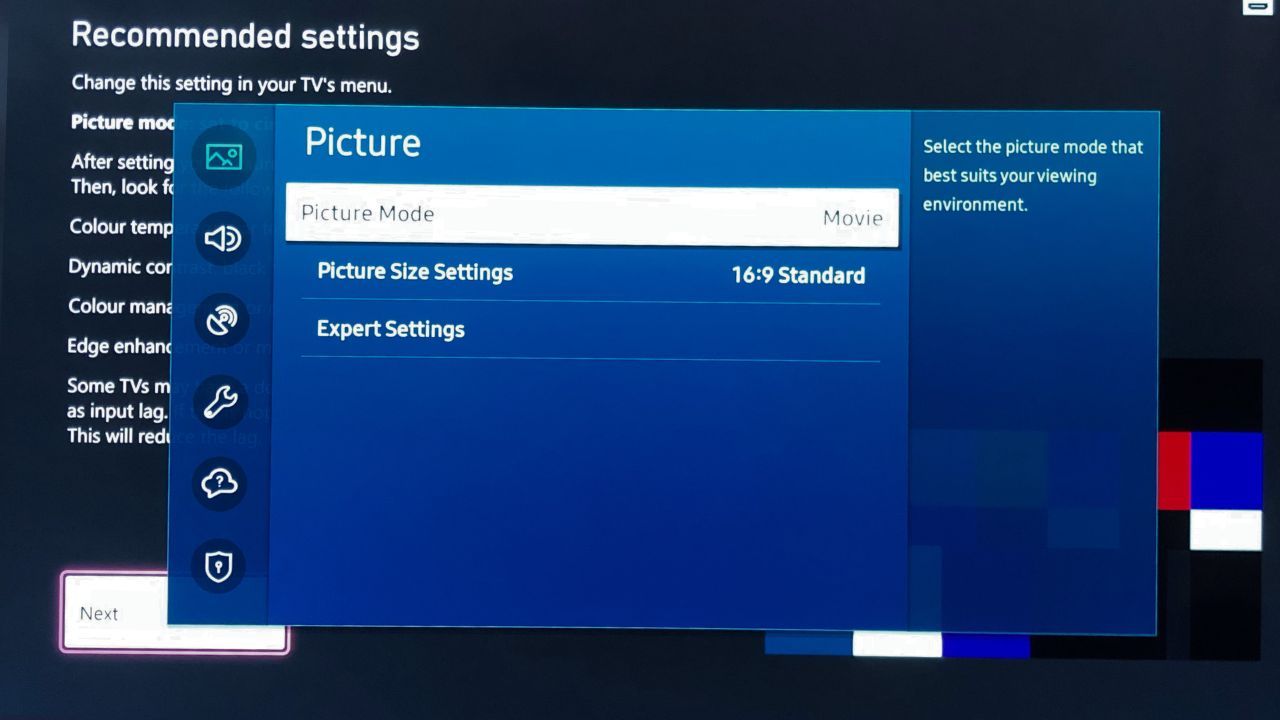
If you regularly experience lag when you’re gaming, you may want to have your TV set toGaming Mode instead. This mode can be found in theGeneral settings, and while it does increase your performance, it also sacrifices your picture quality.
UsePicture Reset after changing yourPicture Mode settings to update your display and move onto yourColor Temp orColor Tone settings. This setting will most likely be in yourAdvanced orExpert picture settings. Change yourColor Tone toWarm 1 ,Low ,Mid , orNeutral .
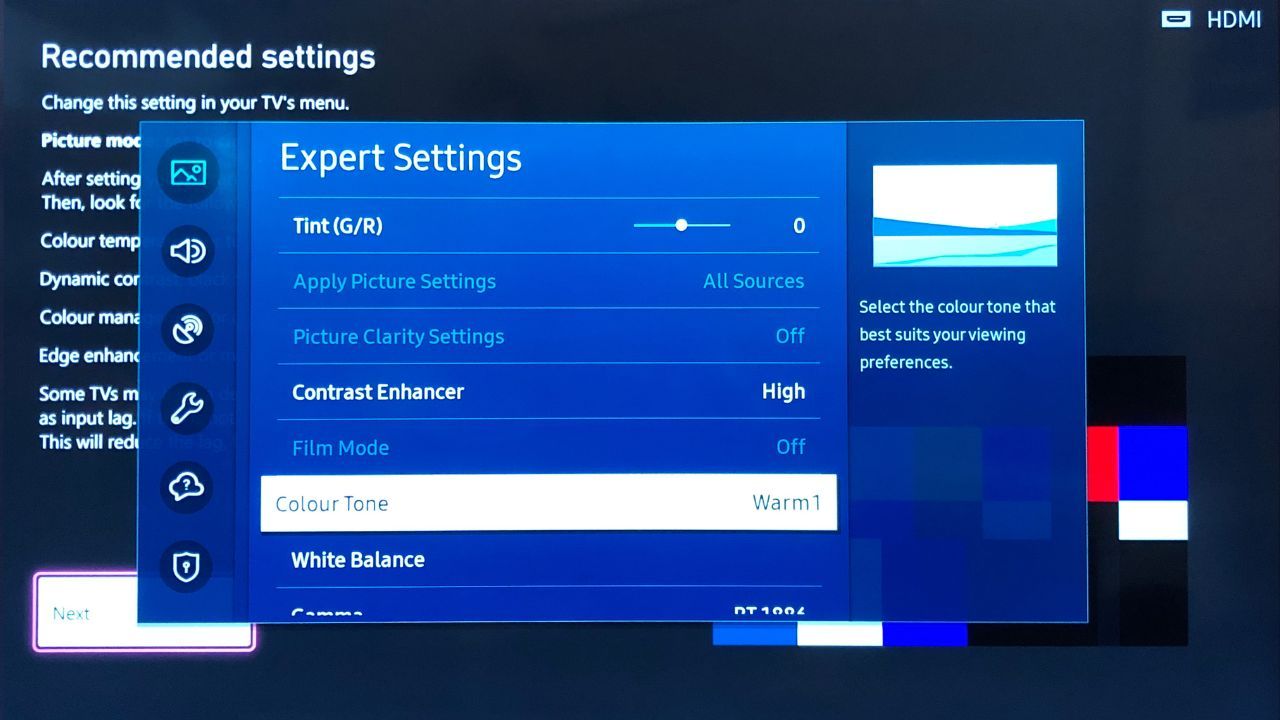
Scroll up or down until you find a setting labeledDynamic contrast ,black tone , orshadow detail . Turn that off or to 0.
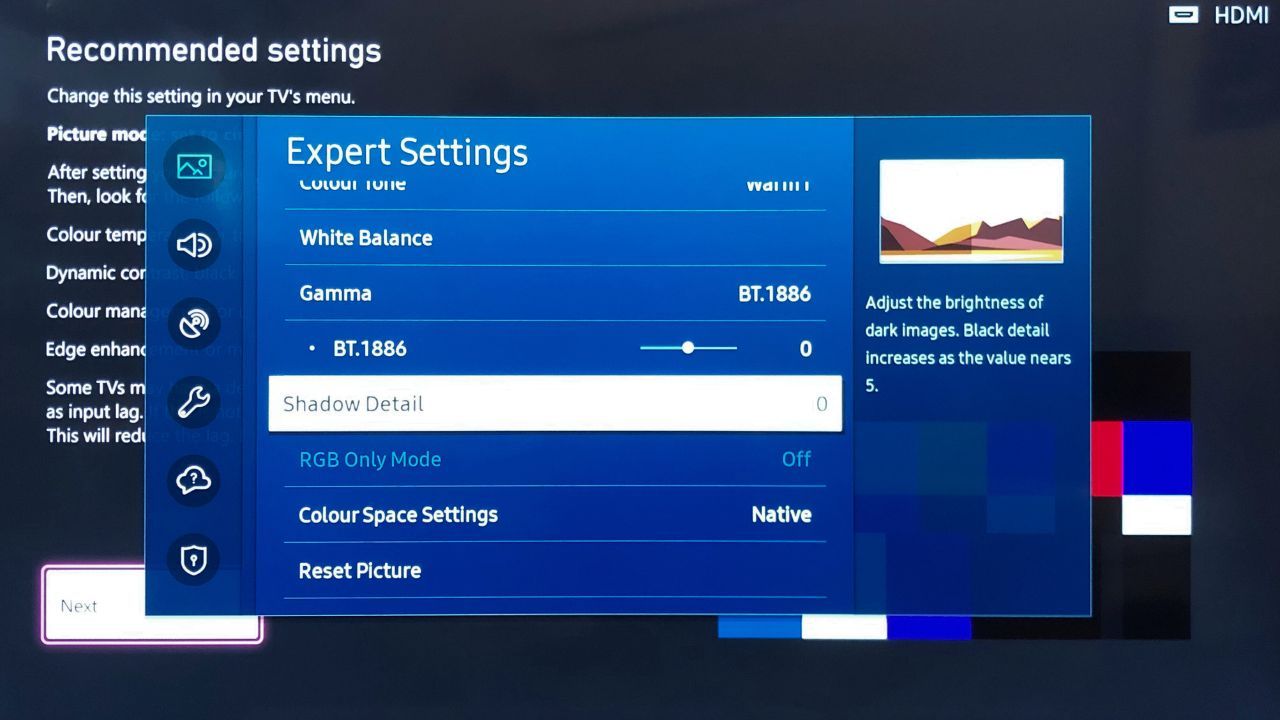
Continue scrolling until you find any of the below settings and ensure they are all switched off:
- Color management .
- Dynamic color .
- Edge enhancement .
- Motion lighting .
Once you have completed tweaking those settings, pressNext .
Aspect Ratio and Sharpness
You will then move on to tweaking your aspect ratio and image sharpness. The key to this page is to have thegreen lines match up perfectly with the edges of your TV. If they don’t, open yourPicture settings once again and selectPicture Size Settings .
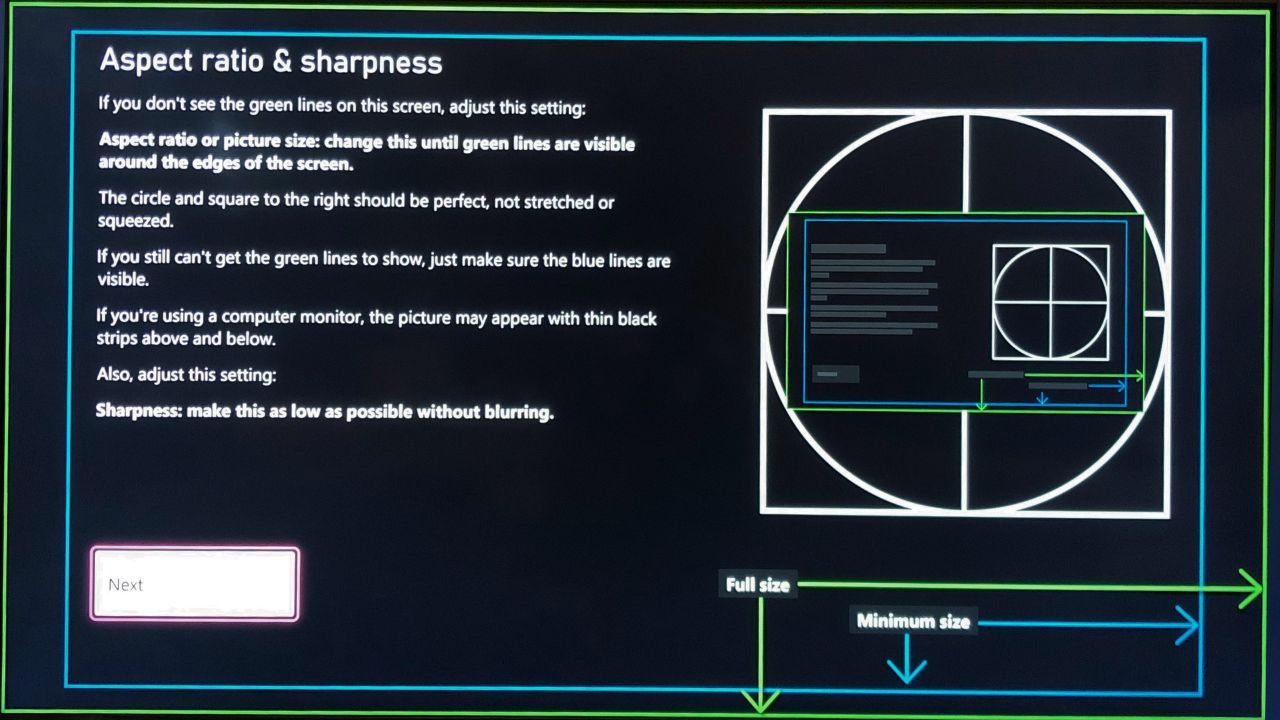
The setting you will require for most modern TVs is16:9 . If you’re calibrating on a computer monitor, the settings you need may be different again. If you can’t see the green lines at all, calibrate your monitor using theblue lines instead.
Open your TV’sPicture settings and head to theAdvanced/Expert section. Scroll down to theSharpness setting, and turn it down as low as possible without blurring your image. Don’t be afraid to turn it all the way down to zero if you can.
Optimizing Your Brightness Settings
PressNext to move on to theBrightness page. The first page is a general description of how to set your brightness. You can complete the process here or pressNext to see a larger version of the image you need.
The key to getting your perfect brightness level is to create a balance between light and dark. If your brightness is too low, you won’t be able to make out objects hidden in dark corners, and if it’s too high, your picture could appear blown out during bright scenes.
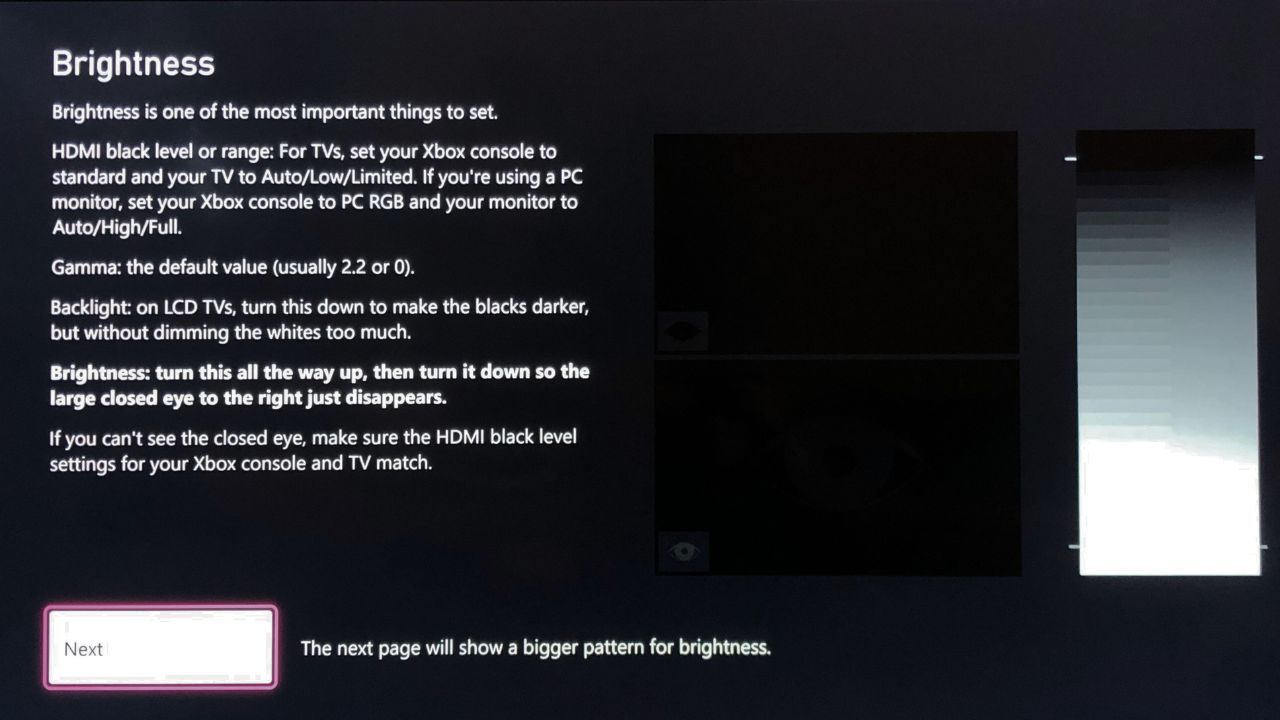
To set your brightness, head to yourAdvanced/Expert picture settings once again and pressBrightness . First, scroll all the way up so you can see theclosed eye . Then, scroll back down again until theclosed eye just barely disappears into the darkness.
Once complete, you shouldn’t be able to see the closed eye at all, and you should be able to only just see theopen eye . It’s a good idea to tweak this setting while you are sitting in your usual TV viewing spot, as you might be able to see the eyes differently at different angles.

If you can’t see theclosed eye at all, go back to your TV’sGeneral settings and selectExternal Device Manager . Open theHDMI Black Level setting and change it toAuto ,Low , orLimited . Then head back on your Xbox to reach yourGeneral settings and selectVideo fidelity & overscan .
Change yourColor space setting toStandard and return to the TV Calibration tool to skip to theBrightness page. You should be able to see theclosed eye now. PressNext when you’ve reached your perfect brightness setting.
Optimizing Your Contrast Settings
Next up is theContrast settings screen. This is a similar setup to theBrightness page, but you havetwo suns andtwo eyes now instead. Open yourAdvanced/Expert picture settings and find theContrast setting.
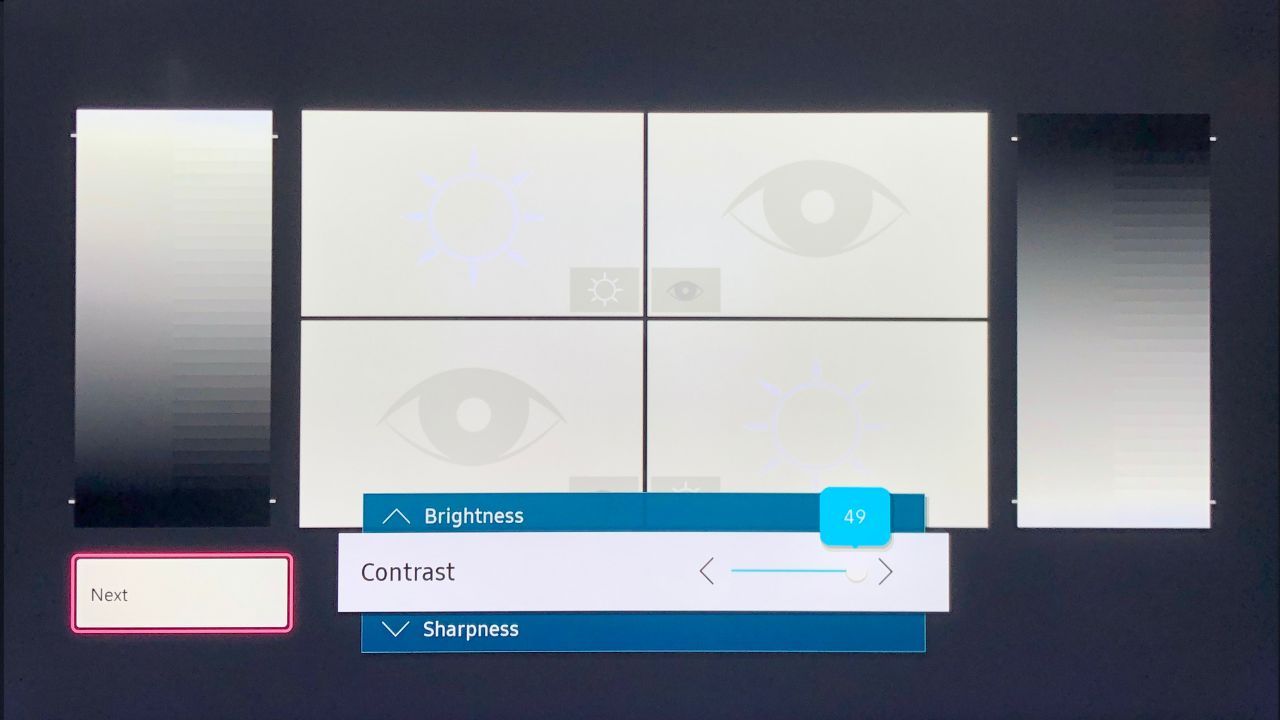
You want to just barely be able to make out both images. PressNext when you’re done.
Brightness Again
The following page requires you to check your brightness again. Changing the contrast can affect the brightness setting, so recalibrate it if necessary and proceed to the next page.
Tweaking Your Advanced Color Settings
The last page is your advanced color settings. The idea on this page is to tweak your color settings so each of the blocks on the right is individual, and no colors are bleeding into the neighboring ones. The easiest way to do this is by turning your TV’s blue filter on or changing yourRGB Only Mode toBlue . This can be found in yourAdvanced/Expert settings.
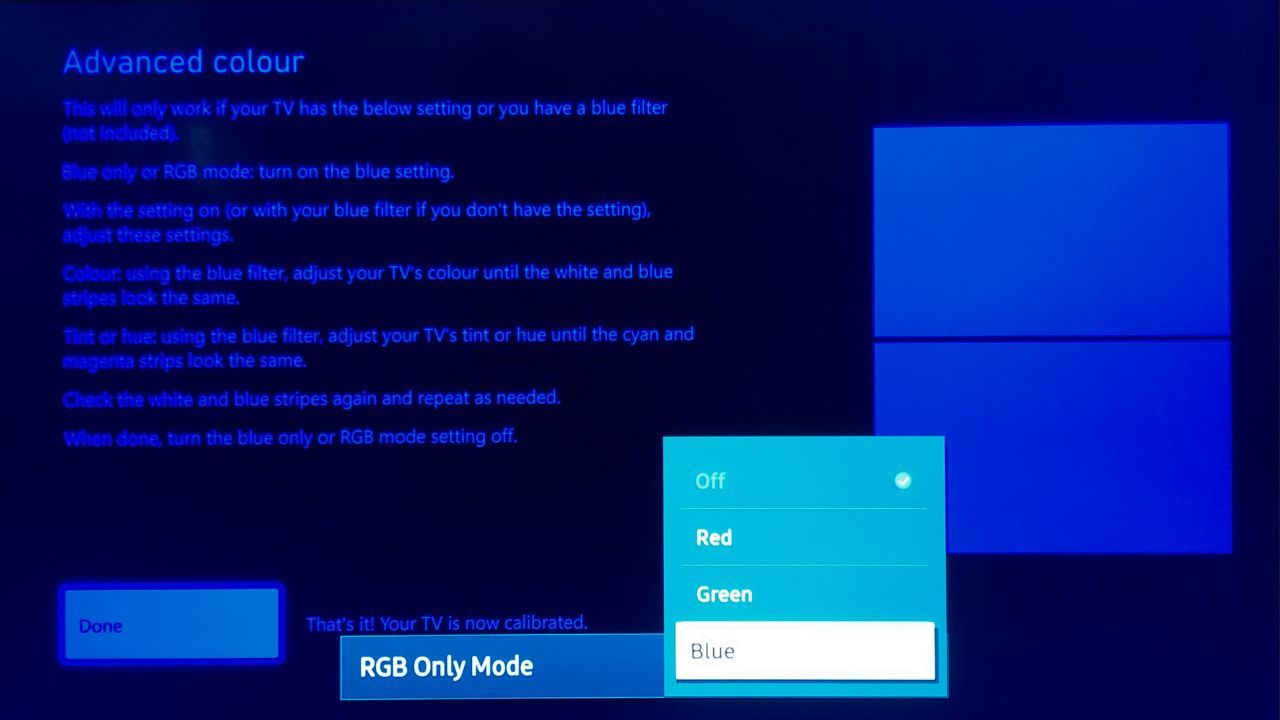
Once your TV display is blue, open theColor settings on your TV and adjust it so the blue and white columns on the top look the same. Then scroll toTint orHue and adjust it so the pink and cyan columns on the bottom match. Once all the colors are matching, change yourRGB filter back to normal and pressDone . Your TV will now be perfectly calibrated to your Xbox Series X|S.
There are plenty more settings to explore on your Xbox Series X|S to make sure it is providing you with the best gaming experience possible.Boosting the FPS on your Xbox Series can give you an even better performance, and there are also a series of sound settings to optimize on your Xbox Series X|S so your sound quality can match that of your display.
Allow Your Xbox Games to Look as Good as Possible
Calibrating your TV for your Xbox is a lengthy process, but it is entirely worth it to enjoy your games with the best picture quality available to you.
If you’ve had your Xbox Series X|S for a long time and you’ve never calibrated your TV, there’s a good chance that you might not be making the most out of either your Xbox or TV display. And using the TV Calibration tool on your Xbox is certainly cheaper than buying a new TV to get better picture quality.
- Title: Step-by-Step: Achieving Optimal Display on Xbox S&X
- Author: William
- Created at : 2024-07-12 03:21:22
- Updated at : 2024-07-13 03:21:22
- Link: https://games-able.techidaily.com/step-by-step-achieving-optimal-display-on-xbox-sandx/
- License: This work is licensed under CC BY-NC-SA 4.0.