
Steam Storage Woes: Fixing Windows 11 Write Errors
Steam Storage Woes: Fixing Windows 11 Write Errors
While Steam is without any issues for many, some users face the “Steam library folder not writable” error when they try to install a game using the Steam client. The error also appears while installing an update for the app.
If you face the same predicament, don’t fret. Let’s explore multiple methods to resolve this annoying error code and help you successfully install your games on Steam again.
1. Change the Steam Folder Attributes
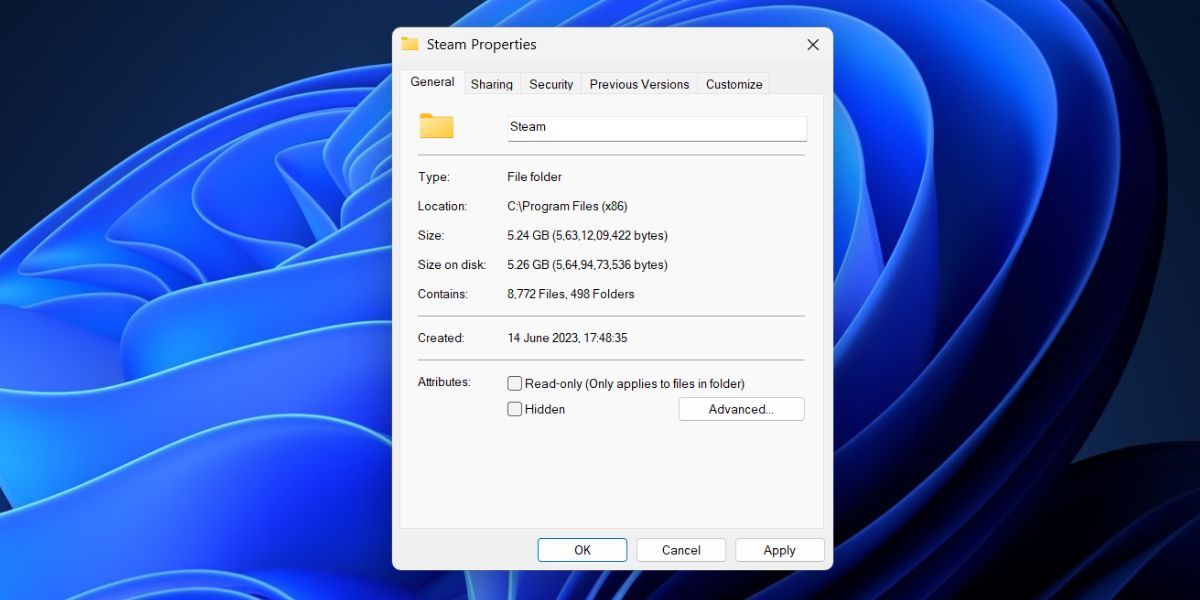
Steam needs to have both read and write permissions to make changes to any sub-folder inside the Steam folder. If the steamapps folder is set to “read-only,” the error can pop up and prevent you from installing the game. Repeat the following steps to change the Steam folder attributes:
- PressWin + E to open a new File Explorer window .
- Type the following path in the address bar at the top and press theEnter key to navigate to it:C:\Program Files (x86)
- Double-click on theSteam folder. Now, right-click on thesteamapps folder and select theProperties option from the context menu.
- Navigate to theAttributes section and uncheck theRead-only option.

- Click on theApply button and then click on theOK button.
- Close the File Explorer window and reopen the Steam client.
- Try to install the game and check if the error appears or not.
2. Run the Steam App With Administrator Privileges
Missing privileges can cause issues with some features in Steam. So, you must close and restart the Steam app with admin rights. Here’s how:
- PressCtrl + Shift + Esc keys together to launch Task Manager .
- Find theSteam process and right-click on it. Select theEnd Task Option.
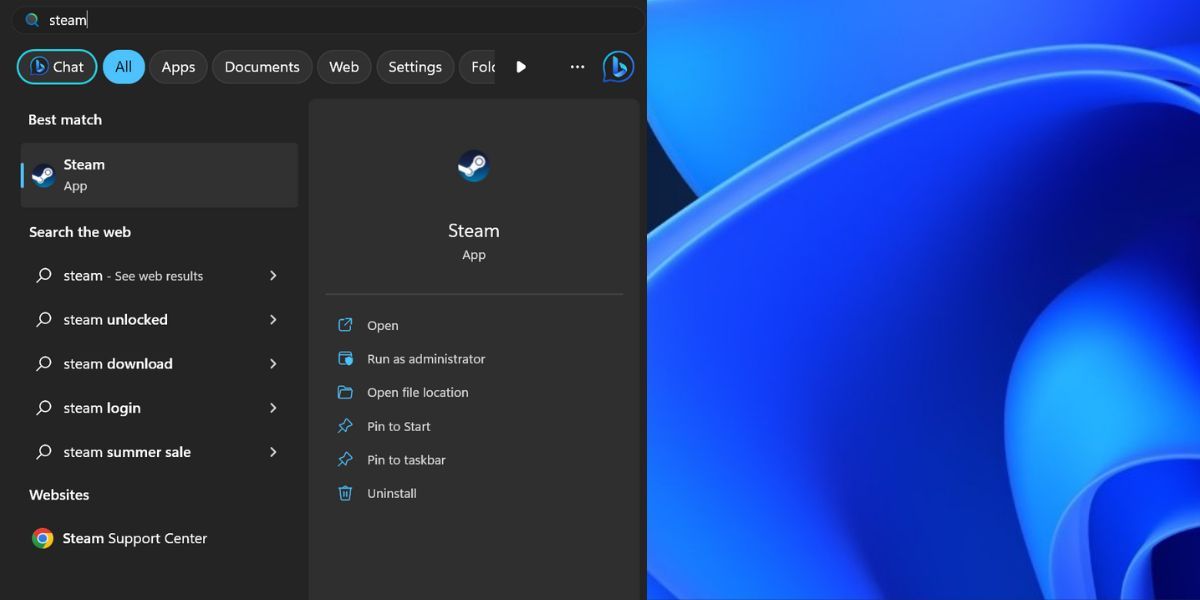
- Press theWin key, typeSteam , and click on theRun as administrator option.
- The User Account Control window will launch. Click on theYes button.
3. Grant Full Ownership of the Steam Folder
If you don’t have complete ownership of the Steam folder, you can face problems while installing a game or making changes to any file or folder. Repeat the following steps to gain complete ownership of the Steam folder:
- PressWin + E to open the File Explorer.
- Type “ C:\Program Files (x86)” in the address bar at the top and pressEnter to navigate to it:
- Click on theSteam folder to select it. Then, pressAlt + Enter to open theProperties window.
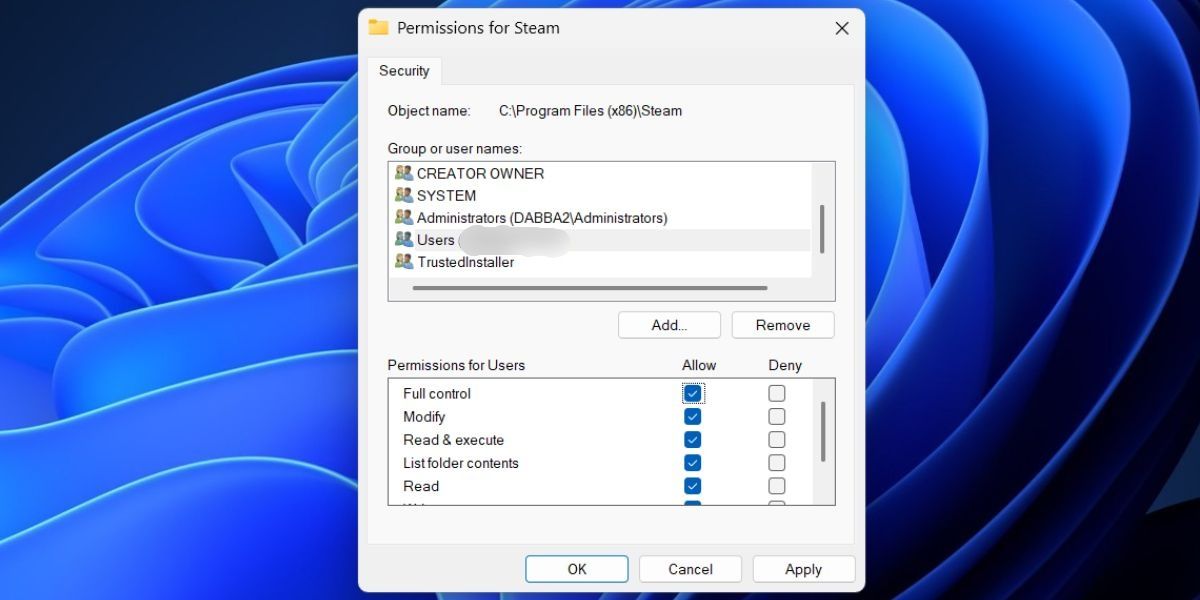
- Switch to theSecurity tab.
- Click on theEdit button.
- Select your User Profile and click on theEdit button.
- Click on theFull Control checkbox to grant all the permissions for your user profile.
- Now, click on theApply button.
- Lastly, click on theOK button and then close the Properties window.
4. Repair the Steam Library Folder
Steam offers the option to repair the Steam library folders to fix issues with it. Here’s how to repair the folder using the Steam app:
- Open the Steam client.
- Click on theSteam button at the top left corner and then click on theSettings option in the context menu.
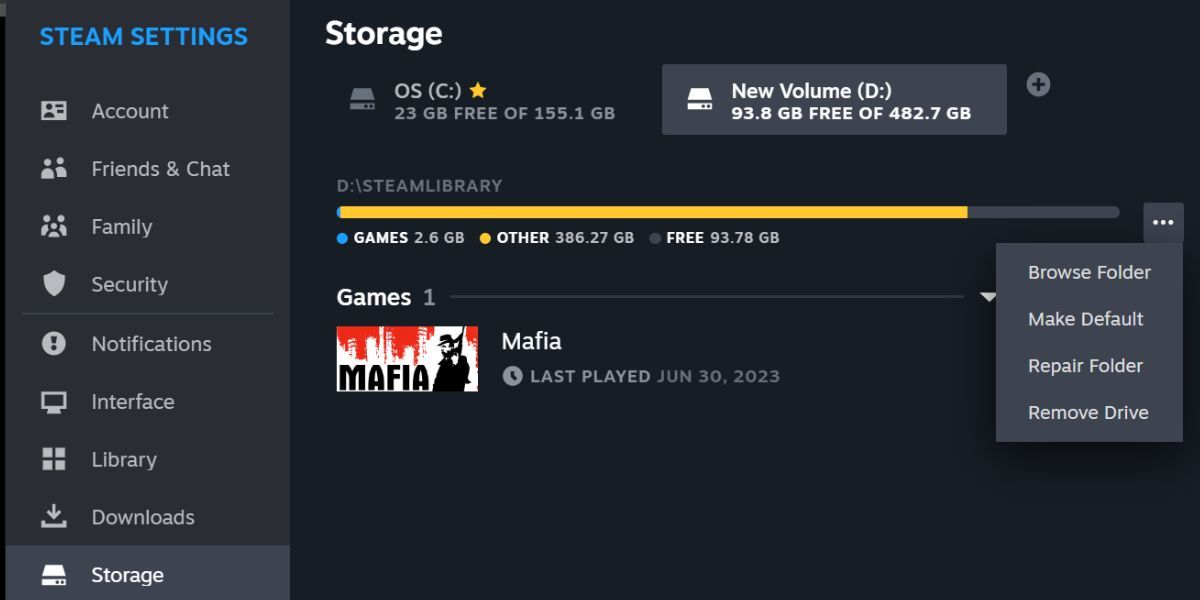
- Scroll down and click on theStorage option.
- Click on thehorizontal ellipsis (three dots) button. Select theRepair folder option.
- The User Account Control window will pop up. Click on theYes button.
- After the repair completes, click on theClose button.
If you still face the “Steam library folder not writable” error, you must remove and re-add the Steam library folder using the Storage settings. Repeat the following steps:
- Open the Steam client.
- Click on theSteam button and then click on theSettings option.
- Scroll down and click on theStorage option.
- Select a Steam library folder and then click on thehorizontal ellipsis (three dots) button. Select theRemove Drive option.
- Now, click on theplus icon. Select the folder location and click on theAdd button.
- Close and relaunch Steam.

6. Flush the Steam Download Cache
An outdated or corrupt download cache can cause interference while installing games or updating the Steam client. So, you must empty the Steam download cache using the settings. Repeat the following steps to do so:
- Launch the Steam client on your PC.
- Click on theSteam button and then click on theSettings option to open the app settings.
- Navigate down and click on theDownloads option.
- Find theClear Download Cache option in the right pane. Click on theClear Cache button.
- Steam will reconfirm your decision to clear the cache. Click on theConfirm button.
- The app will restart after purging the download cache. You will have to sign in again to your Steam account.

7. Run a Check Disk Scan
Hard Disk errors can be a reason due to which Steam is unable to add or modify files. You can use the Check Disk utility in Windows to check your hard disk for errors and fix them. The Check Disk utility will scan the hard disk for errors and repair them, if possible.
 With Screensaver Wonder you can easily make a screensaver from your own pictures and video files. Create screensavers for your own computer or create standalone, self-installing screensavers for easy sharing with your friends. Together with its sister product Screensaver Factory, Screensaver Wonder is one of the most popular screensaver software products in the world, helping thousands of users decorate their computer screens quickly and easily.
8. Reinstall the Game on Another Drive
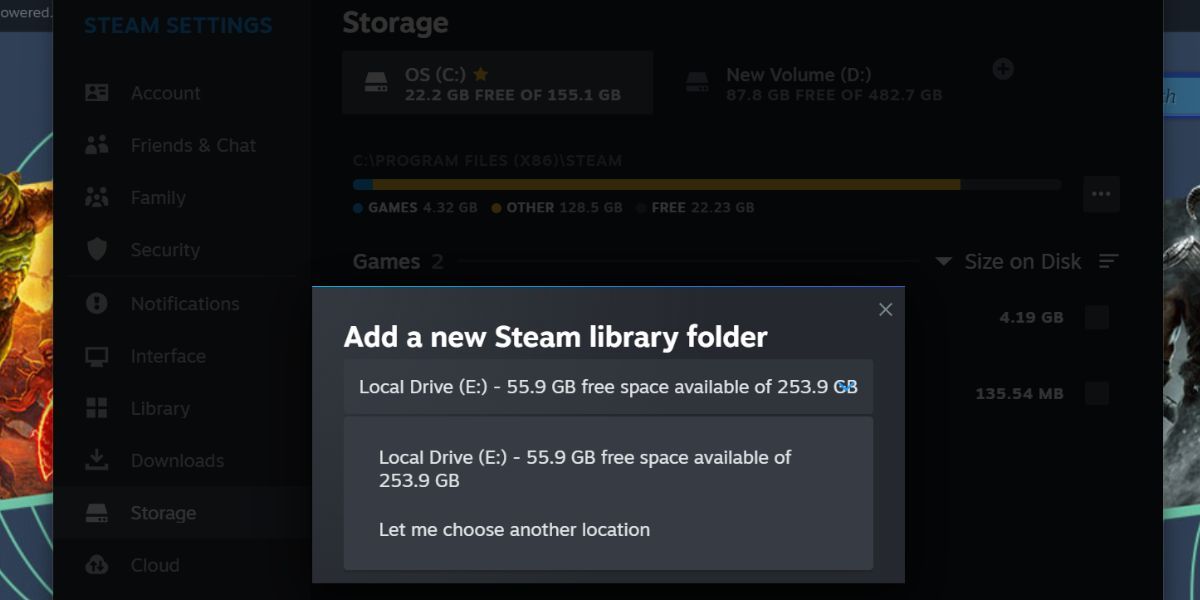
If you are unable to install the game on the C drive, you must add another drive in the Steam Storage settings. Then, attempt the game installation in the newly added drive. Here’s how to do it:
- Open the Steam app and click on theSteam button.
- Click on theSettings option.
- Scroll down and click on theStorage option.
- Click on theplus icon. Expand the drop-down list and select a drive.
- Now, click on theAdd button.
9. Format the Disk and Try Again
Many users want to install games on a newly added disk drive but face the “Steam library folder not writable” error in the process. It is mainly because the newly added disk drive bears the same letter as the old drive with a Steam Library folder.
As such, you must assign a new driver letter and reformat the disk. Here’s how to do it:
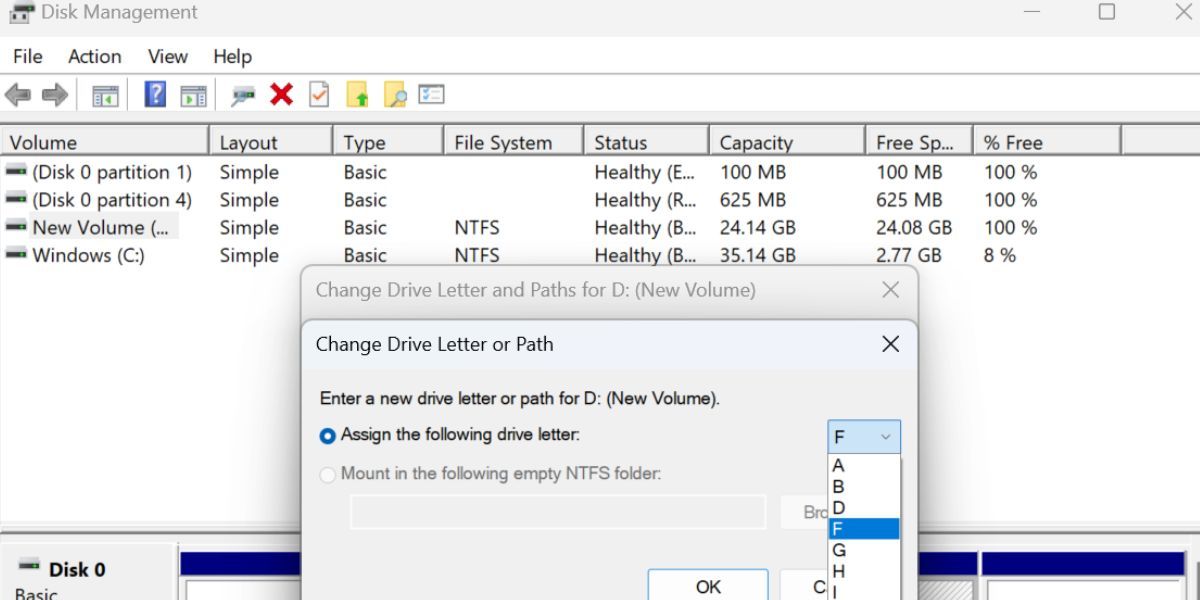
- Open theStart menu and typecreate and format disk partitions . Click on theOpen option in the right pane.
- Right-click on the new drive whose letter you want to change. Select theChange Drive Letter and Paths option.
- Click on theChange button.
- Expand the drop-down list and select a new drive letter. Click on theOK button.
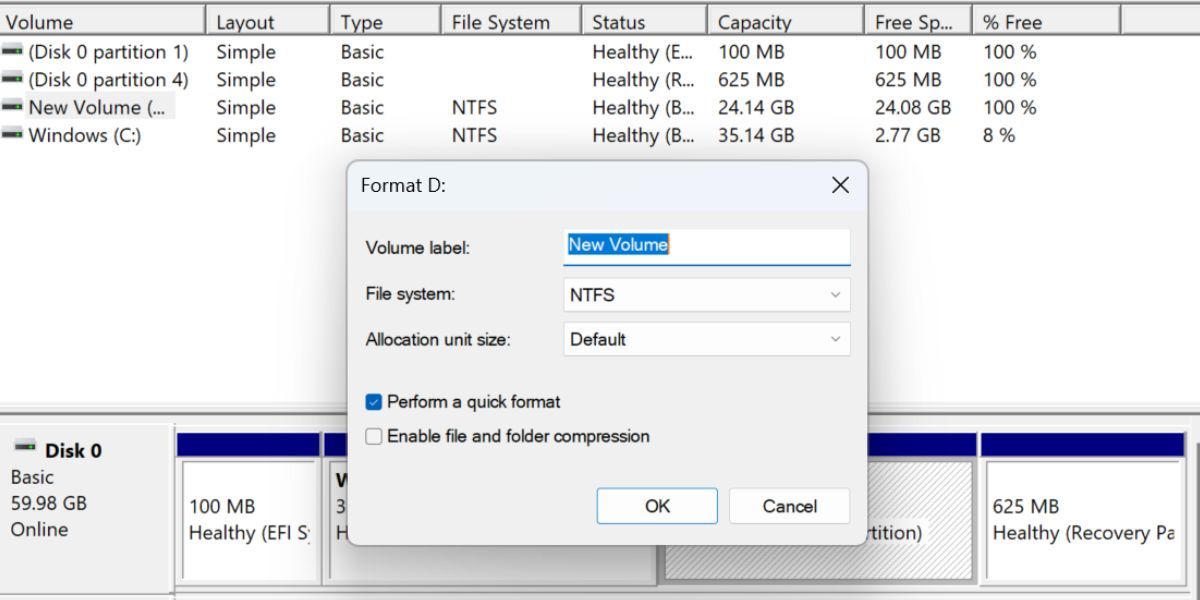
- Now, right-click on the disk drive and select theFormat option.
- Keep theFile System asNTFS and click on theOK button.
- Lastly, click on theOK button once again.
- Close the Disk Management utility.
Make Your Steam Library Folder Writable Again on Windows
These were the methods to fix the “Steam library folder not writable” error. Start by changing the file attributes and relaunching the Steam app with administrator rights. After that, repair the Steam library folder, flush the download cache, and run a check disk scan to fix disk errors.
- Title: Steam Storage Woes: Fixing Windows 11 Write Errors
- Author: William
- Created at : 2024-08-31 19:12:57
- Updated at : 2024-09-01 19:12:57
- Link: https://games-able.techidaily.com/steam-storage-woes-fixing-windows-11-write-errors/
- License: This work is licensed under CC BY-NC-SA 4.0.