
Quick & Effective Steps for Deck's SD Card Revamp
Quick & Effective Steps for Deck’s SD Card Revamp
Quick Links
- Why Cloning Your Steam Deck’s SSD Is Better
- How to Clone Your Steam Deck’s SSD to a New One
- Step 1: Download Macrium Reflect on a Separate PC
- Step 2: Image Your Old SSD
- Step 3: Restore Your Backup Image to Your New SSD
- Step 4: Insert Your New SSD Into Your Steam Deck
Key Takeaways
- Upgrading your Steam Deck’s SSD? Cloning is the best way to go. It saves time and transfers all your files, settings, and games to the new SSD.
- You can use Macrium Reflect to clone your old SSD onto the new one. Make sure to save the backup image file and restore it on the new SSD.
- After restoring the image onto the new SSD, install it onto your Steam Deck. It should boot up without needing to reinstall SteamOS or log in.
Are you upgrading your Steam Deck SSD but don’t want to set up your device from scratch? Here’s how to clone your SSD for an easier upgrade.
Why Cloning Your Steam Deck’s SSD Is Better

Jhet Borja/MakeUseOf
Slotting in a new SSD into your Steam Deck doesn’t automatically load it with SteamOS, your login information, or your games. If you want to just plug in your new SSD into your Steam Deck without setting up the device from scratch, cloning is the best way to go.
Cloning your old SSD will trick your Steam Deck into thinking it’s the same one, except with more storage. All your files, Steam Deck settings, login information, games, etc., will all be recognized the same way by your Steam Deck.
If you’re looking to install a bigger SSD for your Steam Deck , clone your old one to it first so that you can immediately start downloading new games to it instead of sitting fussing about installing SteamOS.

How to Clone Your Steam Deck’s SSD to a New One
Cloning your old SSD to your new one will save you so much time. You won’t need to experience the time-consuming process of manually imaging SteamOS, logging in, waiting for updates, and getting all your old settings right. Here’s how you can do it…
Step 1: Download Macrium Reflect on a Separate PC
Since we’re not going to be using an SSD enclosure in this guide, we’re going to need a separate PC that has an NVMe/SATA M.2 slot on the motherboard.
On the PC, we’re going to use Macrium Reflect to clone the old SSD onto the new one.
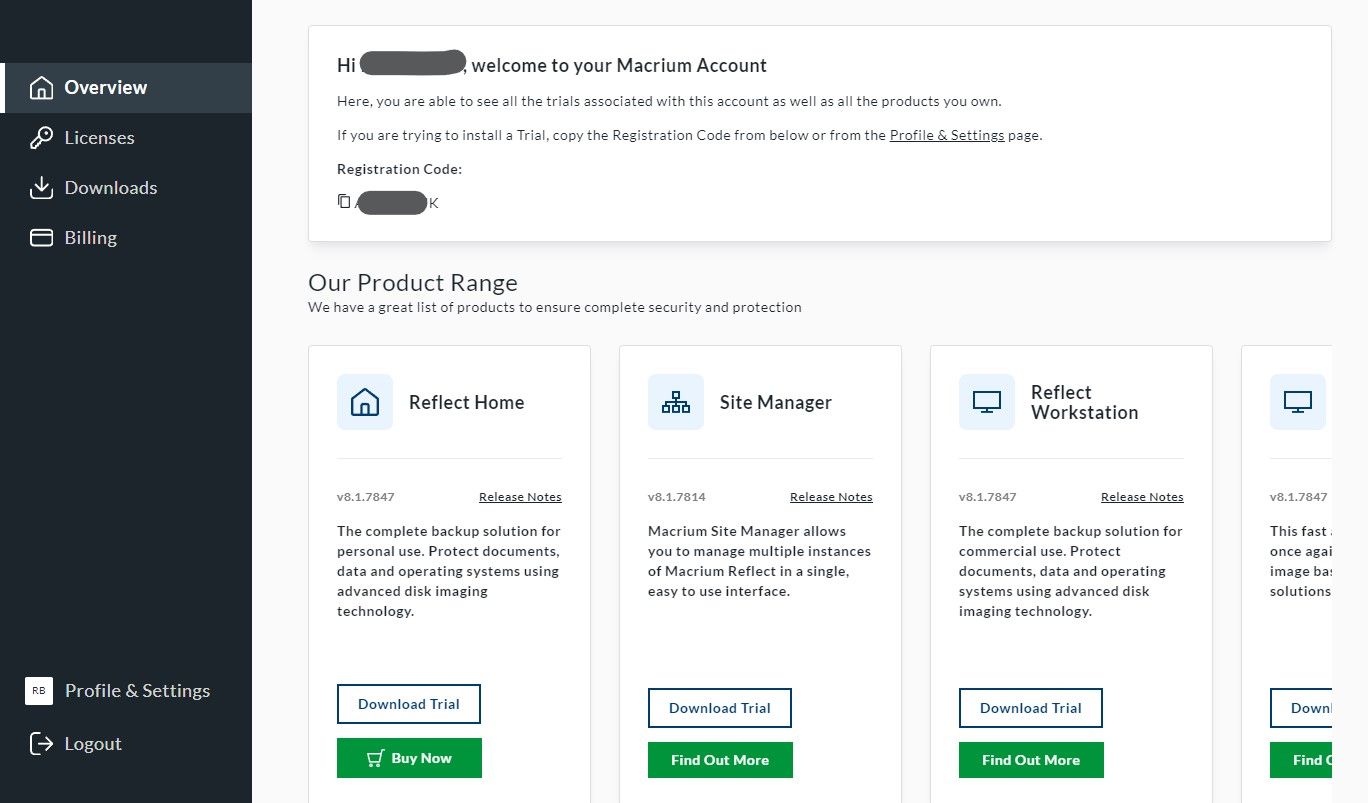
Register and create a Macrium Reflect account and download the free trial as it has everything you need for this process.
Copy your registration code, click onDownload Trial on the Home version, and run the setup.
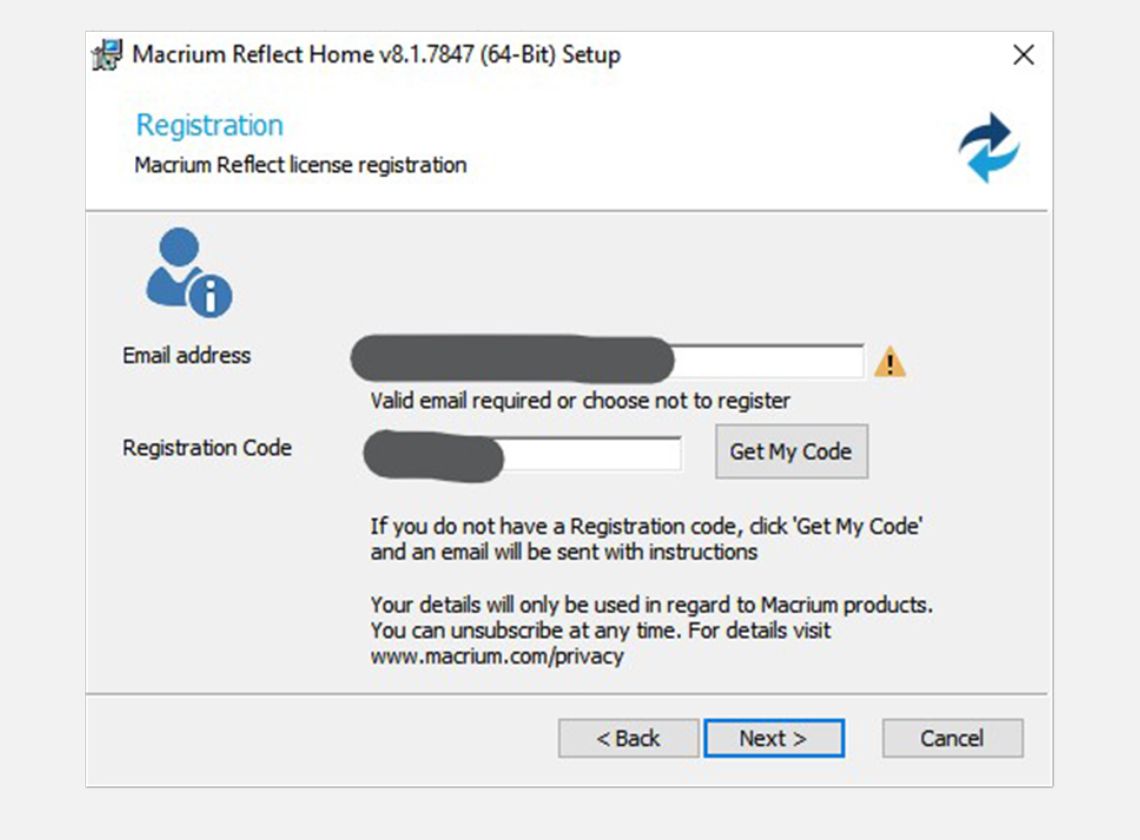

During the setup, check the box for the 30-day trial and enter your registration code when it asks for it.
Once the setup is done, and you’ve installed Macrium Reflect on your PC, you can now head to the next step.
Step 2: Image Your Old SSD
If you only have one SSD slot on your motherboard, then imaging your SSD is the only way to go.
 PaperScan Professional: PaperScan Scanner Software is a powerful TWAIN & WIA scanning application centered on one idea: making document acquisition an unparalleled easy task for anyone.
Jhet Borja/MakeUseOf
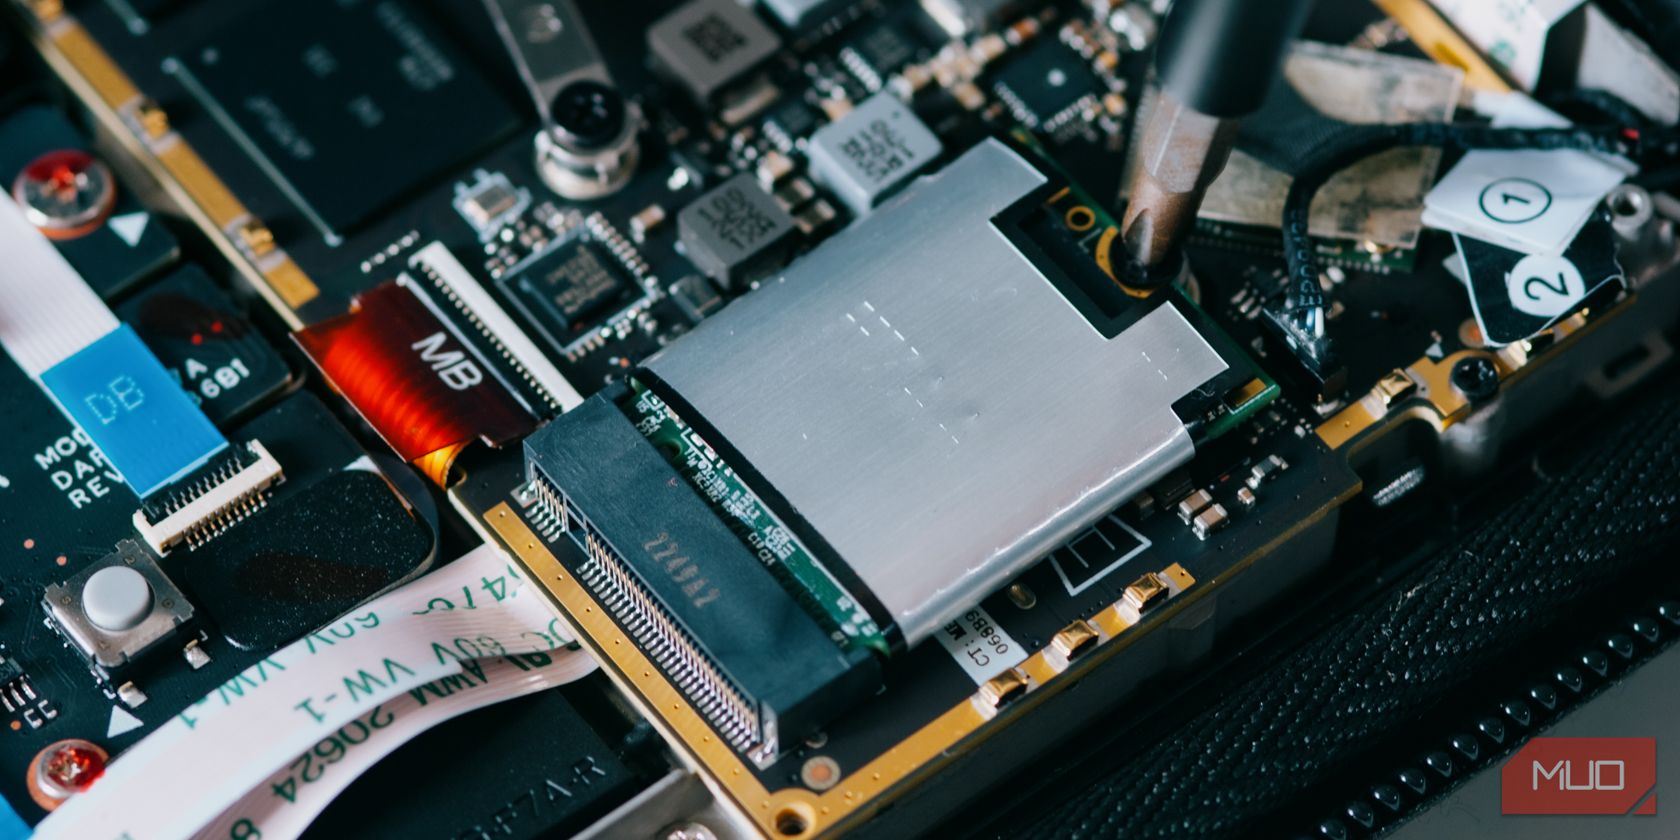
First, remove your Steam Deck’s old SSD. If you don’t know how, check out this Steam Deck SSD installation guide as you’ll be using it later to install your upgraded SSD as well.
Next, with your PC shut down and unplugged, you should install the NVME or M.2 SSD into your motherboard. Since the Steam Deck uses a 2230-size SSD, you most likely won’t be able to screw it down. But that’s okay so long as you don’t knock it off or move your PC too much during the process.
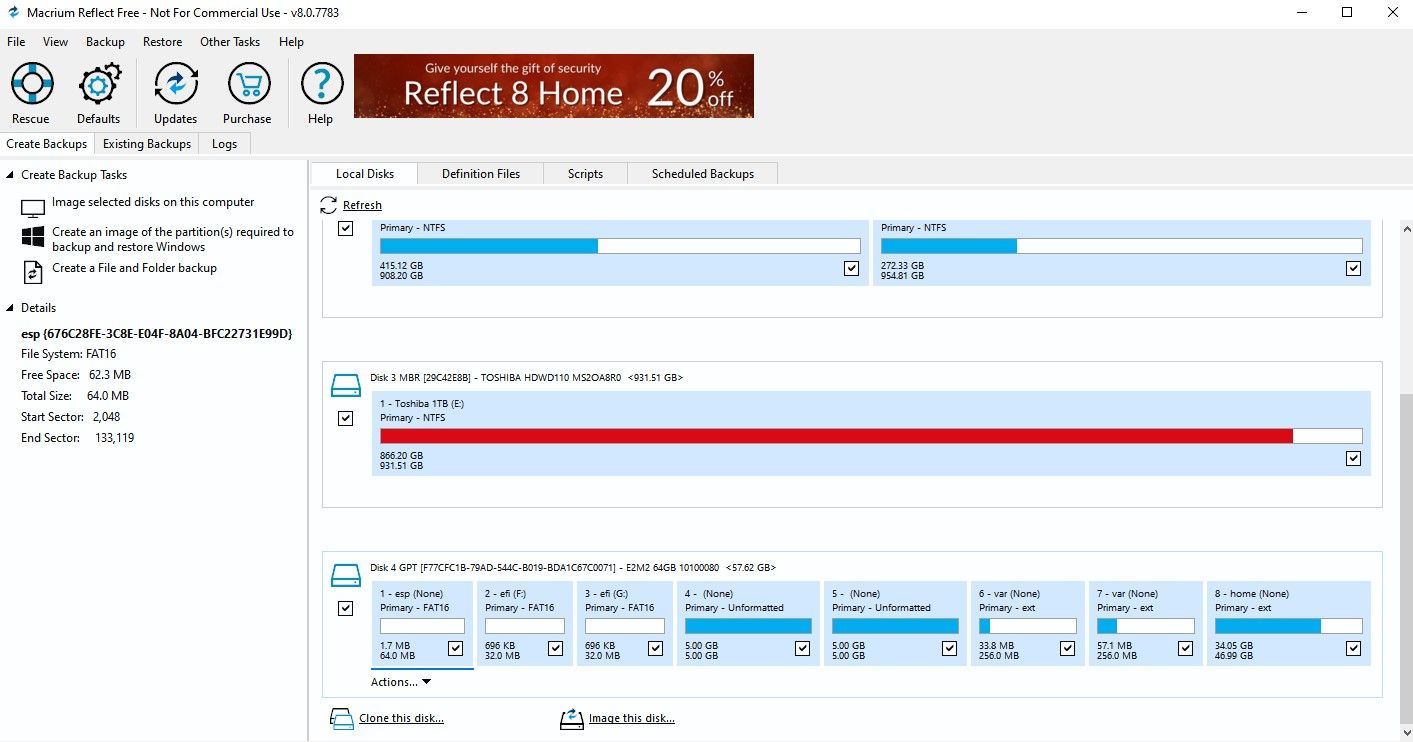
Now, turn on your PC and open up Macrium Reflect. Select your old Steam Deck SSD in the drives list and click onImage this disk… below it.
It will ask you where you want to save your image file. I chose to make a new folder so that I would remember where to get it from later. Macrium Reflect compresses images down to 40% of their original size, so make sure to have at least that much available space where you save it.
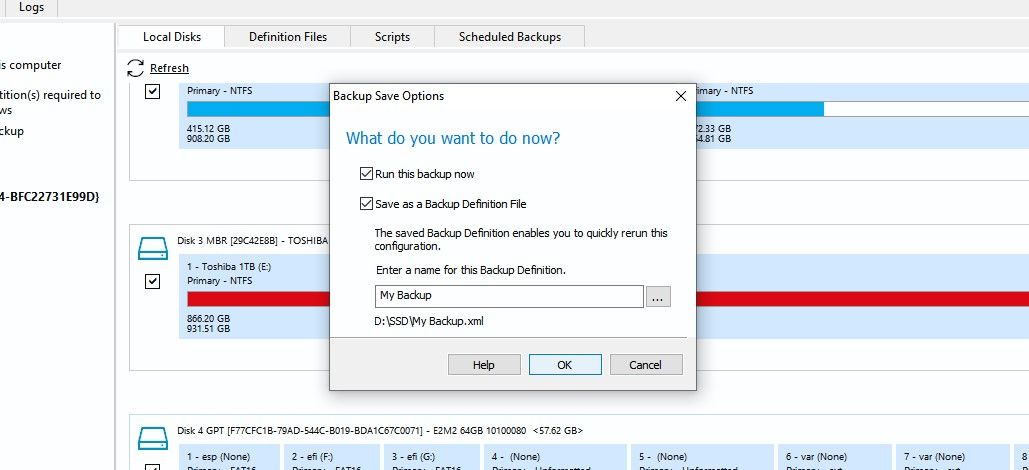

Name your backup image and click OK until it starts creating the image file. It can take anywhere from a few minutes to about an hour depending on the size of the drive and how much is on it. My 64GB SSD only took about five minutes.
If your motherboard has two SSD slots, you can clickClone this Disk … instead of imaging. You can then follow similar steps, but skip the image restoration process by directly copying the partitions of the old SSD to the new one. This method is faster as it’ll do the cloning in one step.

Step 3: Restore Your Backup Image to Your New SSD
Now that your backup image is ready, you can now shut down your PC, replace the old SSD with your new one, and boot your PC back up.
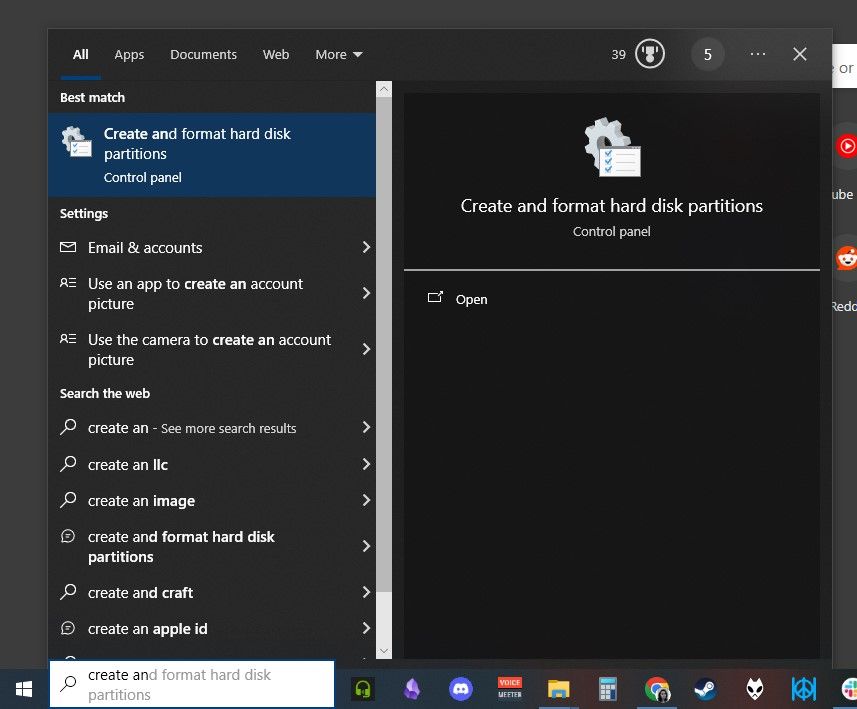
Before you open up Macrium Reflect, search for “Create and format hard disk partitions” in the Windows search bar. This will open up the disk manager.
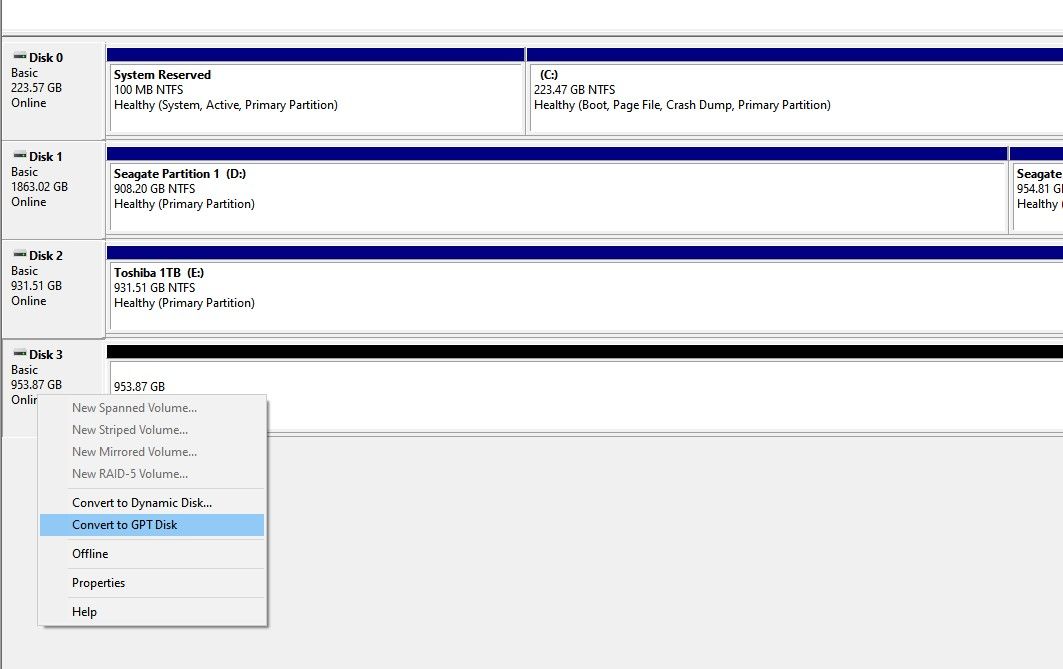

Look for your new SSD—it should be black if it hasn’t been used before. Right-click on it and selectConvert to GPT Disk . The GPT partitioning scheme is what SteamOS works best with, so it’s best to use that.
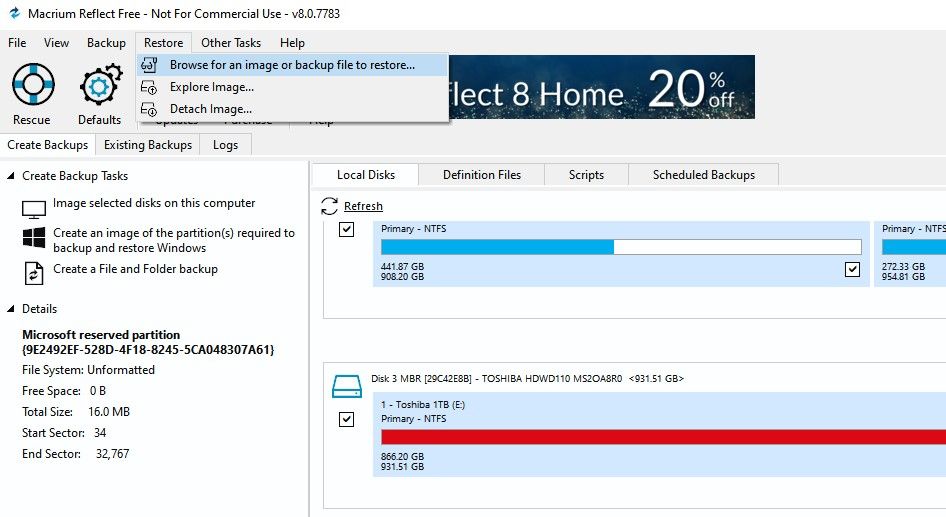
Open up Macrium Reflect, and on the top menu bar, clickRestore > Browse for an image or backup file to restore… .
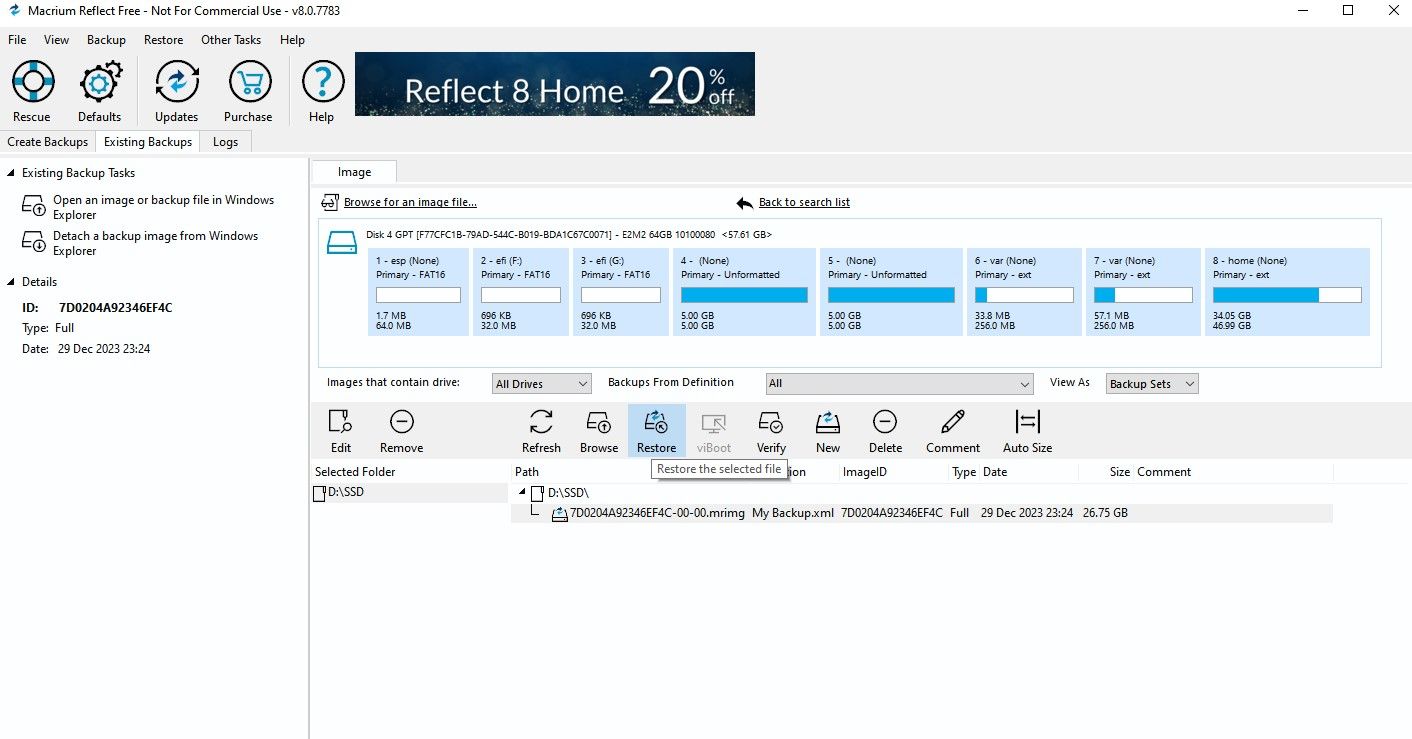
Once you find the image file that you created earlier, select it in Macrium Reflect and clickRestore .

A pop-up will appear, allowing you to choose where you want to restore the image to. Click onSelect a disk to restore to… , and choose your new SSD.
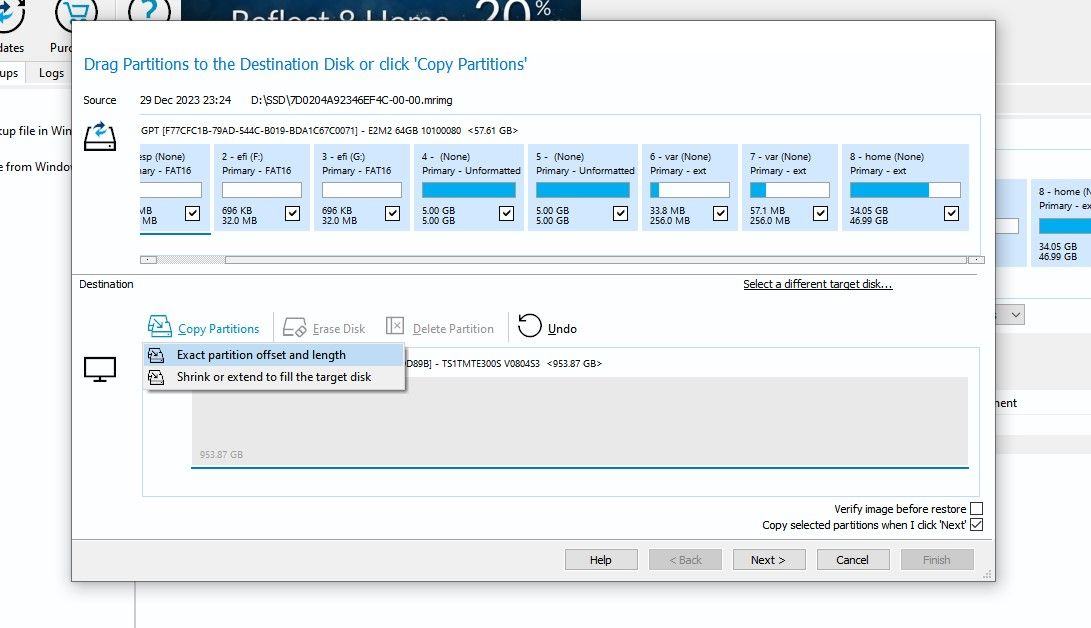
Click onCopy partitions > Exact Offset and Length . This will visualize the partitions on the new SSD. Don’t worry about the empty space, leave that blank as SteamOS will immediately utilize it once you boot up your Steam Deck.
Click onNext until theFinish button is clickable. This will start pasting the image onto the new SSD. It can take a while depending on how big the whole operation is.
## Step 4: Insert Your New SSD Into Your Steam DeckOnce the old SSD’s image has been copied onto your new SSD, you can now shut down your PC and install the drive onto your Steam Deck.
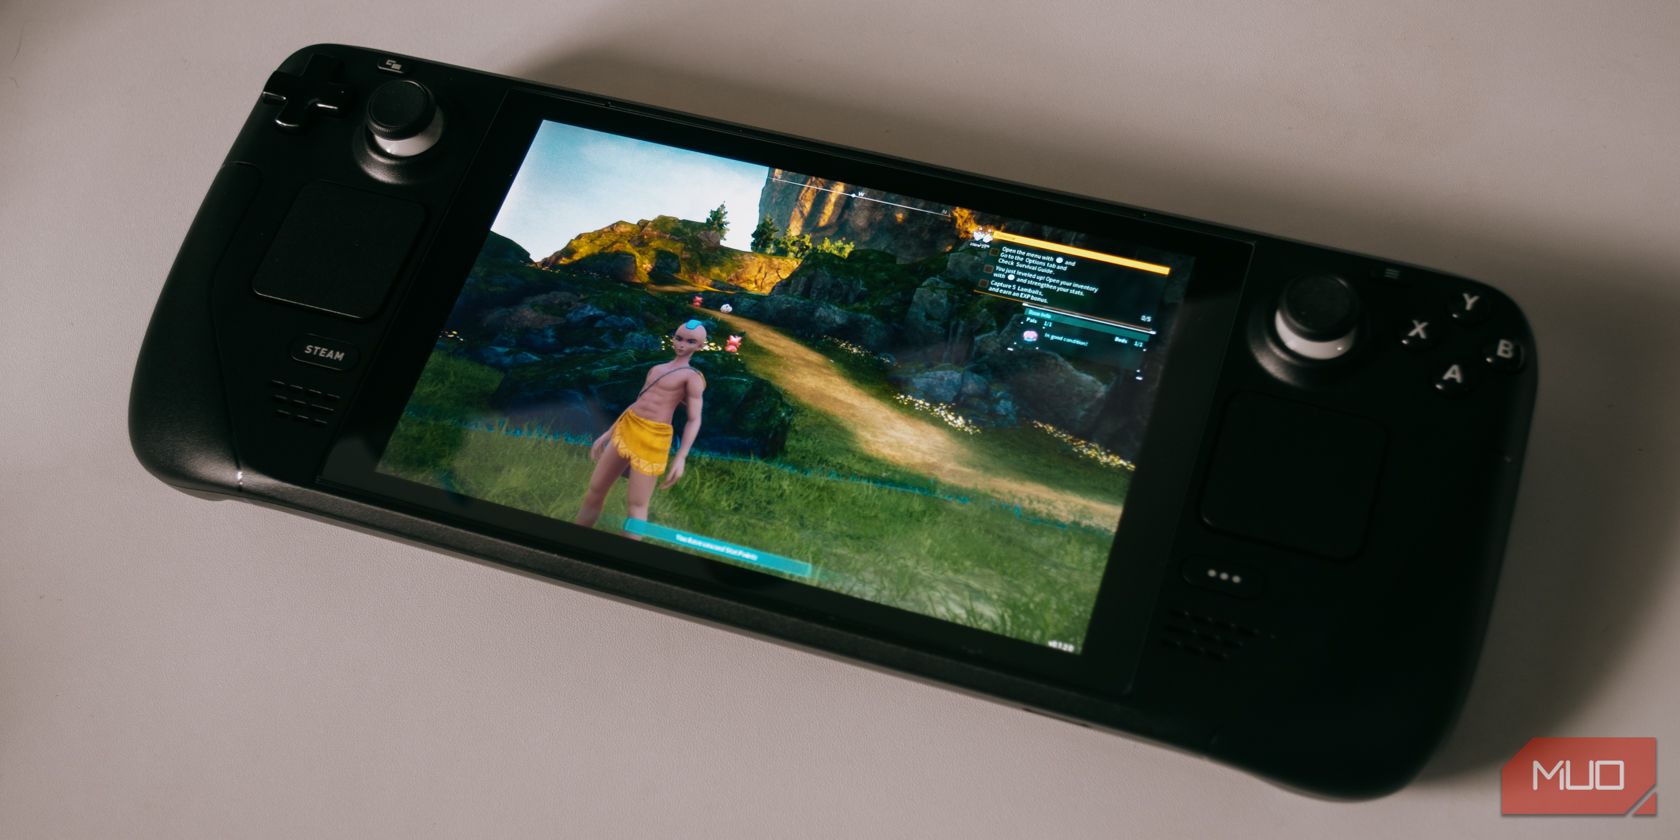
Jhet Borja/MakeUseOf
Power on your Steam Deck, and it should boot up without you needing to reinstall SteamOS or even log in at all.
If SteamOS somehow cannot be found, shut down your Steam Deck and go to the BIOS.
You can open up the BIOS by holding down the volume up button and the power button. You should let go of the power button when you hear a chime, but still hold down the volume up button until the BIOS appears.
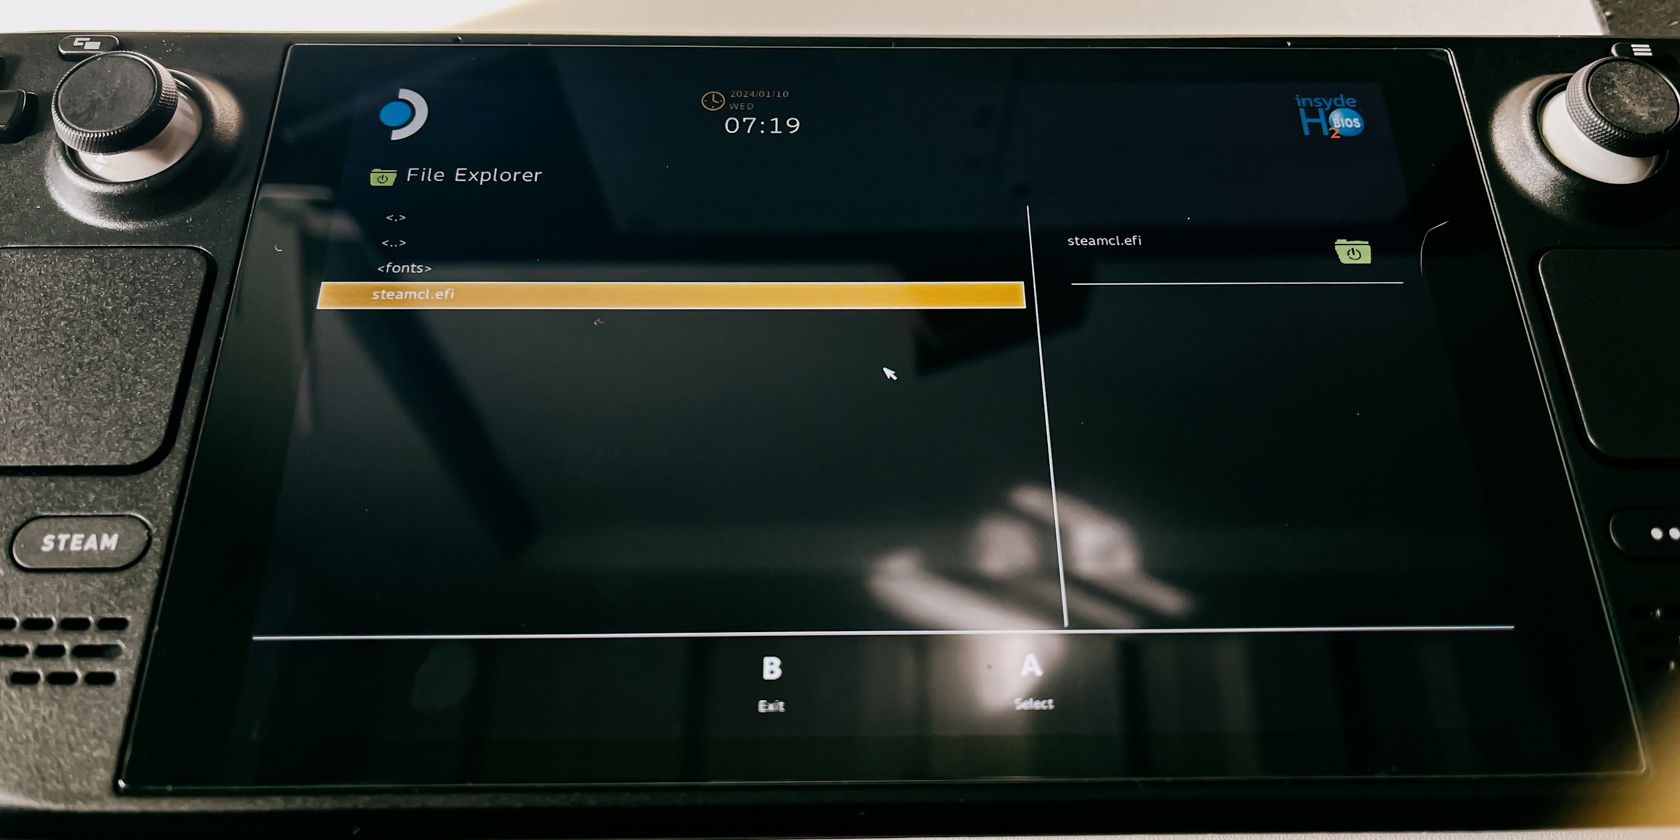
Jhet Borja/MakeUseOf
SelectBoot from file > eps > efi > steamos > steamcl.efi . You’re manually booting into SteamOS with this method and the next time you turn on your Steam Deck, you shouldn’t need to do this again unless you have another OS on your Steam Deck.
You can now go ahead and immediately download your games without ever worrying about setting your Steam Deck up from scratch. We hope this guide has made it easier for you to upgrade your SSD.
- Title: Quick & Effective Steps for Deck's SD Card Revamp
- Author: William
- Created at : 2024-08-27 17:02:29
- Updated at : 2024-08-28 17:02:29
- Link: https://games-able.techidaily.com/quick-and-effective-steps-for-decks-sd-card-revamp/
- License: This work is licensed under CC BY-NC-SA 4.0.