
Optimizing Your Play Experience with Windows on a Steam Deck
Optimizing Your Play Experience with Windows on a Steam Deck
Quick Links
- Why You Should Install Windows on Your Steam Deck
- What You Need to Install Windows on Your Steam Deck
- How to Install Windows on Your Steam Deck
- Potential Issues and Solutions While Installing Windows on Your Steam Deck
Key Takeaways
- Installing Windows on your Steam Deck allows you to access a familiar operating system and use the device as a work laptop or desktop replacement.
- To install Windows on your Steam Deck, you need a USB flash drive or SD card, Ventoy software, a GParted ISO, and a Windows 11 ISO.
- Follow our step-by-step guide to install Ventoy, partition your SSD, install Windows 11, and then install Windows drivers for proper functionality on your Steam Deck.
Do you want to have a familiar operating system or Game Pass on your Steam Deck? You can dual-boot SteamOS with Windows on the device. Here’s a thorough guide on installing Windows 11 on your Steam Deck.
Why You Should Install Windows on Your Steam Deck
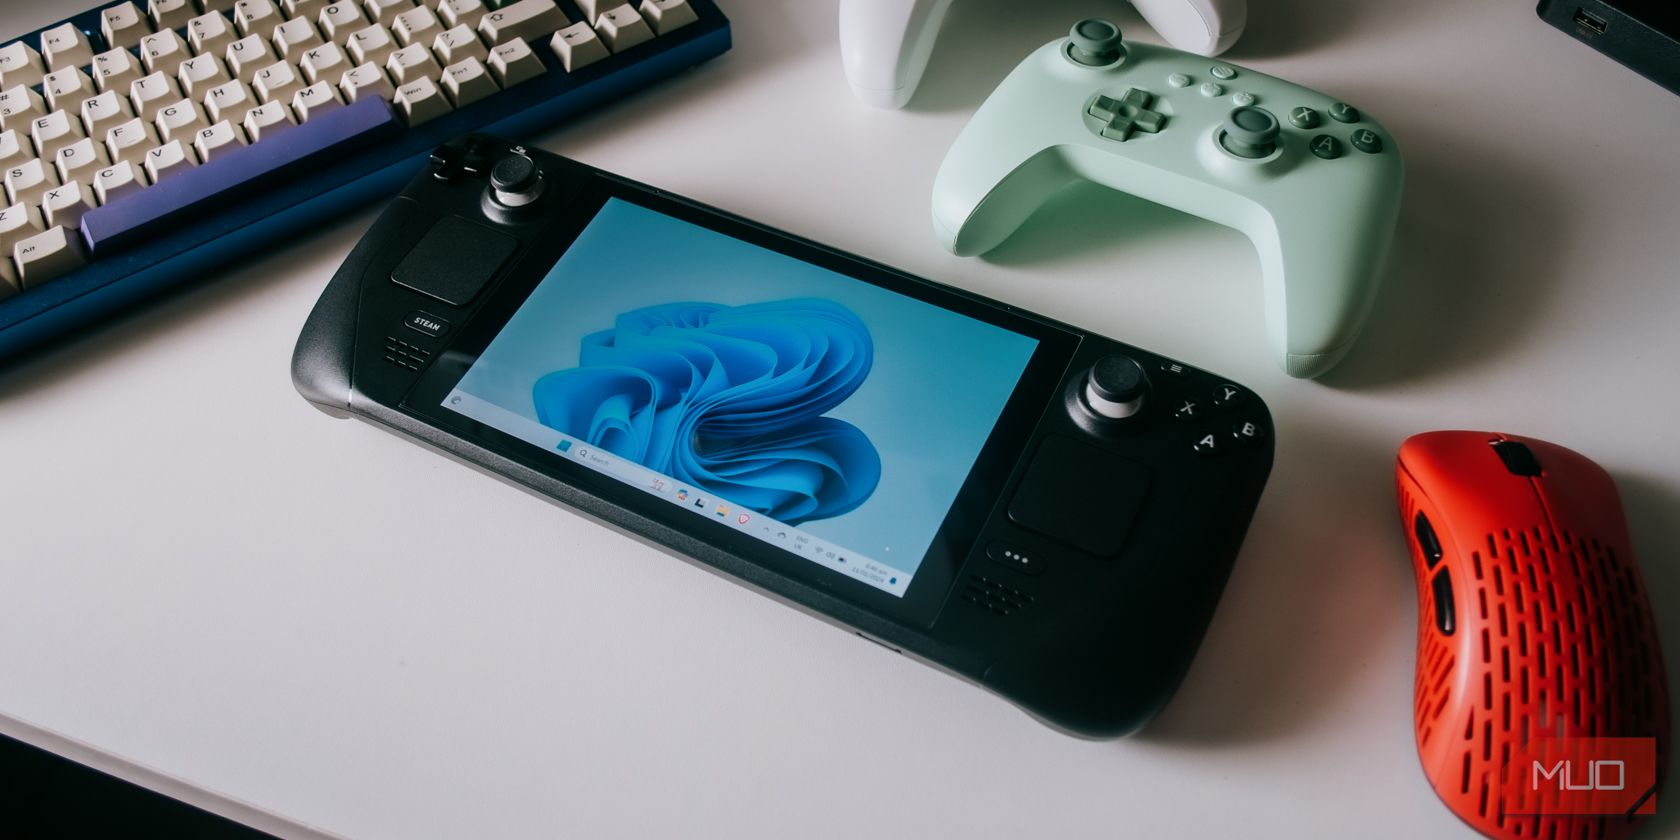
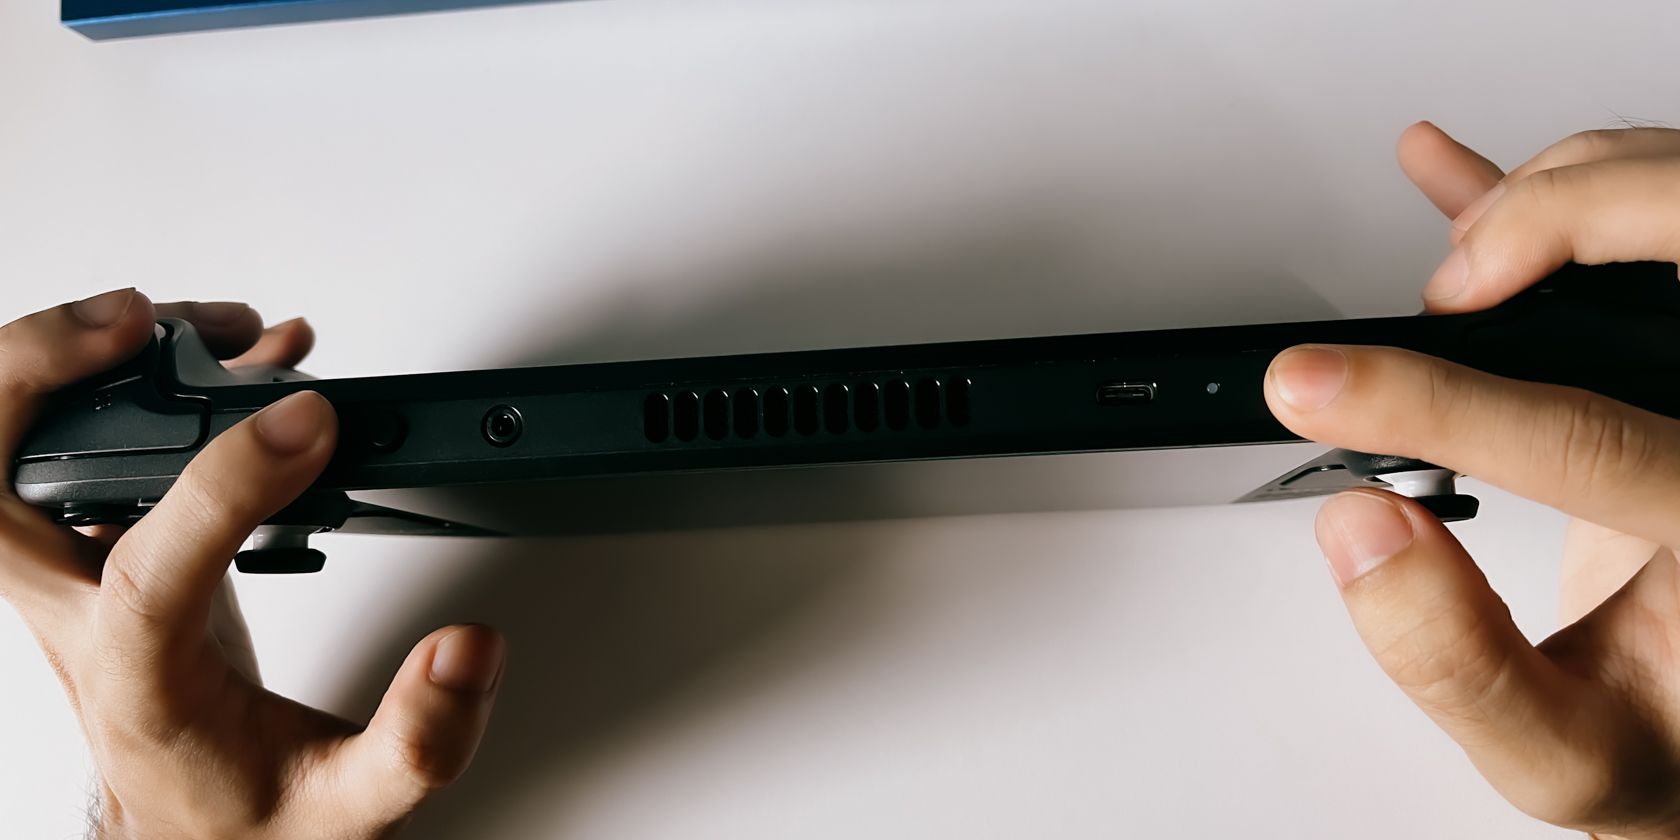
Jhet Borja/MUO
If you’re someone who owns a PC, the chances are very high that you’re running Windows on it. Windows is familiar to many and is fairly easy to use.
While not having a mouse and keyboard on your Steam Deck will pose some navigation issues, having an operating system that’s familiar to you and that you know how to use might be worth that sacrifice.
Having Windows on your Steam Deck can also make it a work laptop or desktop replacement. You can easily use Photoshop, Microsoft Office apps, Lightroom, and all the usual suspects on Windows—so long as you’re willing to bring around a mouse and keyboard. Thankfully, there are plenty of Steam Deck accessories that can make doing real work on it a breeze.
What You Need to Install Windows on Your Steam Deck
You only need a few things to install Windows on your Steam Deck, most of which are software. But you will need a few hardware accessories as well.
Hardware
For hardware, you really only need a USB flash drive and a USB-C hub to plug it into your Steam Deck. You can also install an SD card on your Steam Deck as long as it’s decently fast. A USB 3.0 or higher flash drive or a UHS-I or higher SD card would suffice, but we wouldn’t suggest anything slower.
We also highly suggest using a separate PC as we’ve done in this guide, but you can also use your Steam Deck and follow similar steps using the Linux version of Ventoy.
Ventoy
The first piece of software is Ventoy, a program that allows you to boot multiple ISOs from one external storage device without needing to format it to add a different ISO. This will avoid the back-and-forth formatting of the storage device used, making it easier to go back in case you make a mistake along the way.
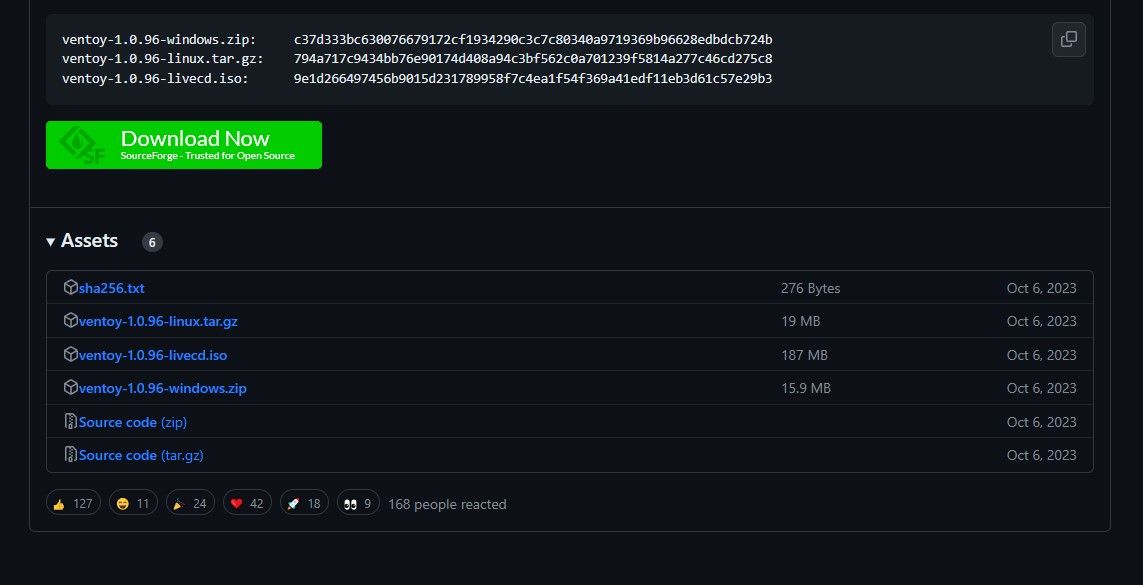
Head to Ventoy’s GitHub page and on the right side, click onReleases . Scroll down toAssets and click on the ZIP folder that says Windows on it. Extract the contents into a folder on your PC.
GNOME Partition Editor (GParted) ISO
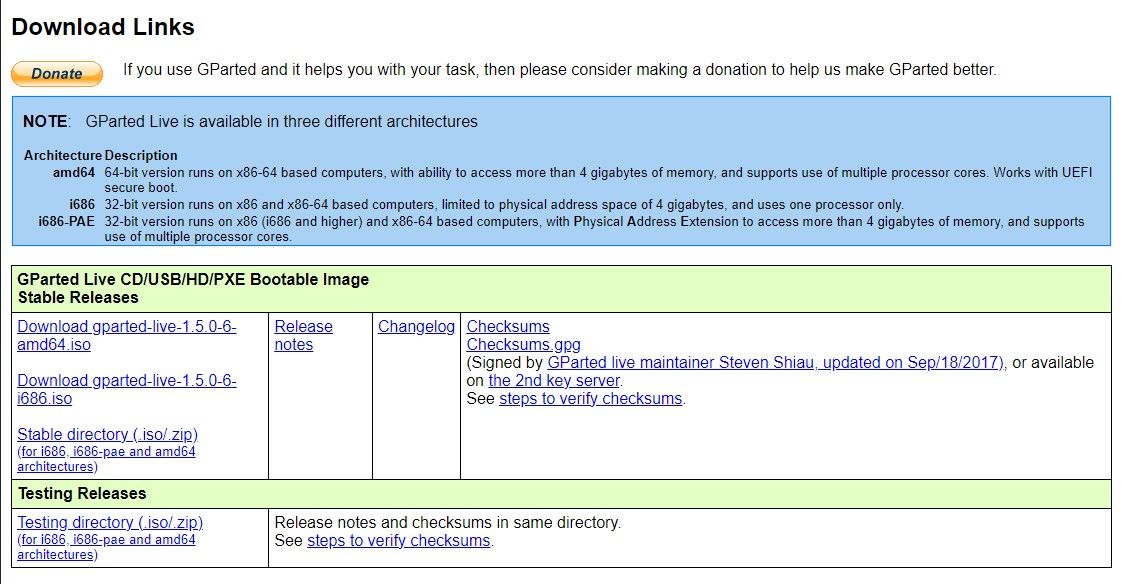
GParted is an ISO used to create partitions on your internal SSD on your Steam Deck. The new partition will be where you’ll place the Windows installation. To download it, head to GParted.org and click on theamd64.iso download file.
Windows 11 ISO
To put Windows onto your Steam Deck, you’ll of course need the installer. You can easily find this on Microsoft’s Windows 11 page .
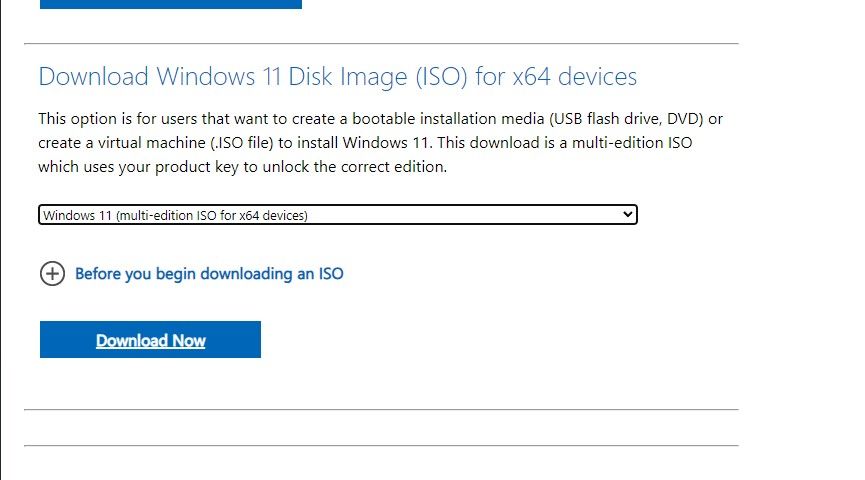
Head to theDownload Windows 11 Disk Image (ISO) option and on the dropdown menu, selectWindows 11 (multi-edition ISO) . Click onDownload , then select your language. It should then give you another download button to download the Windows ISO that is about 6GB to 7GB in size.
Windows Drivers for Steam Deck
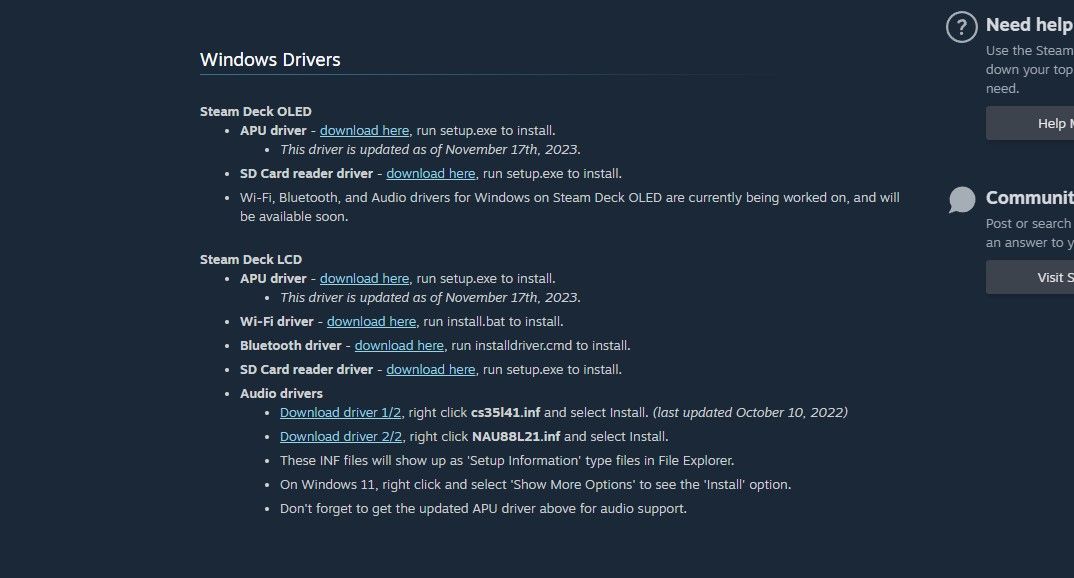
Windows doesn’t support all the Steam Deck’s hardware straight from the get-go. Fortunately, Steam has provided Windows drivers so that your audio, Wi-Fi, Bluetooth, SD card reader, and APU are all working properly.
You can find and download the Windows drivers for your Steam Deck on the Steam Deck Windows Resources support page . Extract all of them into a single folder so that you can paste it onto your SD card or flash drive later.
How to Install Windows on Your Steam Deck
If you’ve got your flash drive or SD card ready with all the software downloaded, you can now start turning your Steam Deck into a Windows experience. In our case, we’ll be using an SD card so that we don’t need to deal with a USB hub or a dock.
1. Install Ventoy on Your Flash Drive or SD Card
To be able to run both the GParted and the Windows 11 ISOs from one SD card without needing to format it multiple times, you’ll need to use Ventoy. This will make things way more convenient.
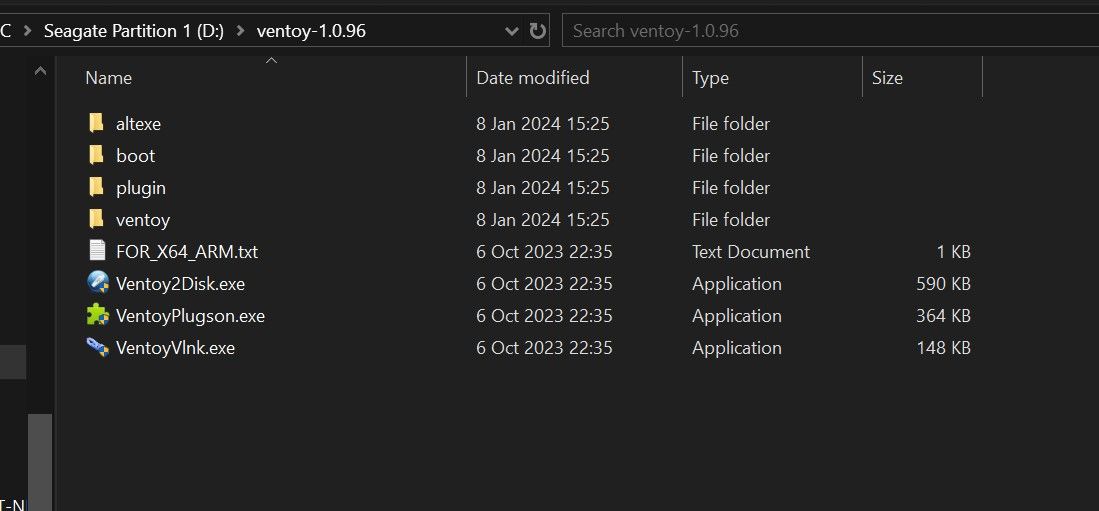
To install Ventoy on your flash drive or SD card, you’ll want to plug it into your PC and open the Ventoy folder you extracted earlier. Then click onVentoy2Disk.exe .
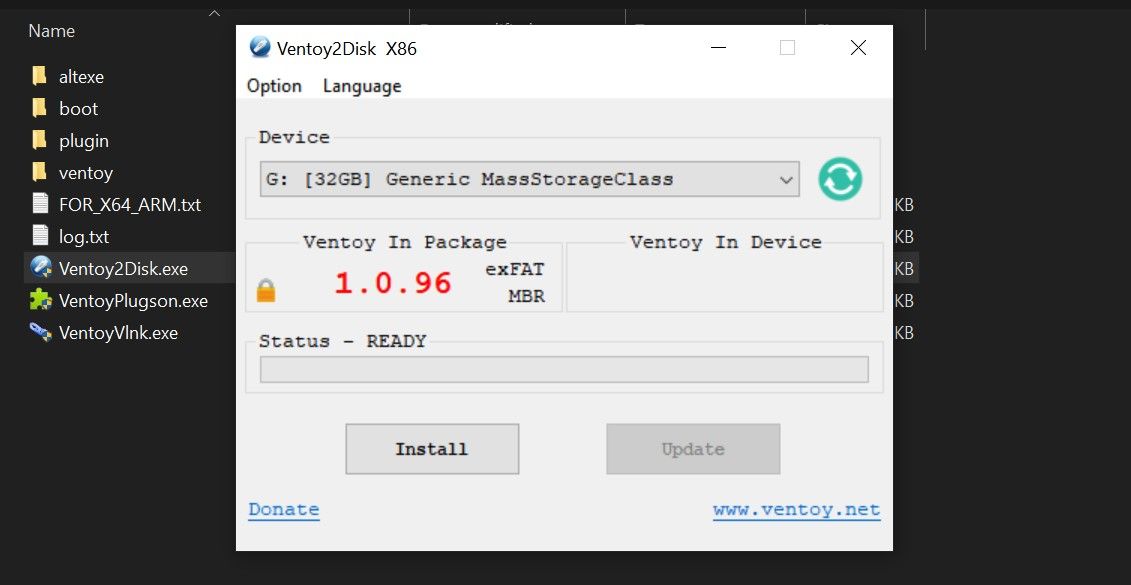
You’ll then select the storage device you want to store Ventoy on. In our case, it’s the 32GB SD card. ClickInstall .
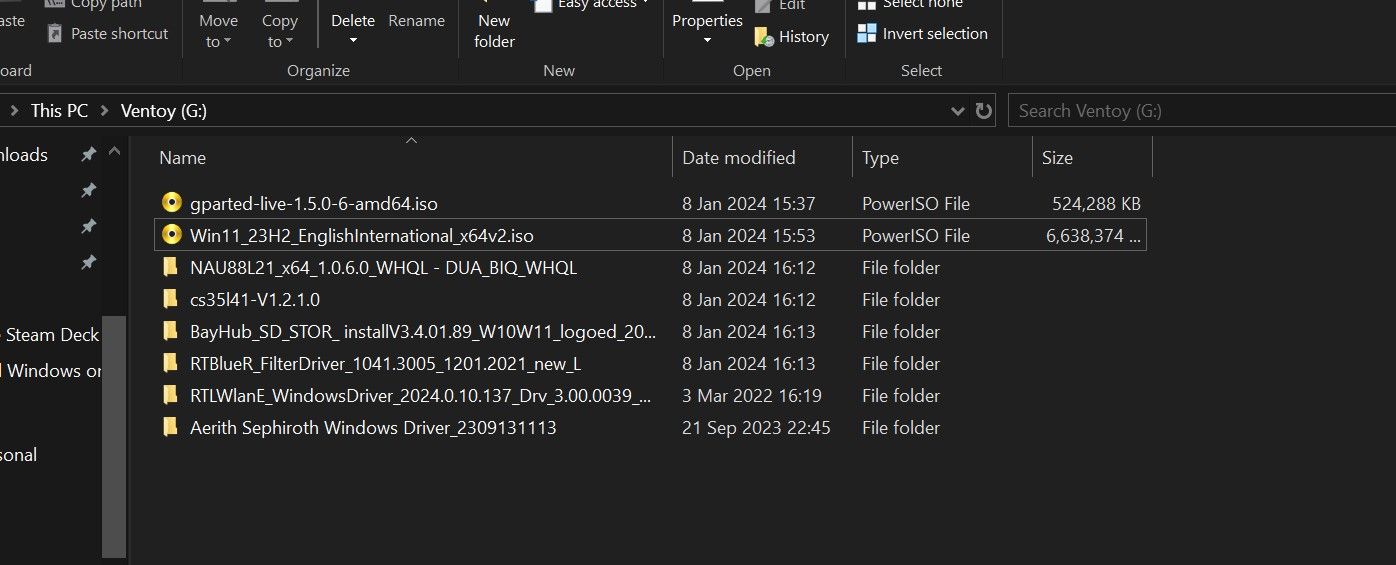
Now that Ventoy is installed, copy over GParted, the Windows 11 ISO, and a folder containing the Windows drivers for the Steam Deck. You can now insert the SD card into the Steam Deck.
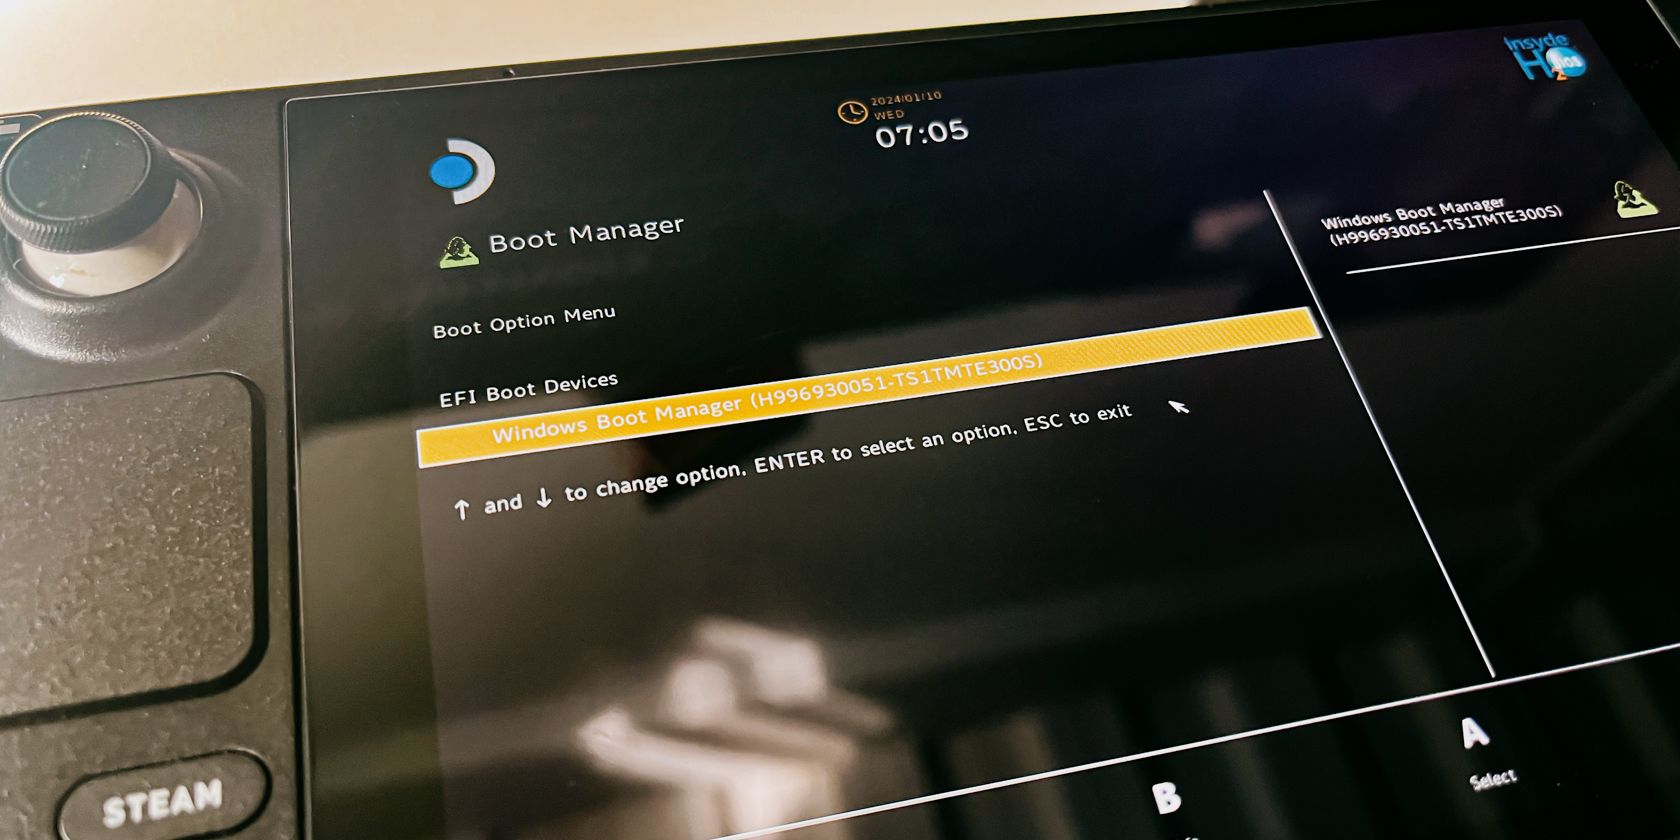
2. Enter the Steam Deck Boot Manager
Next, you’ll need to boot from the SD card or flash drive you’ve connected to the Steam Deck using the device’s boot manager.
Jhet Borja/MUO
To do this, shut down your Steam Deck first. Once it’s off, hold down the volume down button and power button until you hear a chime. Once you hear the chime, let go of the power button, but keep holding down the volume down button until the boot manager shows, like in the image below.
Jhet Borja/MUO
If you hold down the power button after the chime, you’ll most likely end up turning your Steam Deck off again.
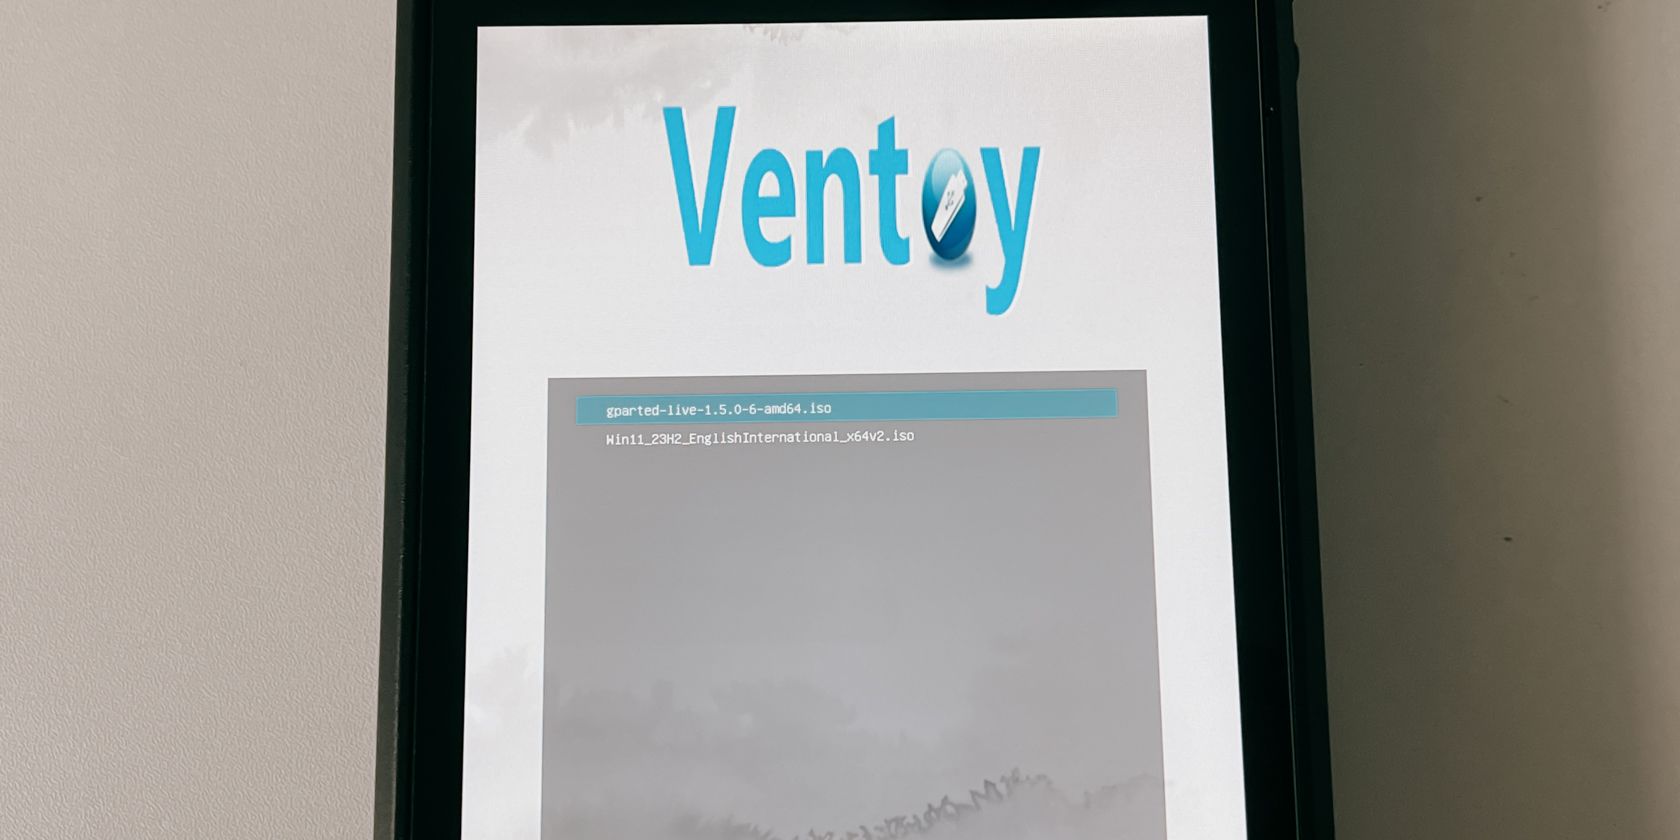
Once you’re in the boot manager, select the SD card or flash drive. This should show Ventoy and both the Windows and GParted ISOs.
3. Use GParted to Partition Your Internal SSD
You’ll now need to partition your Steam Deck’s SSD. If you don’t, you most likely won’t be able to install Windows 11 on the /home partition, and you’ll also end up wiping SteamOS from your drive.
If you want just Windows on your Steam Deck, you can also use Ventoy to wipe all partitions and either leave the combined partition as unallocated or format it as NTFS. We don’t suggest this, however, as SteamOS really is the best way to experience the Steam Deck. It’s better to have the option to switch between the two than be stuck with just Windows.
Jhet Borja/MUO
On Ventoy, select GParted to run it. You can run it in normal mode, but if that doesn’t work, grub2 might do it.
Jhet Borja/MUO
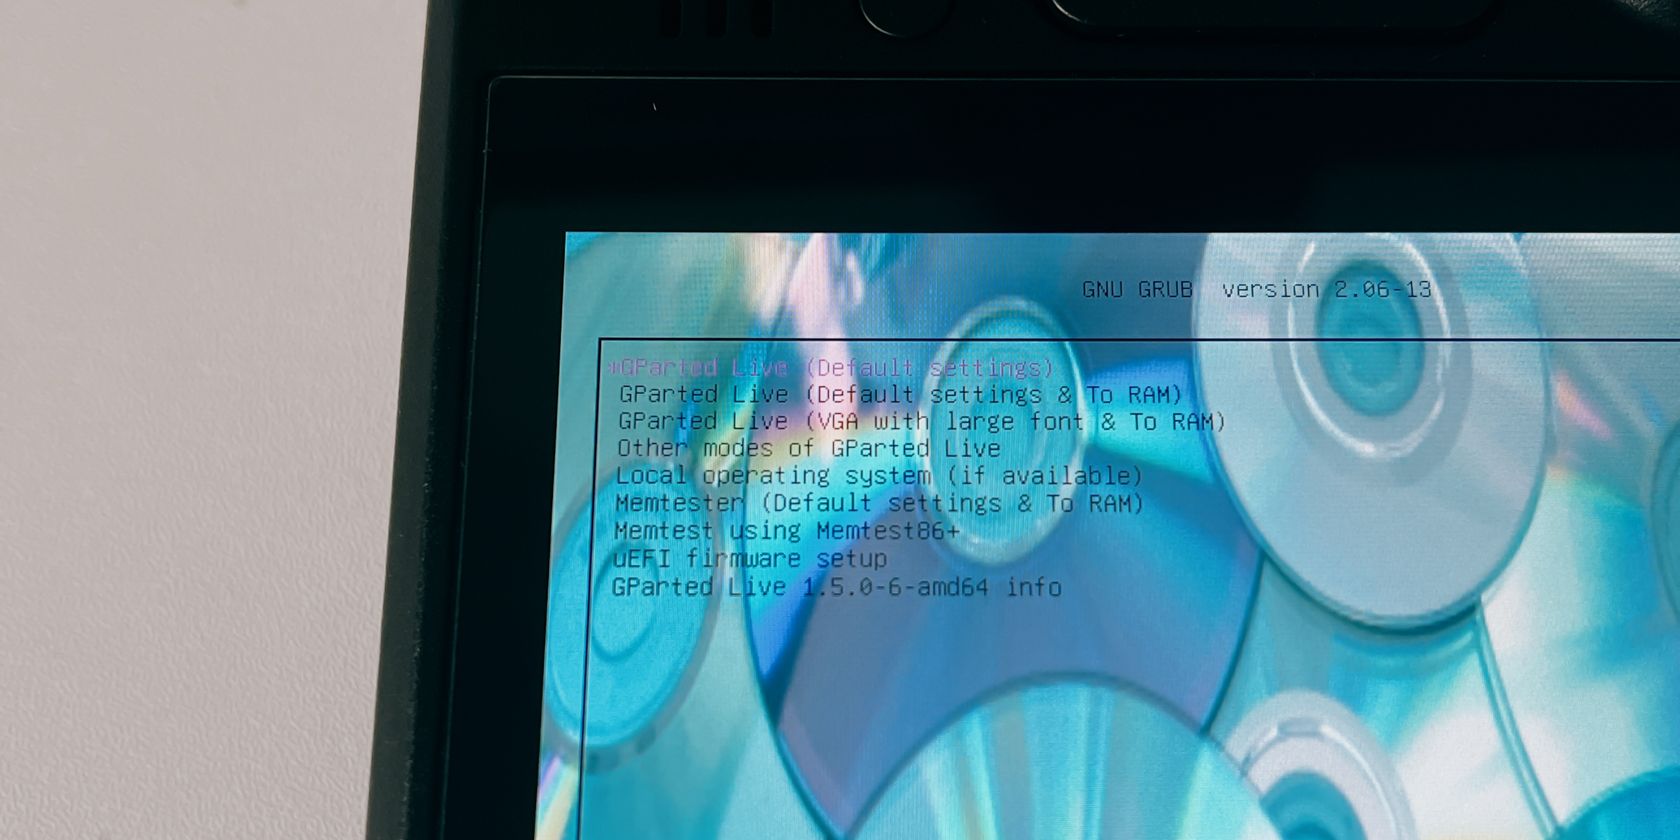
Once GParted is open, you’ll be greeted with a few things before you can get to partitioning. Firstly, you’ll need to select the settings. Pick the first one—GParted Live (Default Settings) .
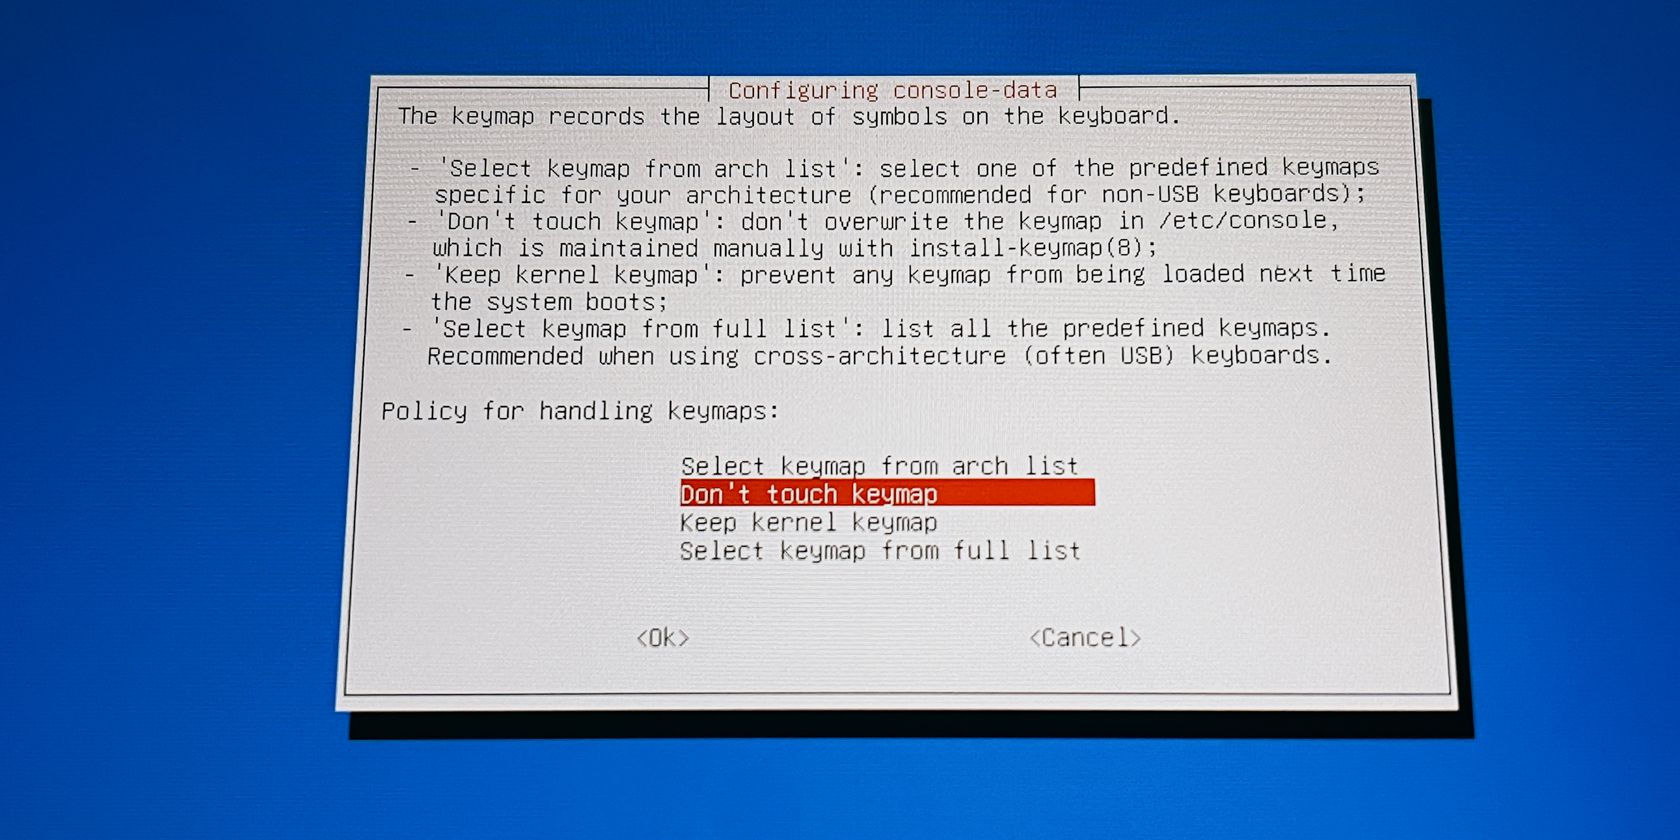
Next, selectDon’t touch keymap and then select your language. If you’re just going to use English, we suggest just pressing A on the Steam Deck until you reach the main screen.
Jhet Borja/MUO
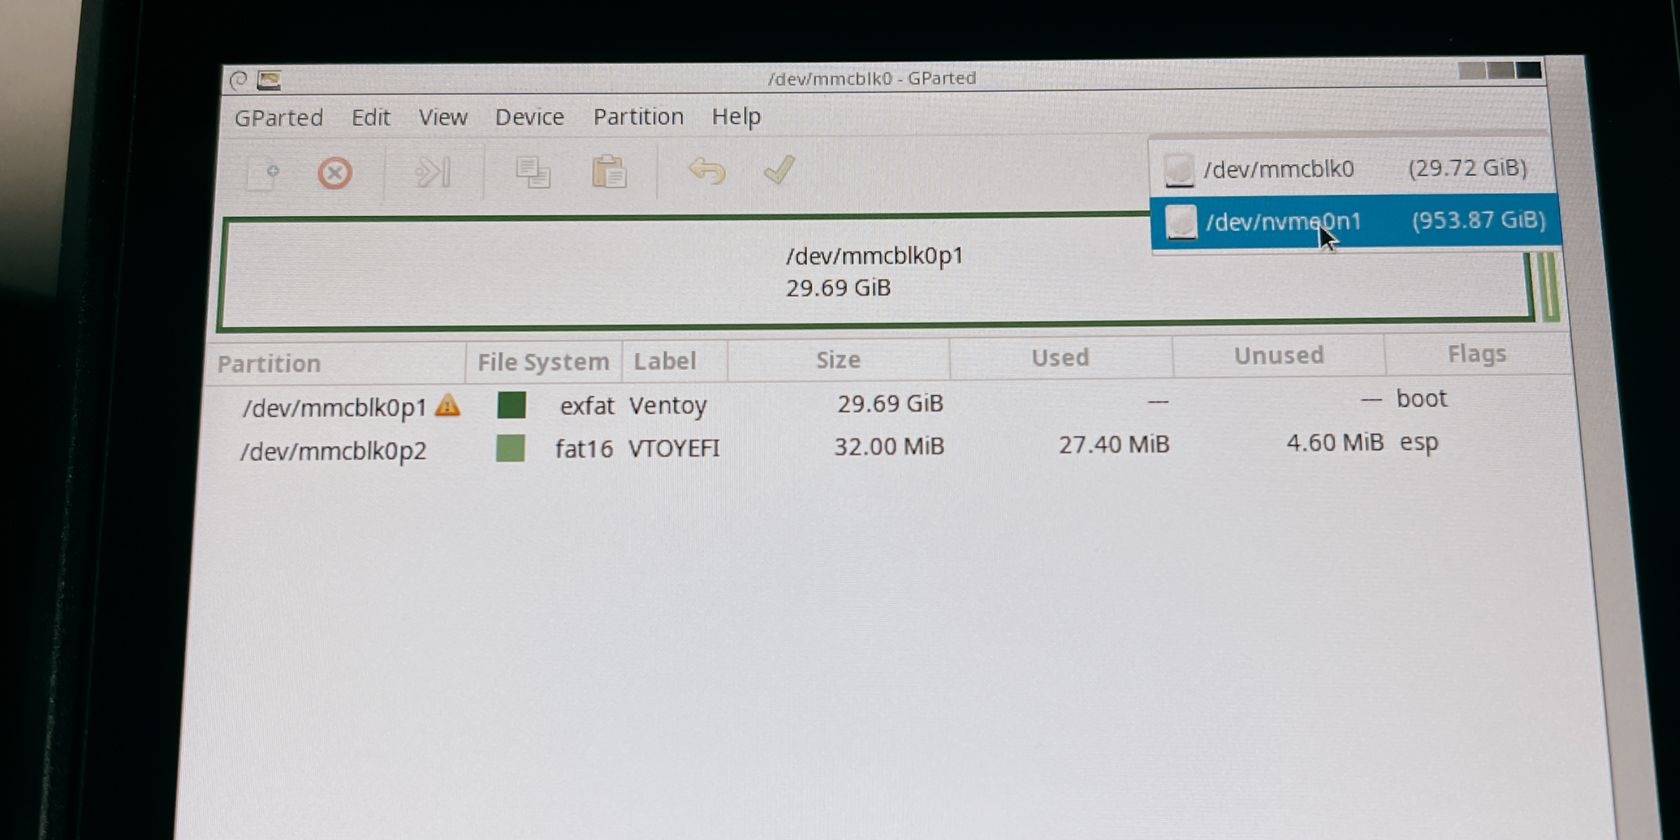
Finally, you’re ready to partition your SSD. By this point, you can plug in your mouse and keyboard to make it easier to navigate. If your SD card or flash drive is the only thing you can see, switch it to your SSD on the upper right drop-down menu.
Jhet Borja/MUO
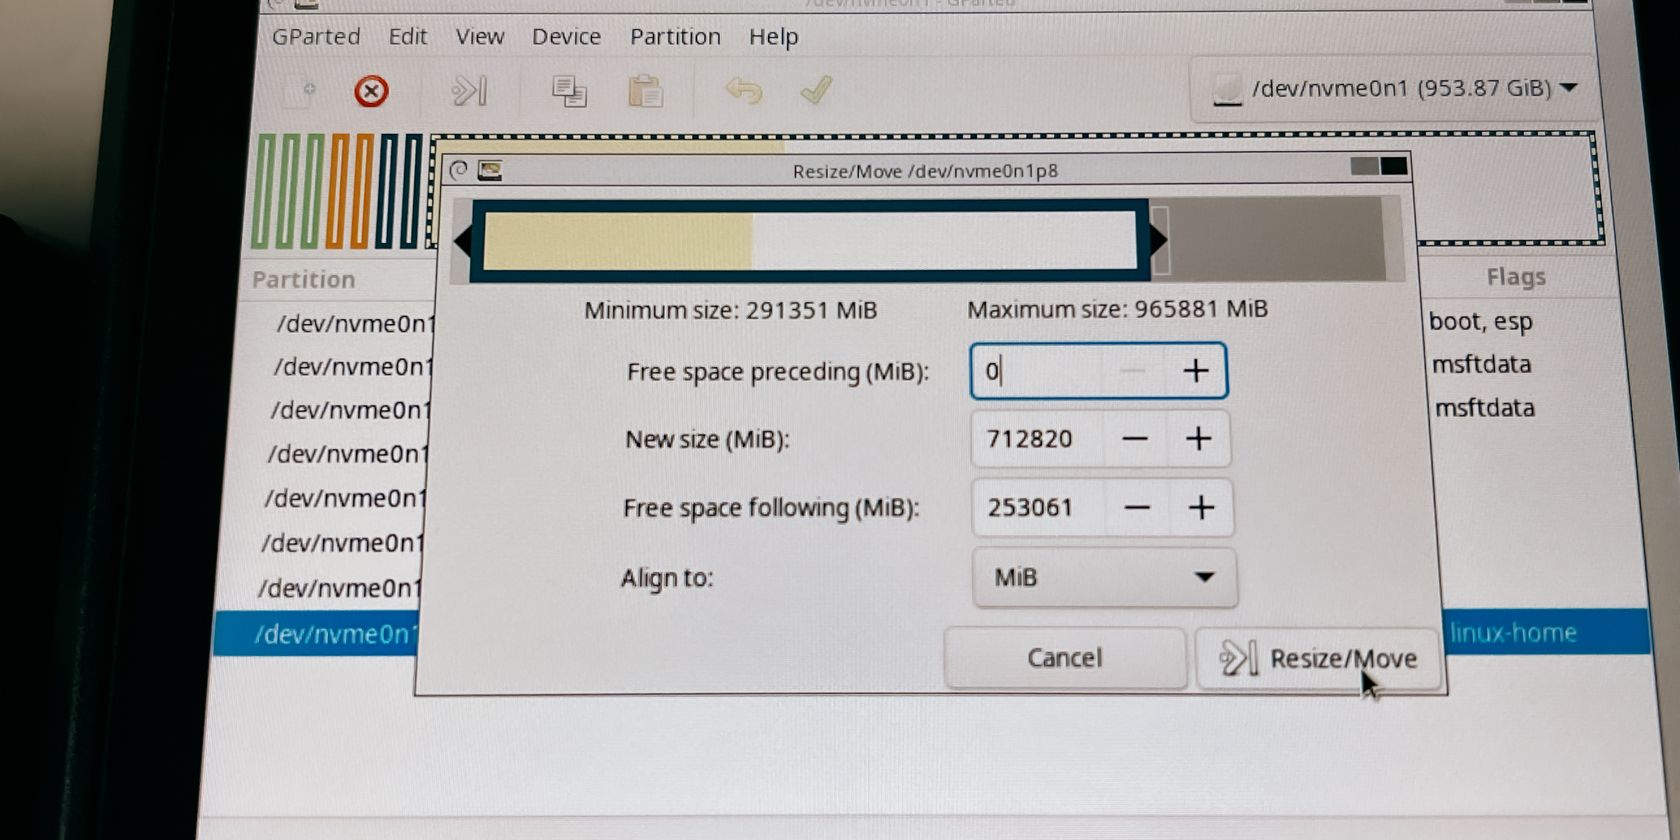
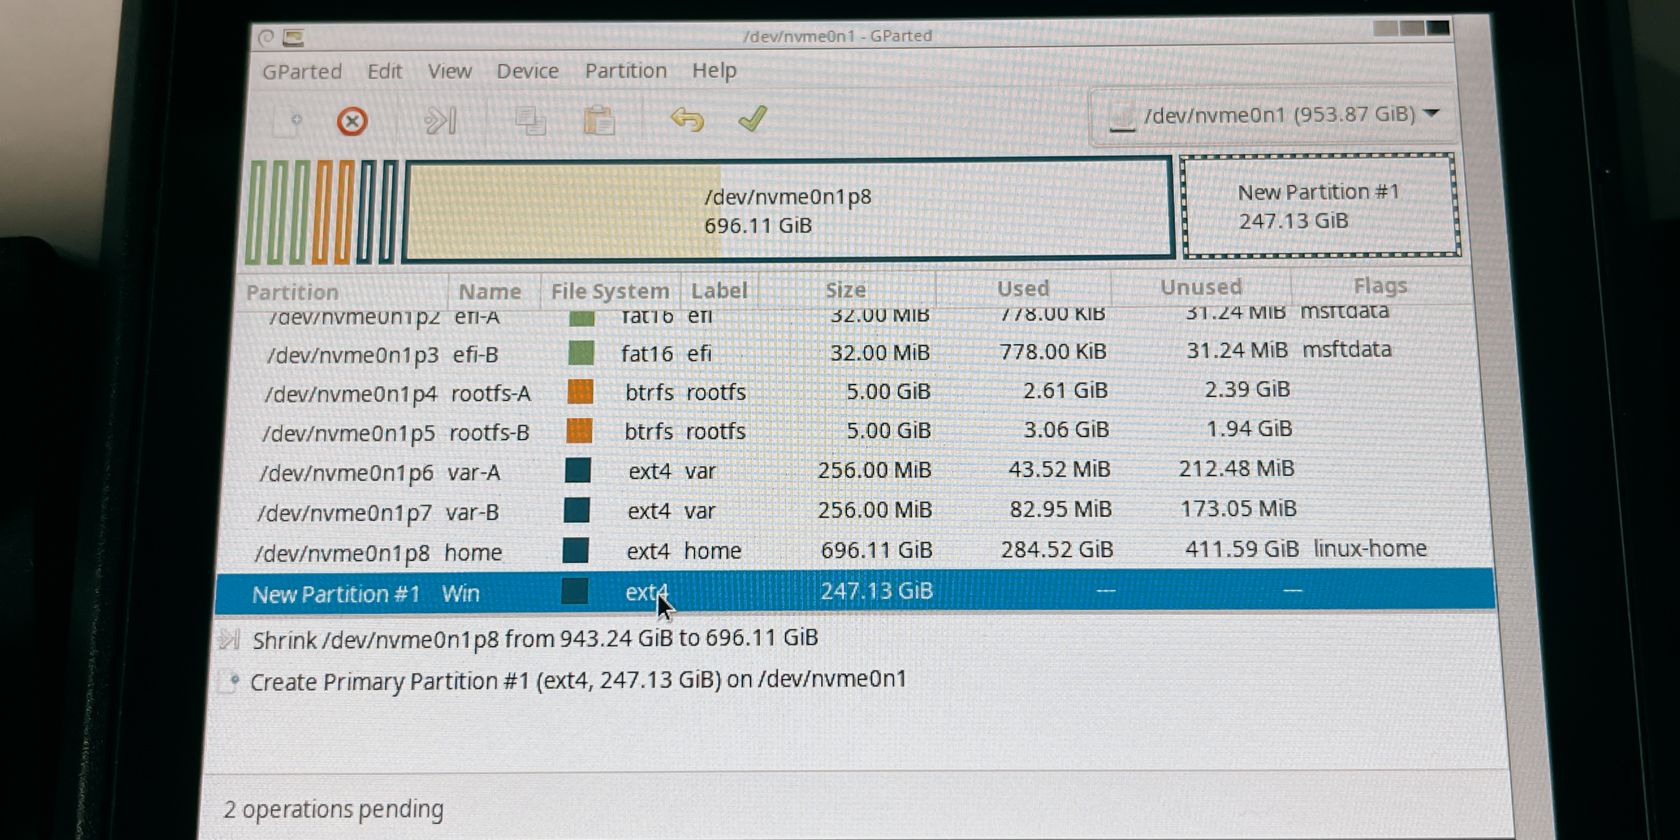
To partition your SSD, right-click (left trigger) on the**/home** partition or the largest partition on the SSD. Click onResize/Move and move the right wall to the left, leaving the empty space as a new unallocated partition.
In our case, we’re leaving around 250 GB or about 250,000 MiB for Windows 11. Click on theResize/Move button on the bottom right to make your changes.
Jhet Borja/MUO
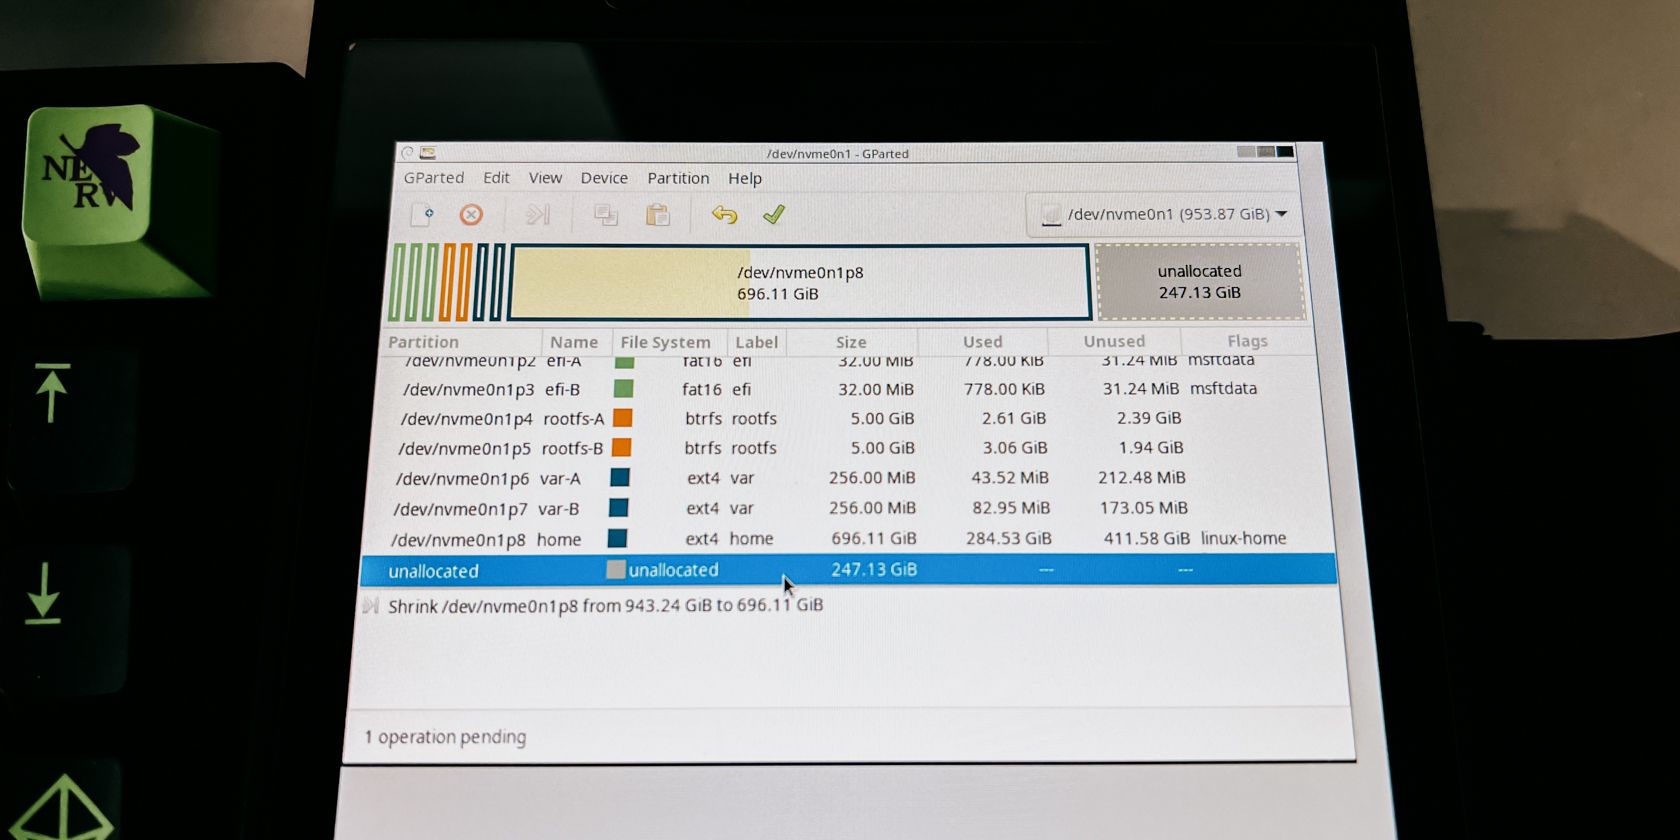
Finally, click on thegreen check mark in the toolbar. Forgetting to do this will not apply your partition changes.
The software will then process the new partition sizes, which may take a few minutes depending on how big your SSD is. Once it’s done, you can now press the power button to exit GParted and power down.
4. Windows 11 Setup on the Steam Deck
Now you’re ready to install Windows on your Steam Deck. Before you go to the boot manager though, unplug any other USB devices you used earlier except the flash drive. This prevents the ISOs or Ventoy from malfunctioning.
Jhet Borja/MUO
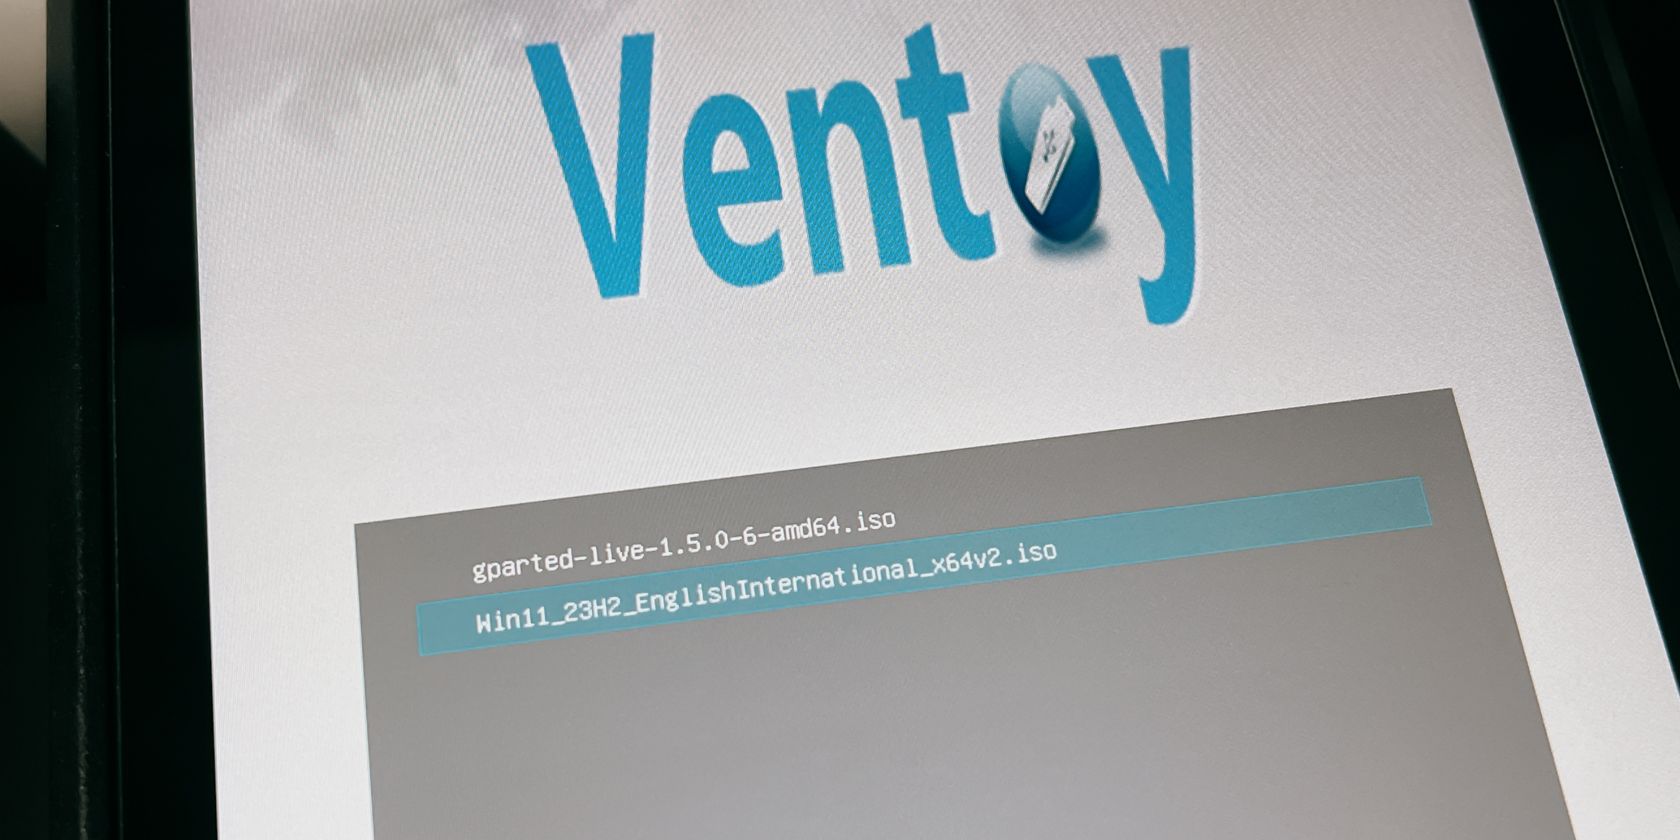
Go back to the boot manager (with the volume down button and the power button) and select the SD card or flash drive once again. With Ventoy open, this time select the Windows 11 ISO.
Jhet Borja/MUO
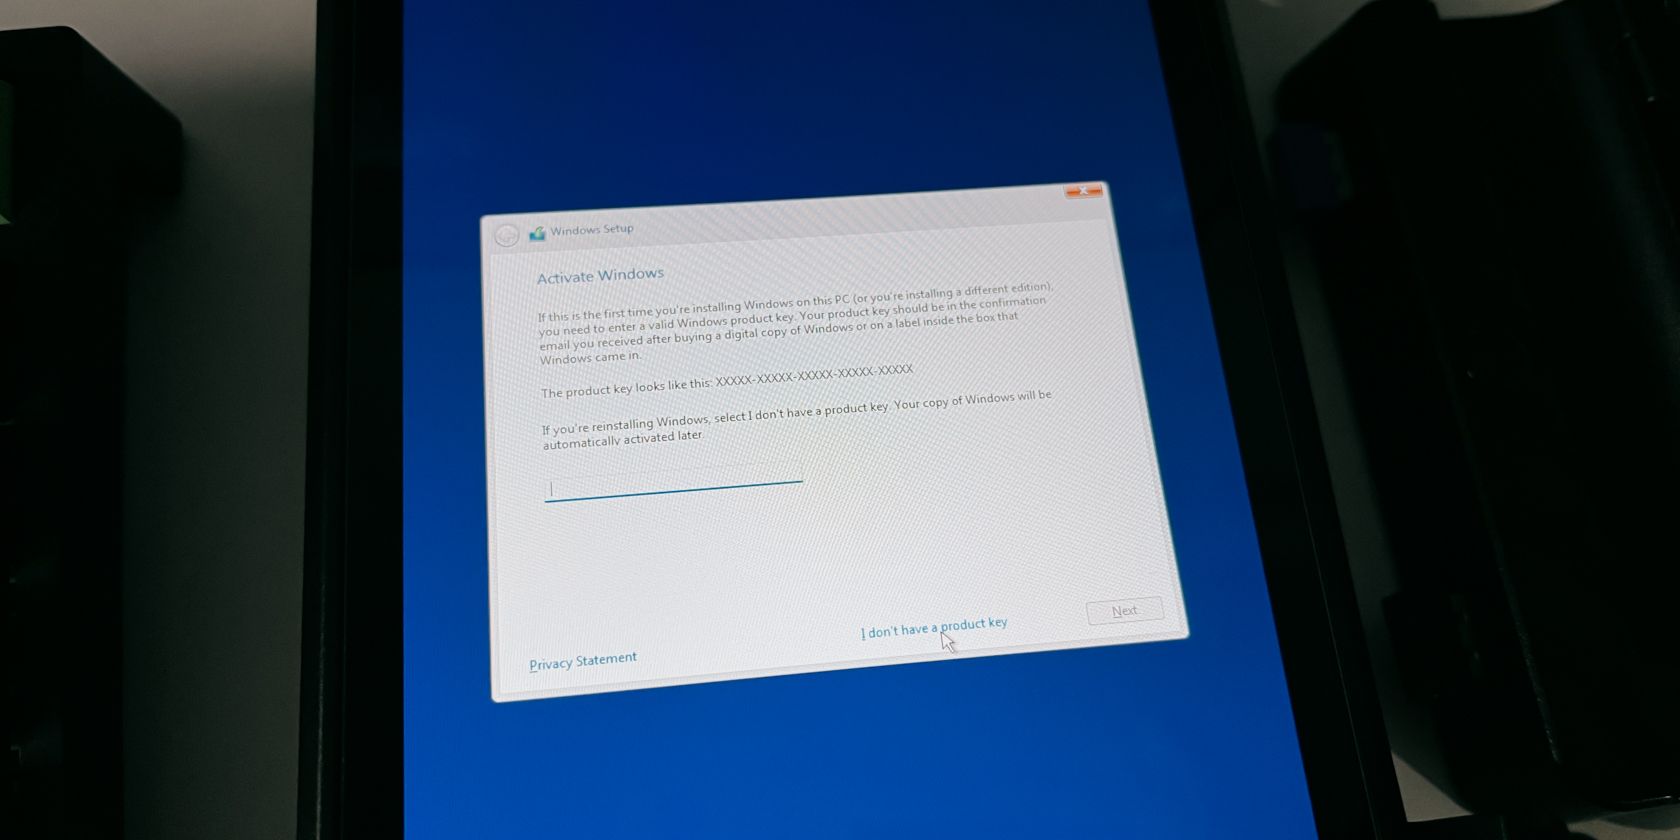
Just follow the setup by choosing the right language and keyboard layout until you reach the Windows key section. There, you can safely chooseI don’t have a product key if you don’t have one.
Jhet Borja/MUO
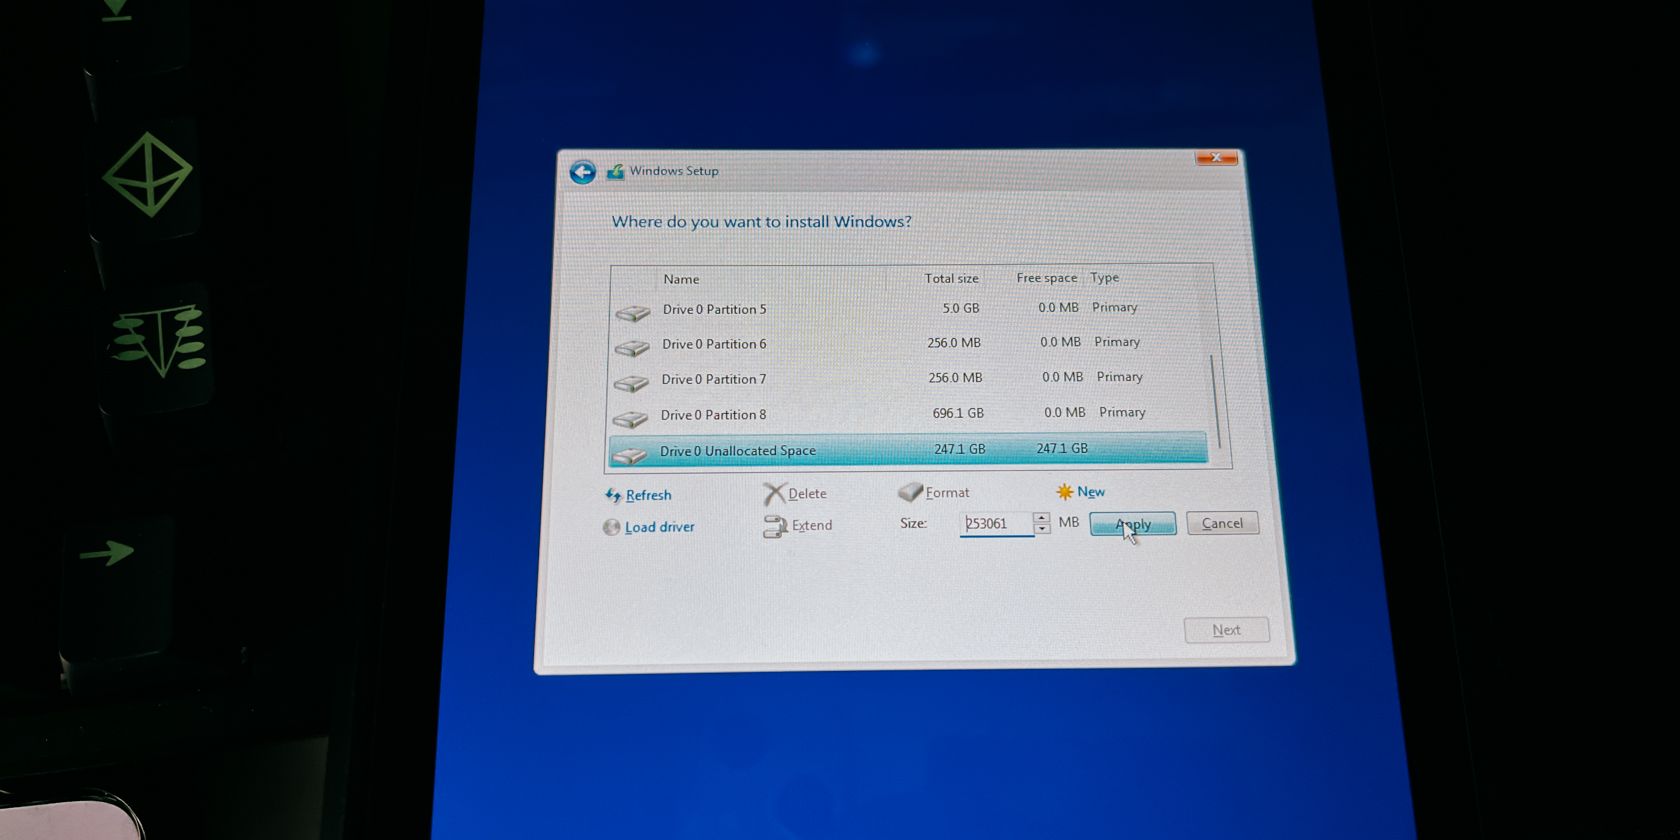
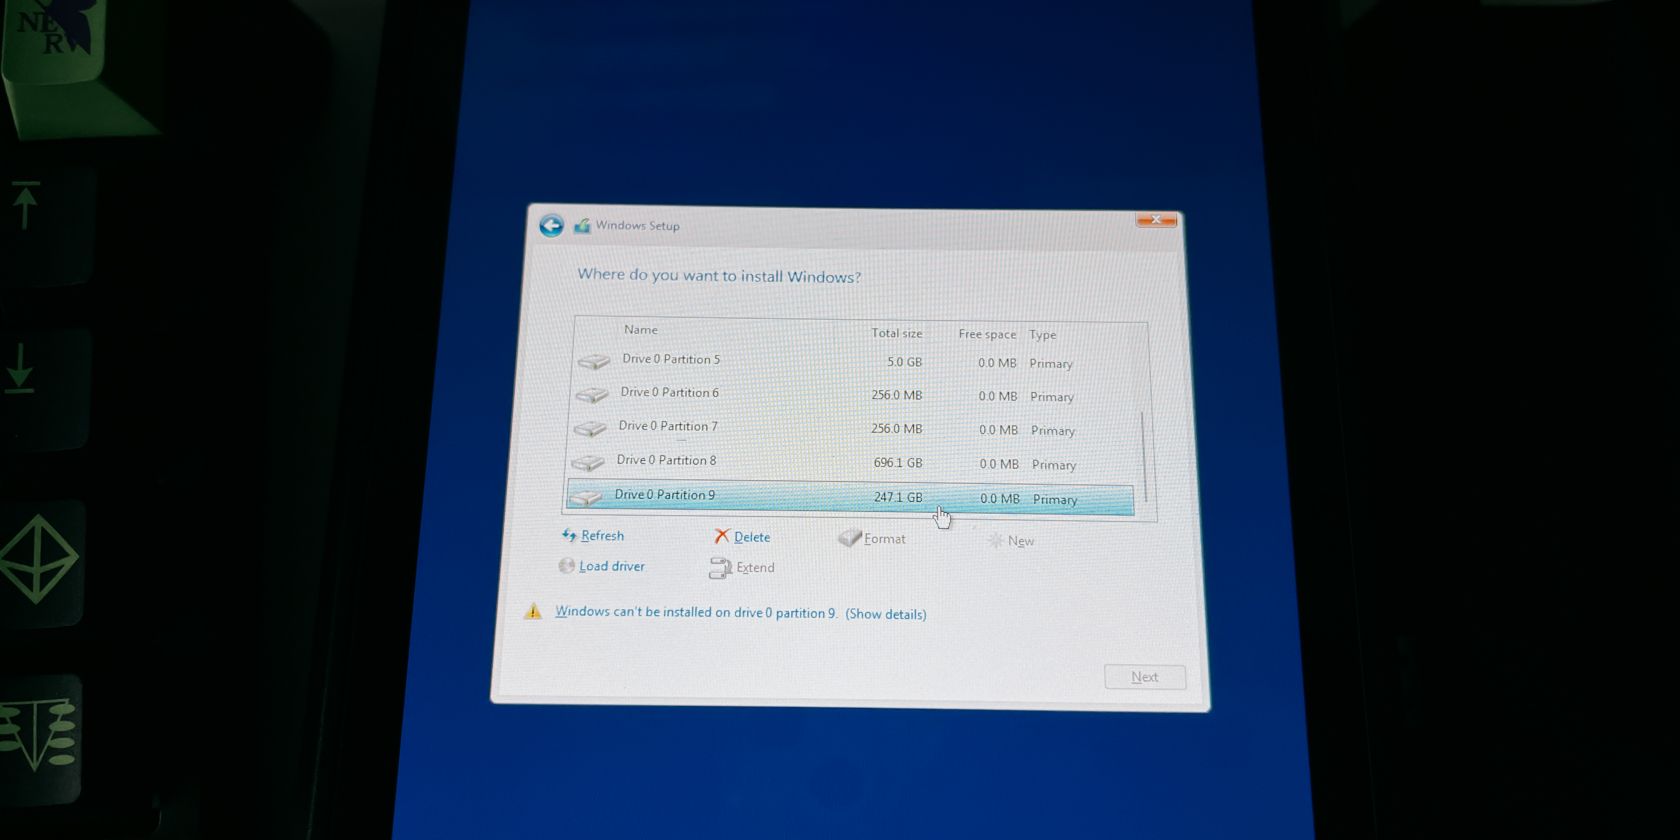
Proceed until you reach theWhere do you want to install Windows? screen. You’ll want to scroll to the very bottom and click the drive that saysUnallocated space . Next, clickNew, and it’ll automatically add the right size for you. So just clickApply .
It will then start installing Windows onto that partition. Once Windows 11 is installed, you’ll have to go through another setup process.
5. Install the Windows Drivers for the Steam Deck
Once you’ve installed Windows, you can now install the drivers for your Steam Deck.
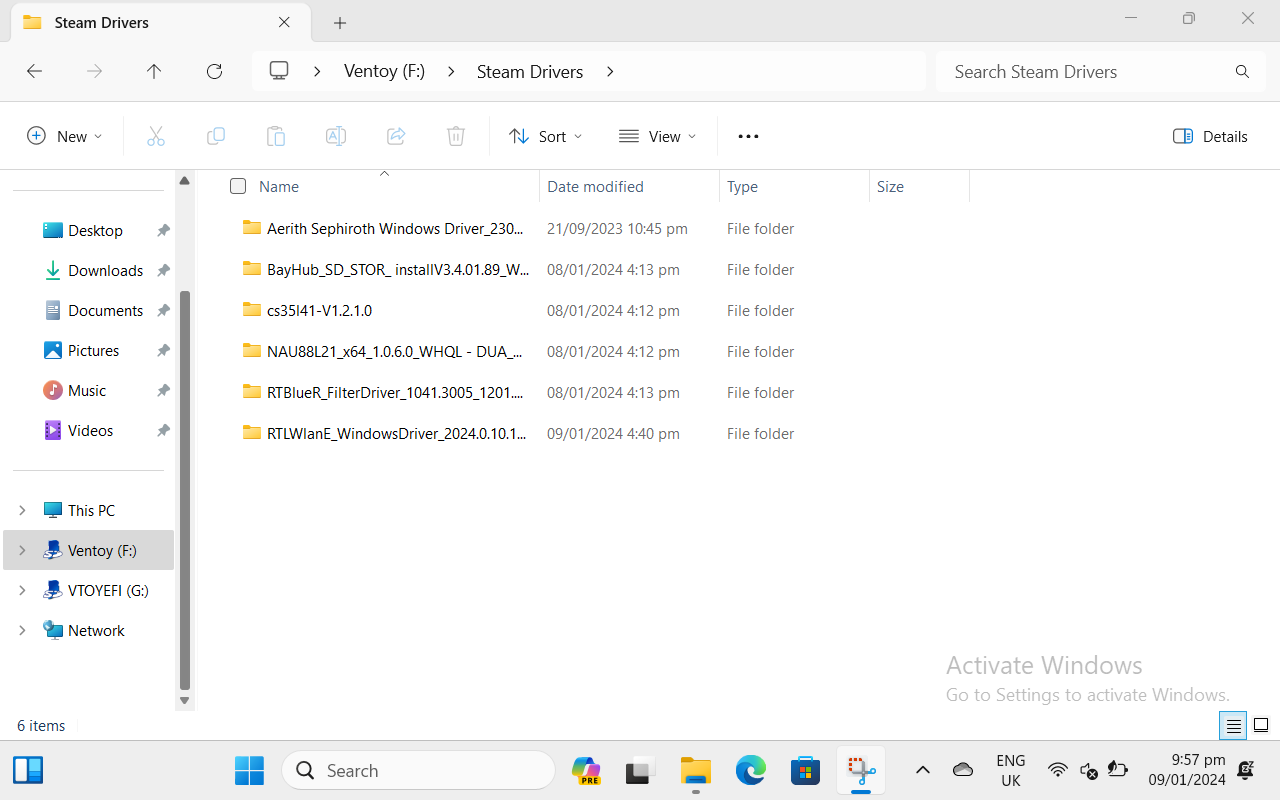
To do this, open up your File Explorer and click on the Ventoy drive. Open the folder we told you to place the Steam Deck drivers inside and start with any one of them.
If you’re prompted to restart, don’t do it yet. You can restart once you’ve installed all the drivers to make it easier.
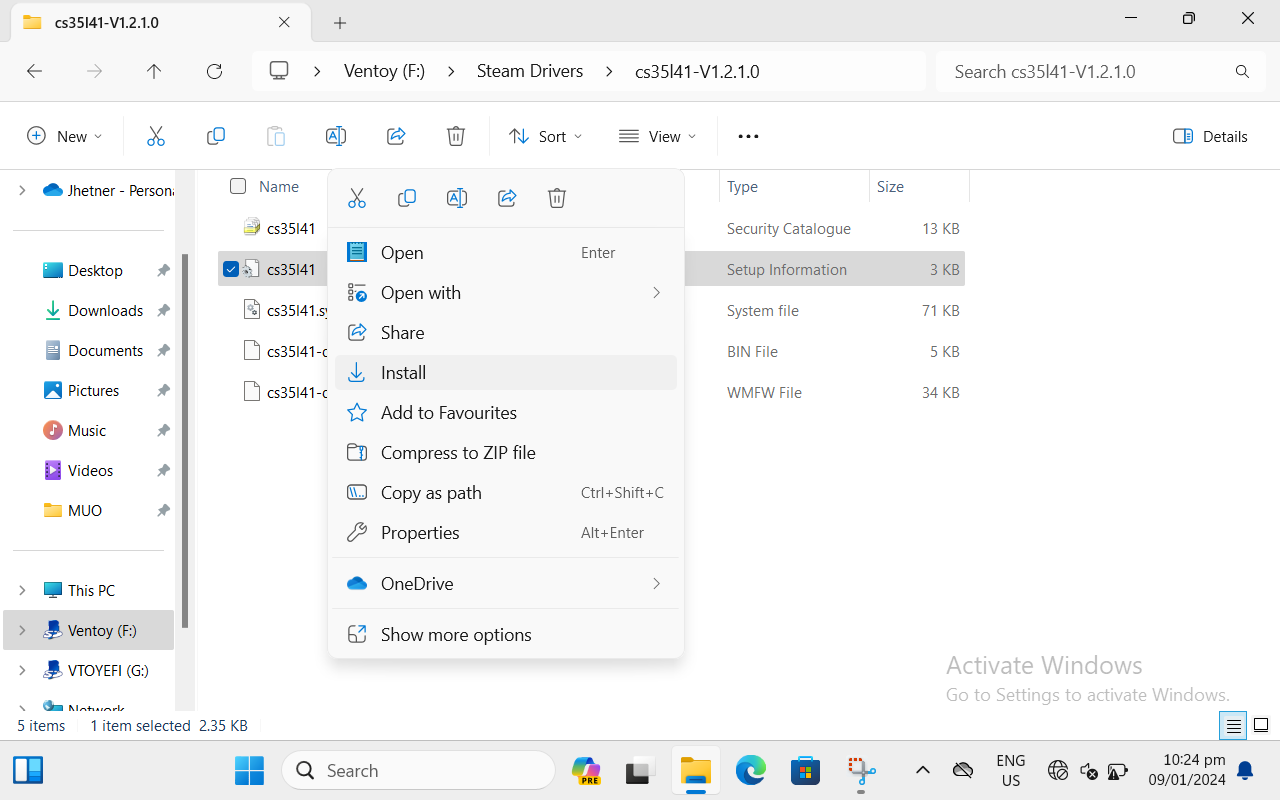
Proceed to click onInstall for the other drivers, but you may find that the audio drivers do not have an executable. To install the two audio drivers, simply right-click (left trigger) on the file that saysSetup information and clickInstall .
Once they’re all installed, you can now restart your Steam Deck. If things didn’t go so smoothly, you can refer to the section below to find your issue and the solution for it.
Potential Issues and Solutions While Installing Windows on Your Steam Deck
We’ve compiled a few issues that we came across during our installation and found solutions to them so that you don’t have to scour the internet to find fixes.
ISOs Show a Black Screen or Don’t Boot Up
If the ISOs aren’t working properly, just press the power button once to exit and shut down. This is most likely due to other USB devices plugged into your Steam Deck like a keyboard and mouse. This is why we used an SD card in our installation. Remove all USB devices except your flash drive or use a USB-C flash drive if possible.
If this doesn’t work, you may also try to delete the other ISO from the SD card or flash drive. You may also try reinstalling Ventoy as a last resort, but this will format the drive so make sure you have everything in a folder that you can easily paste onto the drive.
The Windows 0x80300001 Error
Jhet Borja/MUO
This error will most likely pop up because the partition you want to install Windows on isn’t in NTFS format or a blank unallocated partition.
Jhet Borja/MUO
You may have created a new partition as ext4 in GParted instead of leaving the unallocated partition as it is. If you insist on creating a new partition in GParted, make sure it’s in NTFS format and not ext4.
Windows Cannot Install Drivers
Jhet Borja/MUO
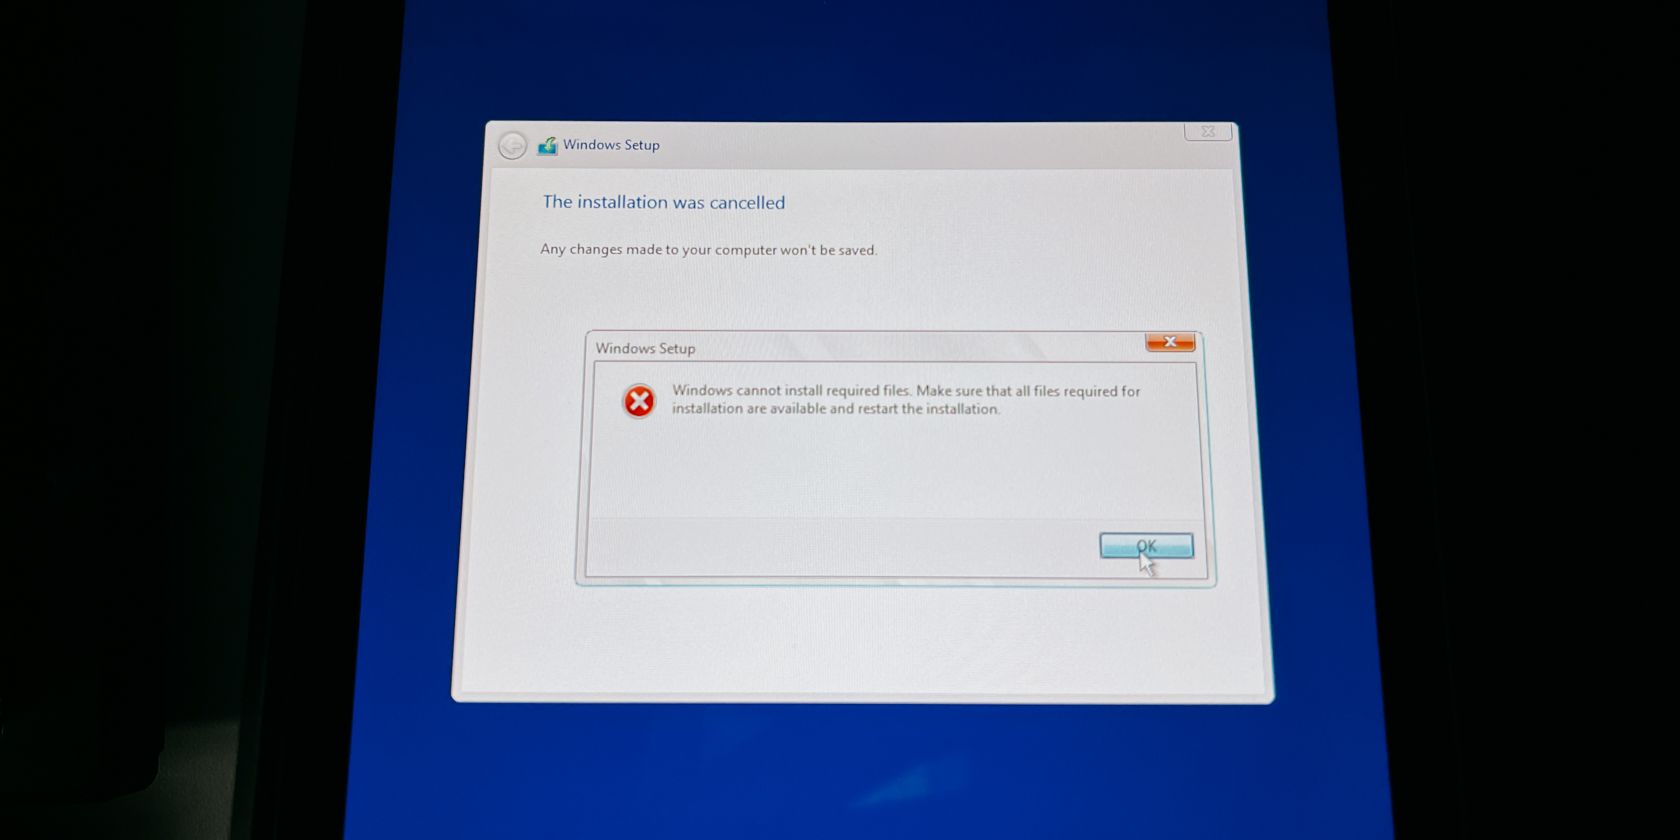
If you’re near the end of your Windows installation and it suddenly says it cannot install drivers, other USB devices may be interfering with the installation.
Shut down your Steam Deck by holding down the power button and unplug any USB devices except your flash drive or SD card. Don’t plug in any USB devices during the installation to avoid this issue.
You Can’t Find SteamOS in the Boot Manager
Jhet Borja/MUO
If you want to go back to SteamOS and can’t find it in the boot manager, you should shut down your Steam Deck and go to the BIOS instead.
To enter the BIOS, hold down the volume up button and the power button until you hear the chime. Let go of the power button but hold down the volume up button until you enter the BIOS.
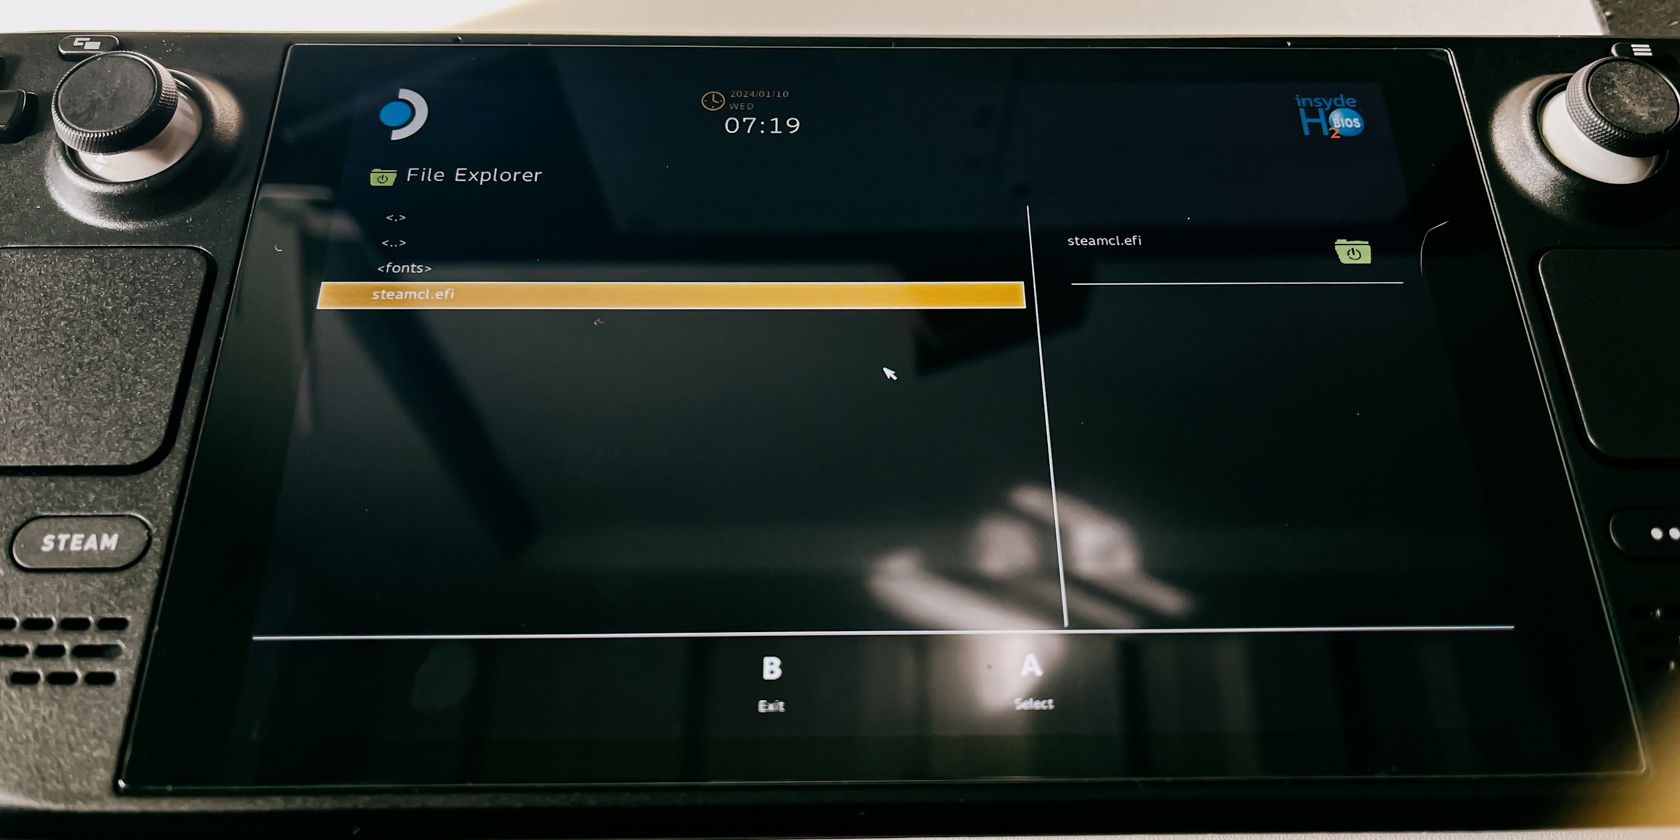
Jhet Borja/MakeUseOf
Once you’re in the BIOS, select Boot from file > eps > efi > steamos > steamcl.efi . This should boot you back into SteamOS.
Now that you’re in SteamOS, you can put it back onto the boot manager by entering desktop mode.
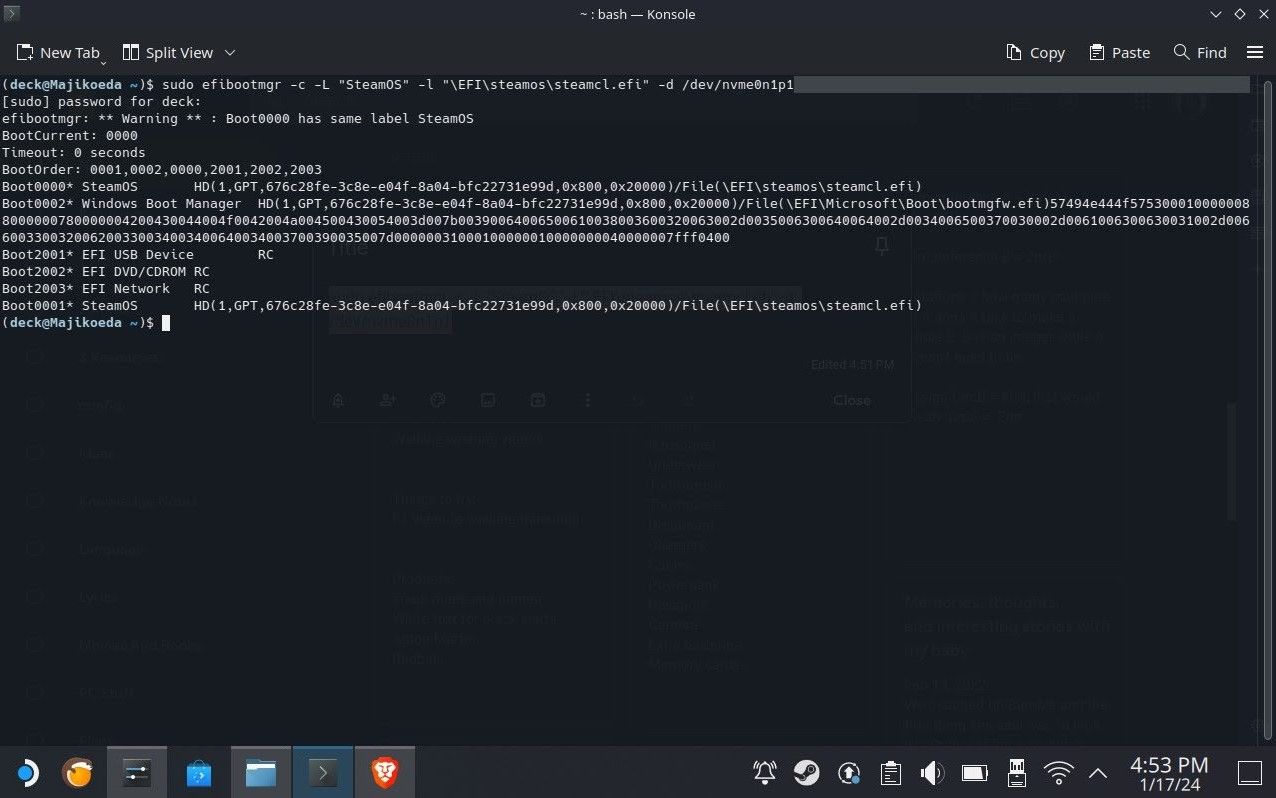
On desktop mode, click on the Steam Deck icon on the bottom left and open Konsole. You can search for it by bringing up the keyboard by clicking on the text box and pressing on the Steam button + X.
Then type:
sudo efibootmgr -c -L "SteamOS" -l "\EFI\steamos\steamcl.efi" -d /dev/nvme0n1p1
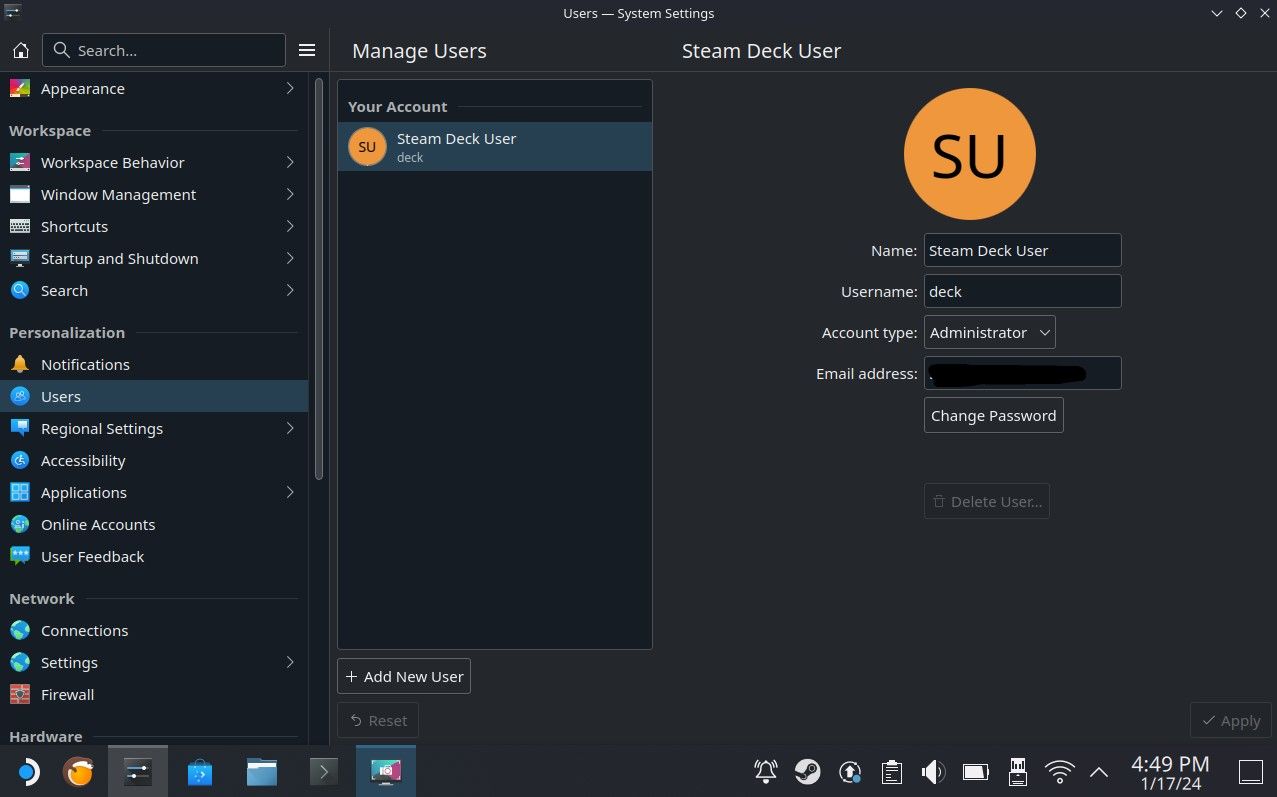
In case you don’t have a sudo account and can’t add the command, go toSettings > Users then assign a username and password. You can then try adding the same command in Konsole and adding your password after pressing Enter. It will then show your boot options.
If you can see steamcl.efi with an asterisk next to its boot order number, it means that it’s in your boot manager now. You can verify it by shutting your Steam Deck down and entering the boot manager.
Steam Deck Navigation and Controls on Windows
If you’re having a hard time with the Steam Deck controls on Windows and want to use the controls like on SteamOS, download Steam and have it open.
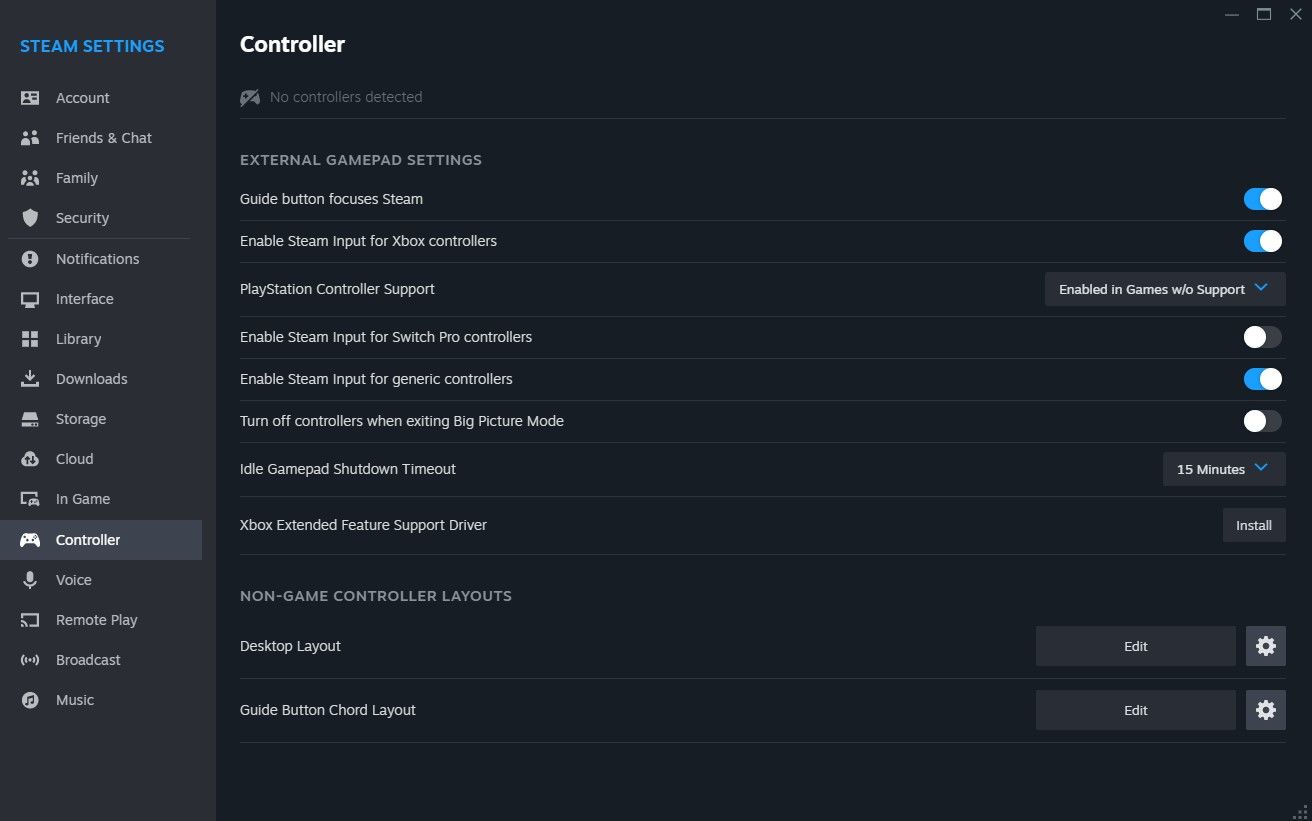
Then go to Steam > Settings > Controller > Enable Steam Input for Xbox Controllers . You should then be able to use both trackpads like on SteamOS. You may also configure it by scrolling down and editing it on theNon-game controller layouts .
The Steam Deck is a very versatile device as it’s not just a full-on gaming device, but also a full-on PC. Installing Windows on it will allow you to use it similarly to your desktop PC for regular writing work, but also for more intensive work like video and photo editing.
We hope this guide has helped you figure out how to install Windows on your Steam Deck and fix some of the issues you might face while doing so.
- Title: Optimizing Your Play Experience with Windows on a Steam Deck
- Author: William
- Created at : 2024-07-12 03:31:42
- Updated at : 2024-07-13 03:31:42
- Link: https://games-able.techidaily.com/optimizing-your-play-experience-with-windows-on-a-steam-deck/
- License: This work is licensed under CC BY-NC-SA 4.0.