
Navigate Joy-Con Replacement Effortlessly
Navigate Joy-Con Replacement Effortlessly
If you own a Switch and you have for a while, the chances are you will be all too familiar with Joy-Con drift. Some of us can’t help but shudder when we hear the words and can almost hear our wallets begin to cry from the depths of our pockets. It’s such a common and frustrating dilemma, in fact, that it’s worth learning how to fix it yourself.
Replacing your own joysticks is a simple process, but it is also daunting, so we have documented the entire process for you in this guide and will walk you through every step of the way.
Why Would I Need to Replace the Joysticks in My Joy-Con?
The components in Joy-Con are so compact that the parts wear down at a much faster rate than other controllers. There is also no wiggle room for any of the dust or debris that can work its way into your controller over time.
When either of these things happens, your controller will start drifting. Drifting occurs when your joystick senses incorrect input and starts to move on its own, almost like your game is playing itself. Unfortunately, though, it’s definitely not as good at that as you are.
Once a Joy-Con has drift, there is little you can do to fix it. There are, however, several tricks you can try to fix Joy-Con drift on your Nintendo Switch before you open it up and take matters into your own hands. The first thing you should try when you notice drift in your Joy-Con is to calibrate them using the calibration tool in the Switch’s menu. That may help for a while, but it is more of a Band-Aid and doesn’t fix the root of the issue.
You can also send your Joy-Con away for a free repair . This is a great service, but you aren’t guaranteed to receive the same Joy-Con back. So, if you send a limited edition pair, there is a chance you may get the classic red and blue Joy-Con back. Some gamers aren’t willing to take that risk.
When all the above methods fail, learning how to replace your faulty joysticks yourself is the best option. It is worth noting, however, that doing so voids your warranty. But if your warranty has already run out, and you would rather fix your pair for around $10.00 rather than pay $79.99 for a new set, you don’t really have much to lose.
What Do I Need to Replace the Joysticks in My Nintendo Switch Joy-Con?
There are a couple of tools you will require to complete the task at hand. These can all be purchased individually or in sets from sites like eBay or Amazon for just a couple of dollars each.

- 1.5mm tri-wing screwdriver.
- 2.0mm Phillips head screwdriver.
- Plastic prying tool.
- Needle nose tweezers.
- A replacement joystick. These are universal, so don’t worry about having to locate a left or right one.
It isn’t compulsory for the replacement, but you would also seriously benefit from using a small dish to keep all your loose screws.
How to Replace the Joysticks in Your Nintendo Switch Joy-Con
So you’re all kitted out with each of the items above, and you are ready to give your Joy-Con the life-saving surgery needed to eliminate the dreaded Joy-Con drift. This process is relatively simple, but it is very important that you take your time with it. Everything inside your Joy-Con is extremely delicate, and the last thing you want is to snap a ribbon cable or do some other type of damage to the device.
If you do happen to damage something in your Joy-Con, try not to panic. You won’t be able to send it back to Nintendo for repair, but you can find replacement parts for any component you may have damaged on Amazon or eBay for a relatively cheap price.
The first step is to remove the four screws on the back of the Joy-Con. This can be done with the 1.5mm tri-wing screwdriver.

Gently run the plastic prying tool around the outside seam of your Joy-Con until the two plastic shells come apart.
Use the plastic prying tool to gently pry the battery out. It can be a little difficult since the battery is stuck down with some sticky tabs, but it will come loose eventually. If you don’t have a plastic prying tool, that’s fine, using your finger will do. Just make sure you don’t use anything metal to pry your battery out.
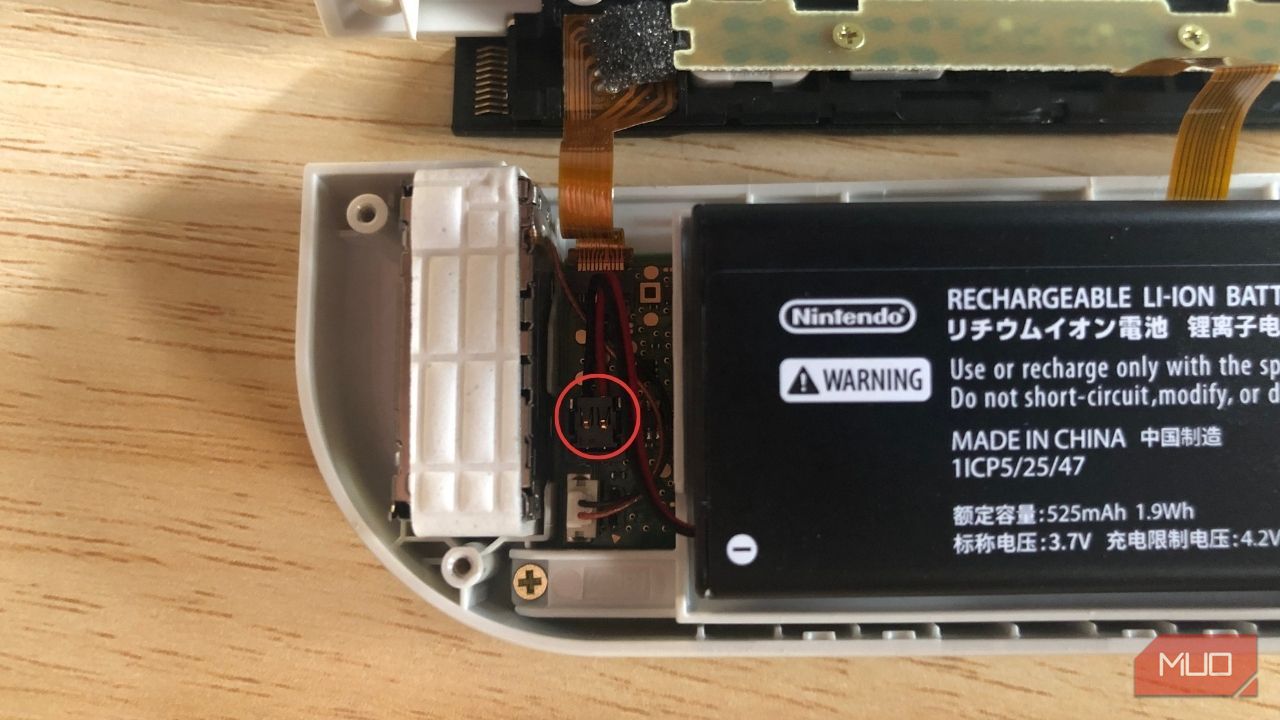
Unplug the battery by pulling the cord directly upwards and placing it to the side.
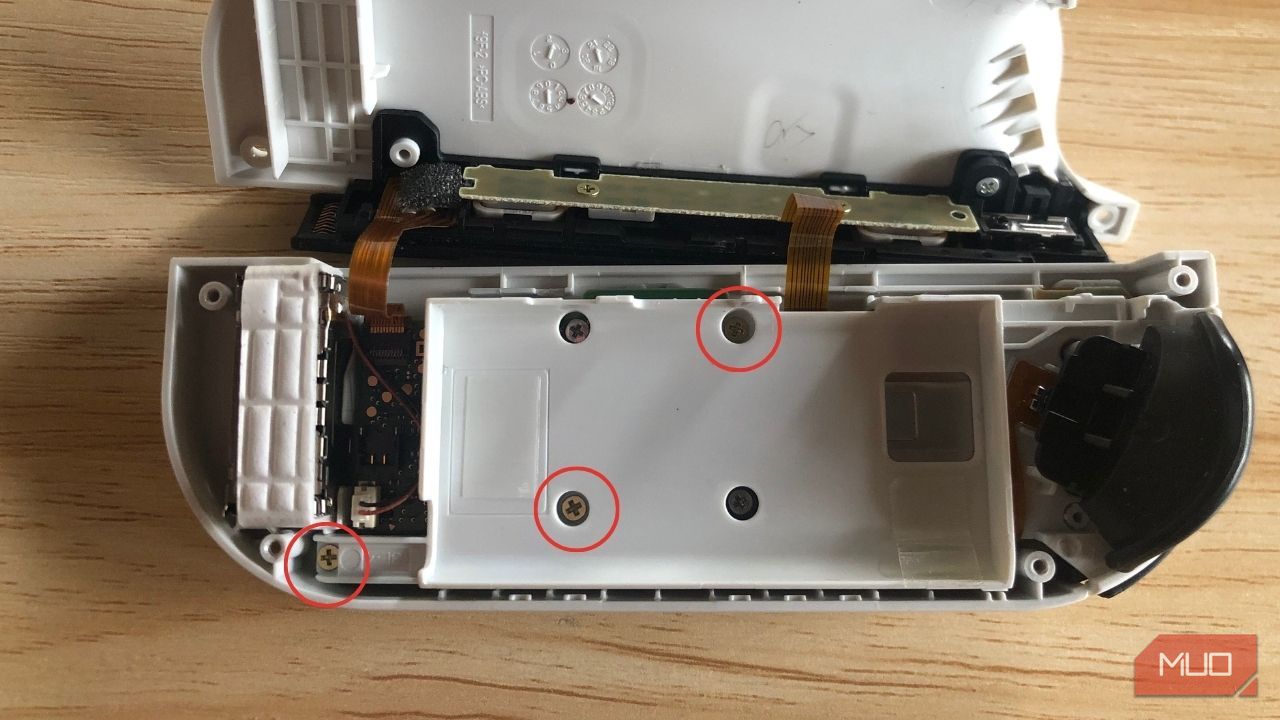
Remove the three screws holding the center plate down with the 2.0mm Phillips head screwdriver. You only have to remove the top left, bottom right, and bottom right corner screws.
Remove the ribbon cable holding the center plate on by gently lifting the flap and pulling it out.
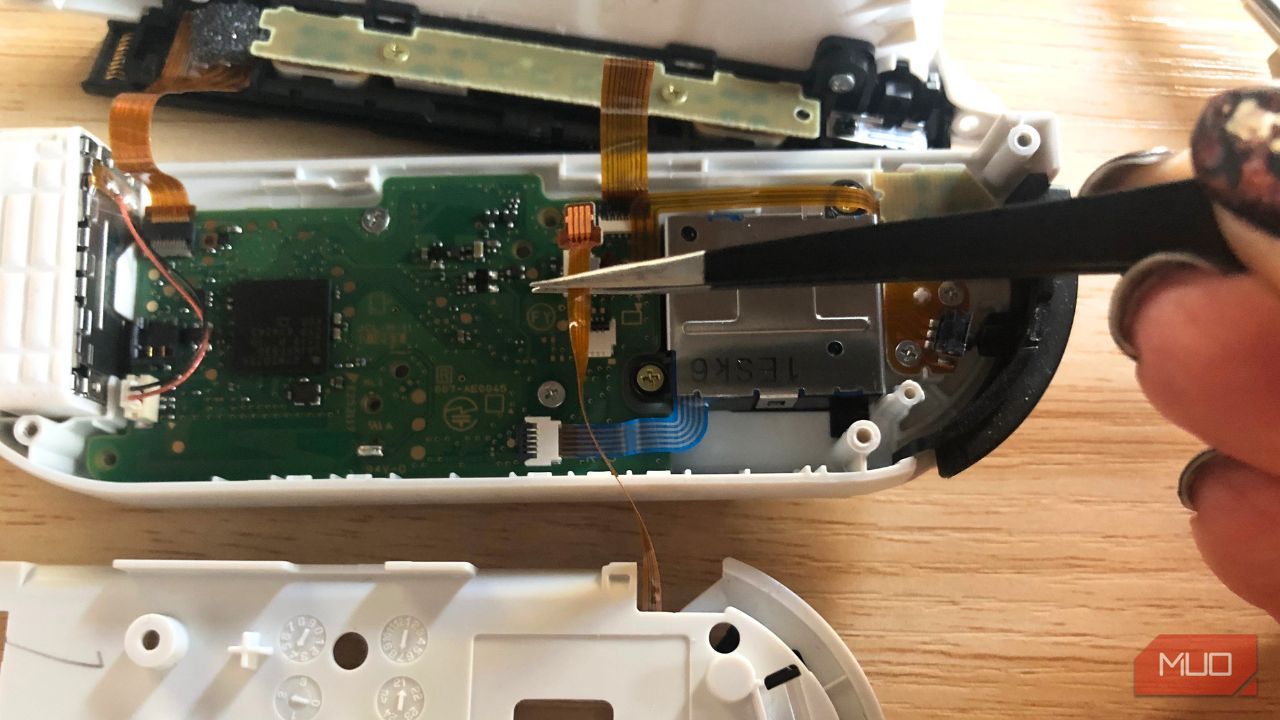
Gently unplug the blue ribbon cable near the joystick.
Unplug the ribbon cable that runs over the top of the joystick.
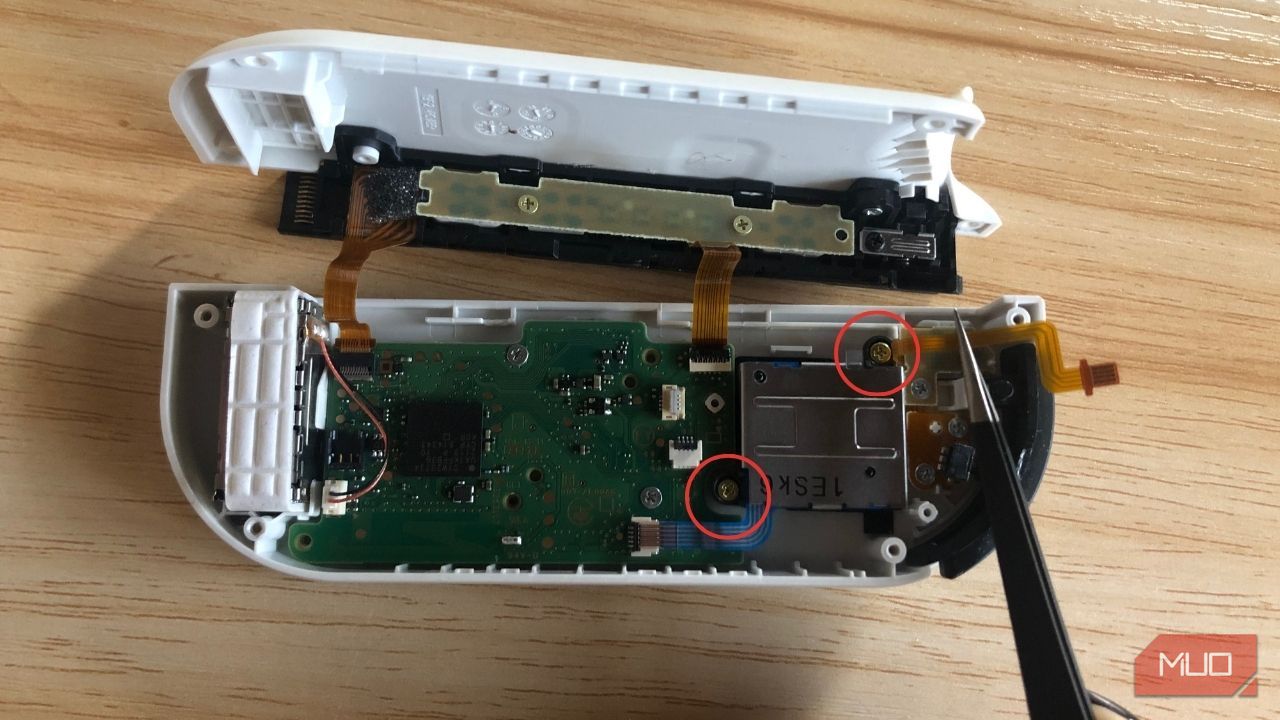
Grab your 2.0mm Phillips head screwdriver and remove the two screws holding the joystick in place. Gently wiggle the joystick until it releases and place it to the side.
Take your new joystick and place it in position, then reinstall the two screws you just removed with your 2.0mm Phillips head screwdriver.
Start plugging the ribbon cables back in by taking your needle nose tweezers and gently slotting them back in place. Flick the tabs down over the top to lock them in position.
The hardest ribbon cable to plug back in is the one for the center plate. Sit the plate beside the Joy-Con and notice the slight curve that the ribbon cable naturally has. Don’t try to fight this curve or straighten it out, simply slide it back in the way it naturally wants to go.
Sit the center plate back in place and screw the three screws back into position with the 2.0mm Phillips head screwdriver.
Plug your battery back in by lining the plug up and pushing it down with a plastic tool.
Place the backplate on and screw the four screws back in using the 1.5mm tri-wing screwdriver.


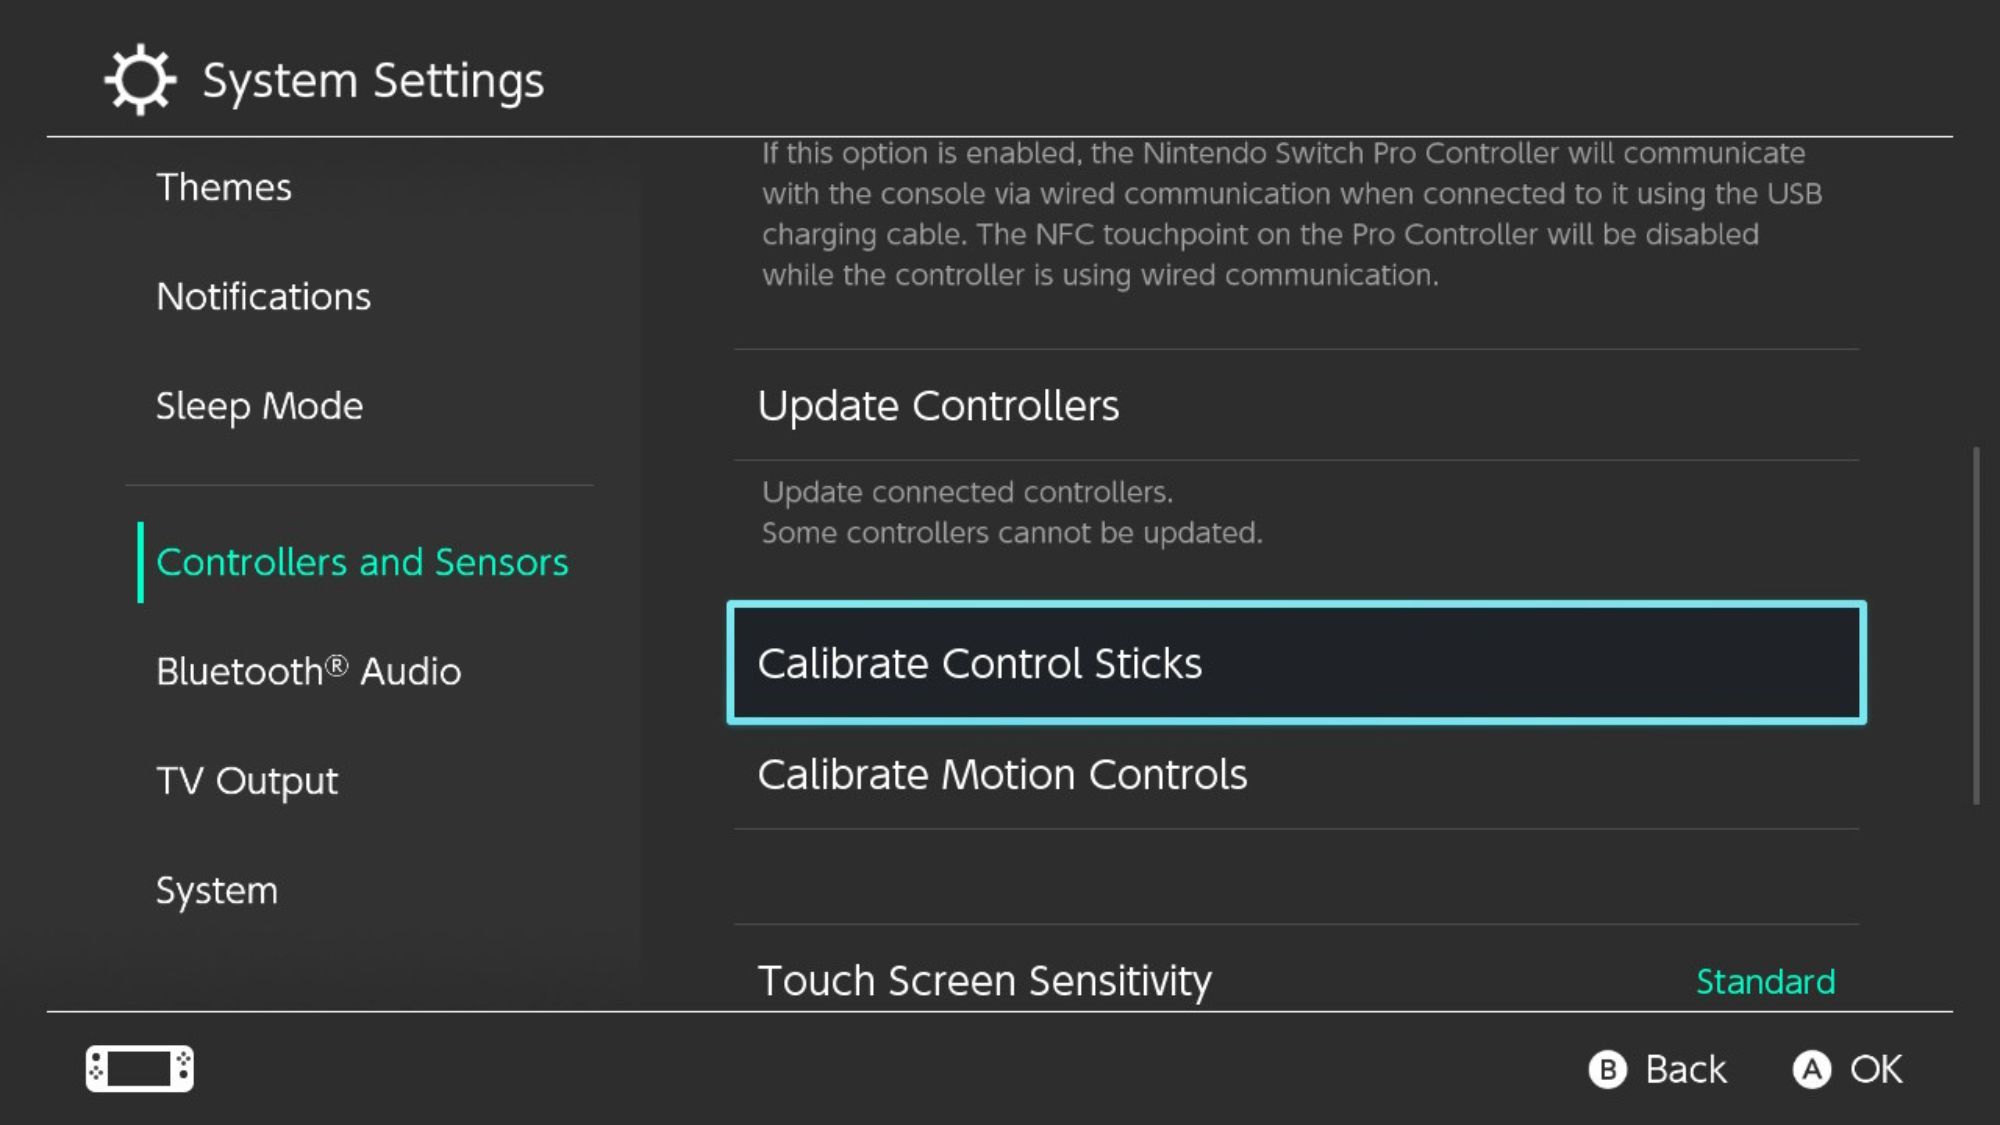
Your Joy-Con should now be as good as new. The last step is to use the joystick calibration tool to make sure everything is working as it should. You can find the calibration tool in the Switch’s settings. Scroll down toControllers and Sensors , pressCalibrate Control Sticks , and follow the on-screen prompts to calibrate your joysticks.
As simple as replacing your joystick is, it’s not ideal to have to repeat the process frequently. Make sure to regularly clean your Nintendo Switch and Joy-Con to prevent dust buildup and increase the longevity of your joysticks.
Say Goodbye to Joy-Con Drift Forever With This Guide
Once you’ve followed this guide a couple of times, you will be replacing joysticks left, right, and center for yourself and your loved ones who also struggle with Joy-Con drift.
Taking advantage of Nintendo’s free repair service to fix your Joy-Con is definitely the best option if you aren’t familiar with taking apart electronics, but if you have a particularly special pair of Joy-Con and you don’t want to lose them, this is a brilliant way to level up your skill set and your Joy-Con at the same time.
- Title: Navigate Joy-Con Replacement Effortlessly
- Author: William
- Created at : 2024-07-12 03:26:22
- Updated at : 2024-07-13 03:26:22
- Link: https://games-able.techidaily.com/navigate-joy-con-replacement-effortlessly/
- License: This work is licensed under CC BY-NC-SA 4.0.