
Delving Into Ryujinx's Controller Integration: A Compreenasory Tutorial
Delving Into Ryujinx’s Controller Integration: A Compreenasory Tutorial
Nintendo Switch emulation is an immensely promising and fresh form of gaming that can improve some of the weakest elements of the Nintendo Switch platform, like power. But because of the finicky nature of Switch emulation, some of the expected features of other emulators can be quite awkward.
If you use Ryujinx, many expected emulation features are supported but often require a lot of trial and error. Luckily, if you want to map and use a controller for Switch emulation via Ryujinx, the process is quite simple. Let’s take a look.
What You Need to Know About Ryujinx Before Using a Controller
Instead of diving straight ahead to connecting and mapping your controller, you need to know a few key features of Ryujinx and its controller mapping beforehand. These features can be defined by the following:
- Because of the nature of emulation, whenever you use an emulator like Ryujinx, you need to ensure you only emulate ROMs of games you own to guarantee legality.
- Some versions of Ryujinx may prompt you to use a hacked Nintendo Switch or encourage you to hack your Switch. Avoid doing so, as Nintendo can issue permanent bans to owners of hacked Switch consoles. Instead, you can download Ryujinx for PC via the official Ryujinx site .
- In terms of controller support, Ryujinx enables you to use almost every popular controller. This includes Xbox Wireless Controllers, PlayStation DualShock 4 or DualShock 5 controllers, Nintendo Switch Pro Controllers, or Nintendo Switch Joy-Con.
If you are yet to install Ryujinx as a Nintendo Switch emulator for your PC , the process can be tricky and may require individual file alterations. But even with the base version of Ryujinx installed, you can start mapping your controller of choice straight away.
How to Map a PlayStation, Xbox, or Third-Party Controller in Ryujinx
With some of the specific features of Ryujinx defined, you should be ready to start mapping a controller for Nintendo Switch emulation. So, as long as you have Ryujinx installed on your device of choice, you can map a Nintendo, PlayStation, Xbox, or third-party controller by following these steps:
- Ensure your controller of choice is connected to your PC.Connecting any modern controller to your PC is easy and can usually be done via Bluetooth or a USB-C cabled connection.
- With your controller connected to your PC, load Ryujinx.
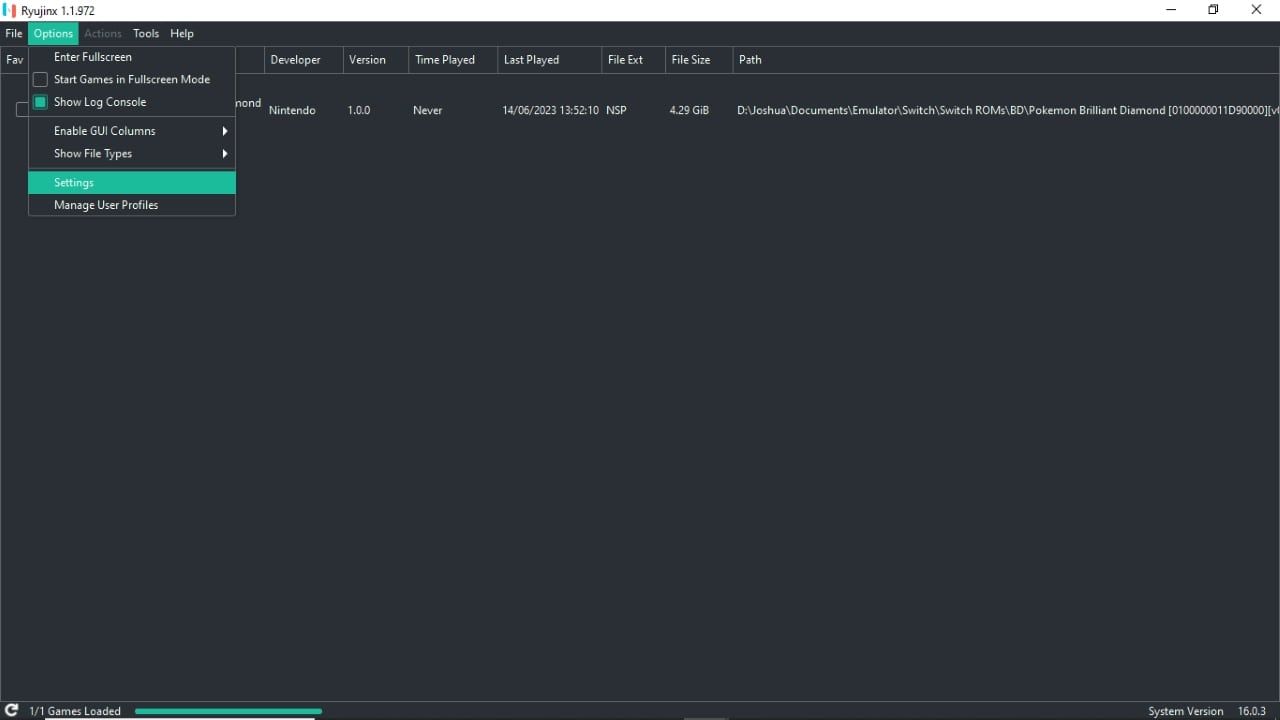
- From the main menu of Ryujinx, selectOptions followed bySettings .
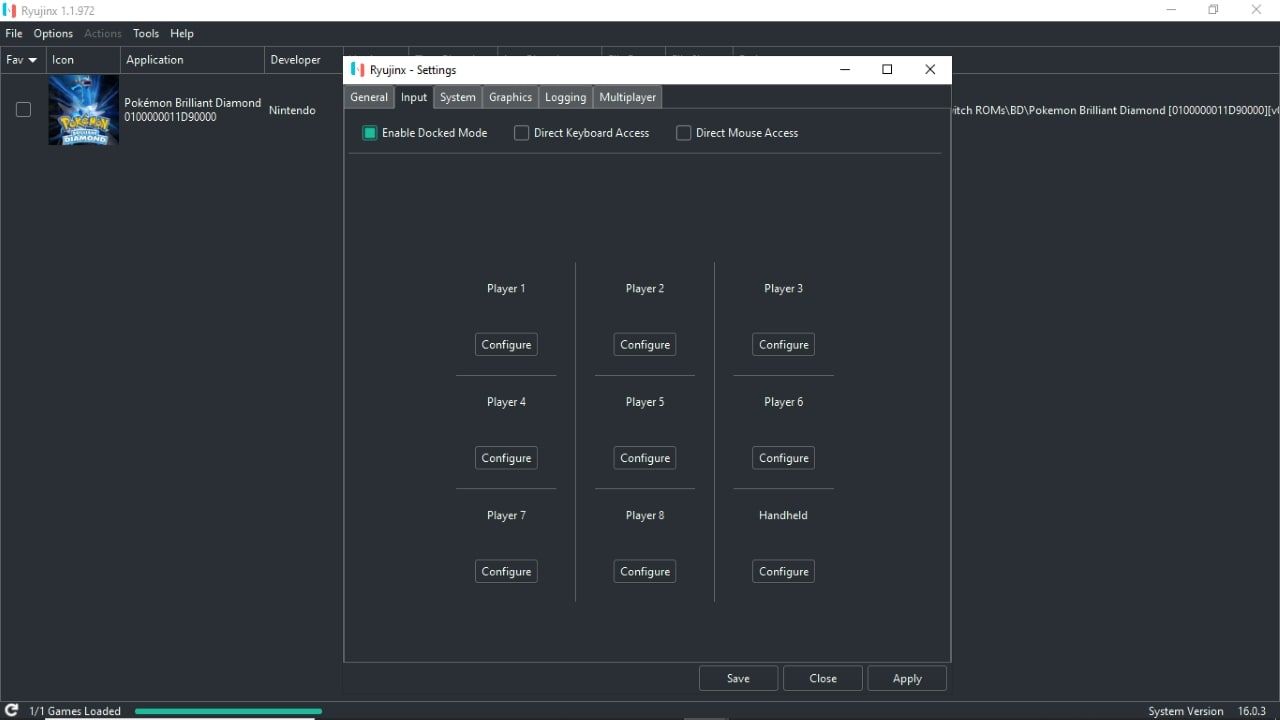
- ChooseInput and ensureEnable Docked Mode is selected.
- UnderPlayer 1 , selectConfigure , and Ryujinx should automatically find your connected controller.
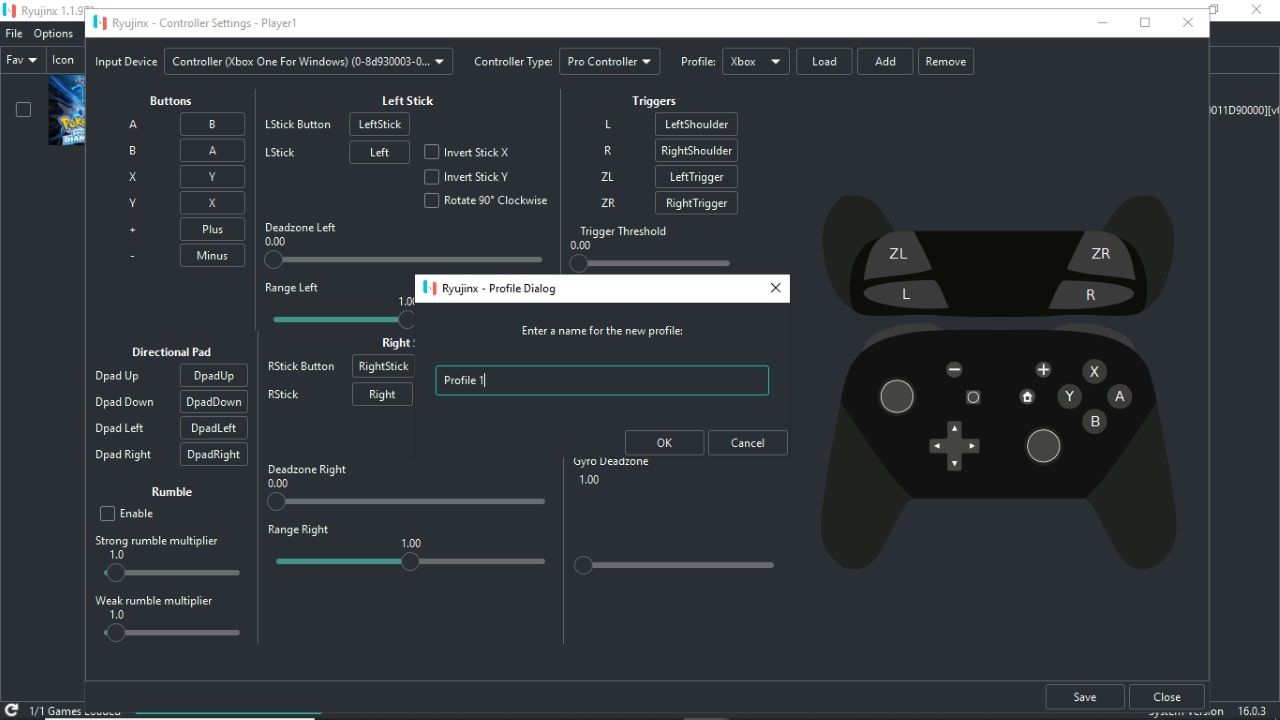
From here, you can individually go through each button command and map it to a controller input of your choice. For instance, If you want to remap theB button, select the on-screenB in Ryujinx, followed by the button on your controller you wantB to be replaced with.
Once you are done, selectAdd in the top-right of theConfigure screen. You will then be prompted to name your controller configuration. Confirm your changes by selectingOk followed bySave .
And that’s it. With your controller configuration saved, you can go on to emulate any Nintendo Switch game through Ryujinx while using your controller of choice, configured exactly to your preferences.
How to Customize Your Ryujinx Controller Settings
Much like other Nintendo Switch emulators available for Windows , now you have a connected and mapped controller for Ryujinx, there are a few extra tips to help streamline and customize your emulating experience.
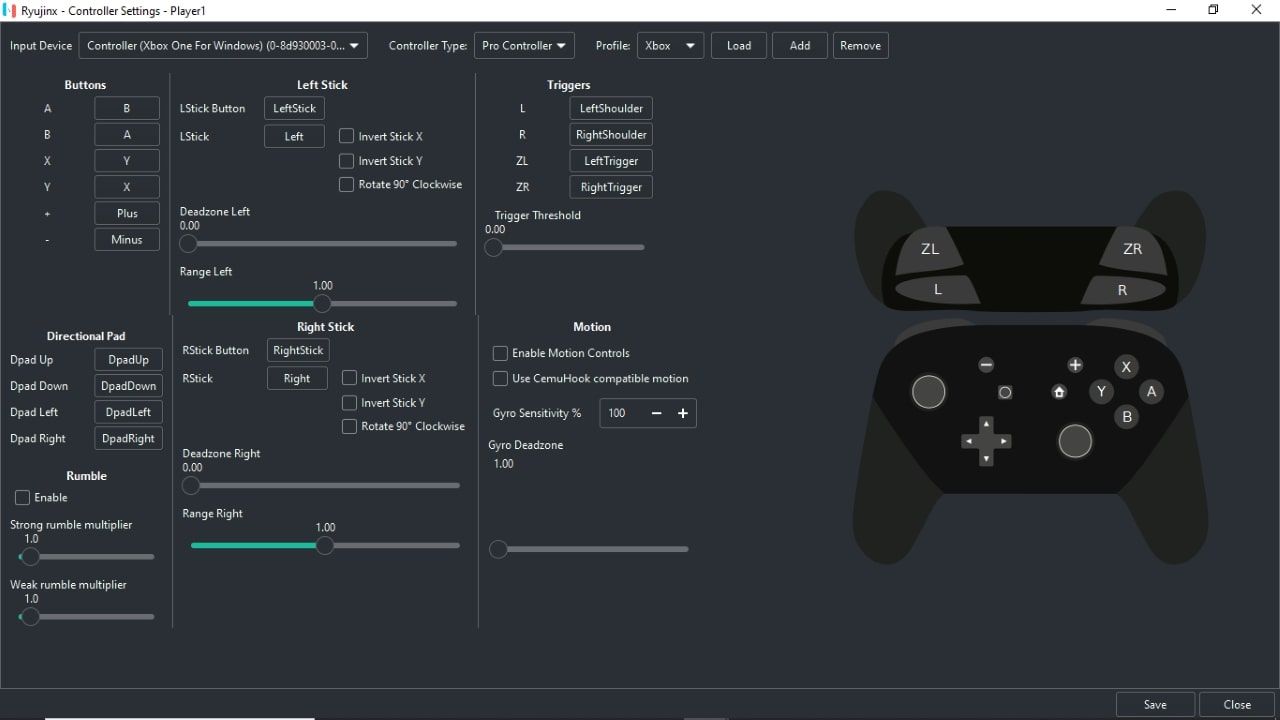
TheConfigure screen for mapping a controller, for instance, comes with a few extra features beyond classically mapping a controller’s input. Most of these extras come down to useful quality-of-life alterations you can make, but some even alter the way you play your emulated Switch games. These features include:
- Enabling and alteringMotion Controls . This allows you to adjust and setGyro Sensitivity andGyro Deadzone to help in the emulation of games that support motion controls.
- Enabling or disablingRumble , as well as altering how strong your controller rumble will be if turned on.
- Changing the designatedController Type , so you can map an entire controller as one Joy-Con controller or vice-versa.
While these alterations may seem small in some cases, having more options is always positive, and with Ryujinx offering a simple and effective way of mapping and customizing a controller for Switch emulation, more simple features are certainly not a bad thing.
Streamline Nintendo Switch Emulation With Ryujinx
With Ryujinx set up and a mapped controller ready to go, your experience of Nintendo Switch emulation should be a lot less stressful. And with a personalized controller configuration, the games you play should feel all the more intuitive.
But even with a simplified way of mapping a controller through Ryujinx, emulation can sometimes be a bit of a headache. Yet, with all the varieties of emulators and the platforms available, you can always find aspects of emulators better suited to you. With Ryujinx, simple controller support is a bonus.
- Title: Delving Into Ryujinx's Controller Integration: A Compreenasory Tutorial
- Author: William
- Created at : 2024-07-12 03:39:17
- Updated at : 2024-07-13 03:39:17
- Link: https://games-able.techidaily.com/delving-into-ryujinxs-controller-integration-a-compreenasory-tutorial/
- License: This work is licensed under CC BY-NC-SA 4.0.